How to install and use Kali Linux on VmWare virtual machine
Until now, a famous Linux distro, Kali Linux, has always been sought by security experts or hackers. Why? Simply because Kali Linux has a built-in range of tools for penetration, hacking, analysis, etc. all are categorized very clearly. Join TipsMake.com to consult how to install and use Kali Linux on VM Ware virtual machines.
1. Download Kali Linux:
You can download the Kali Linux installation as an ISO file directly or via torrent at:
- Kali Linux Home: https://www.kali.org/downloads/
- Kali Linux virtual machine file as VM Ware, ARM or Kali ARM code.
In terms of capacity, Kali Linux's "gentle" ISO file is also over 1GB for the x86 architecture, which is much heavier than the 32-bit version of normal operating systems, as well as other Linux distros. . But what makes Kali Linux so special is its high compatibility with many different medium configuration machines. Let's test it out at the bottom of the article.
In this article, we proceed to install Kali Linux Light version file (meaning gently, download the ISO file directly here).
Refer to how to install Linux from the ISO file on Windows here.
2. Steps to install Kali Linux on VM Ware virtual machine:
As we know, VM Ware software is one of the most stable virtual machine creation applications on the Windows environment. The Windows version we use in this test is 11.x. Now start, you start VM Ware, create a new virtual machine as usual, select Custom mode to change the custom as you like.
Options as usual, to select the operating system as shown below:
- Guest operating system : you choose Linux - of course
- Version : choose the highest Debian support on VM Ware, here is 7.x
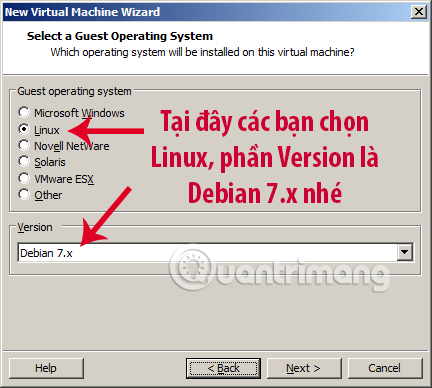
Note that if you install Kali Linux 64 bit, you must also choose Debian 64 bit
The remaining steps are as simple as usual, you Next> Next> Finish . Some of the parameters we apply in this example:
- Hard drive capacity: 40GB
- RAM: 1660MB
- Network mode: NAT
- CPU: 2 cores of 2 cores
- I / O Controller type: LSI Logic
- Virtual disk type: SCSI

Because there are many small, odd steps, I will split up as below. Invite you to follow!
Step 01:
When you start installing Kali Linux, you will see images like this:
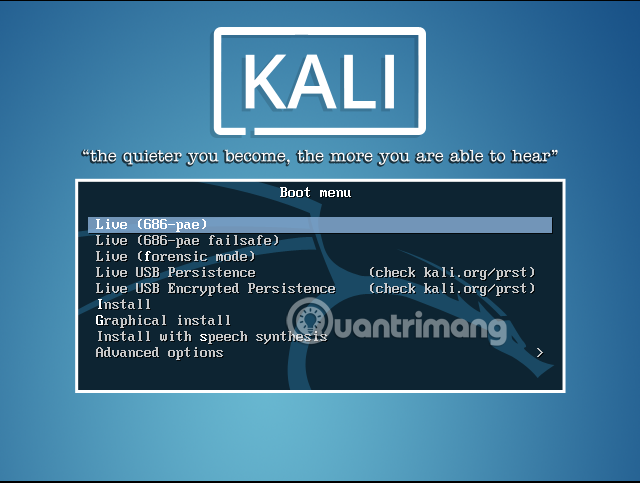
There are several options, such as Live, which is an online installation, requiring an Internet-connected device. Since we installed from the full ISO file, here we switch to Install (command line interface) or Graphical Install (graphical interface support).
Step 02:
The first is the section for Language selection, there are many languages listed here, if you want to use Vietnamese, then you can scroll down to the bottom of the list to see Vietnamese - Vietnamese as the picture:
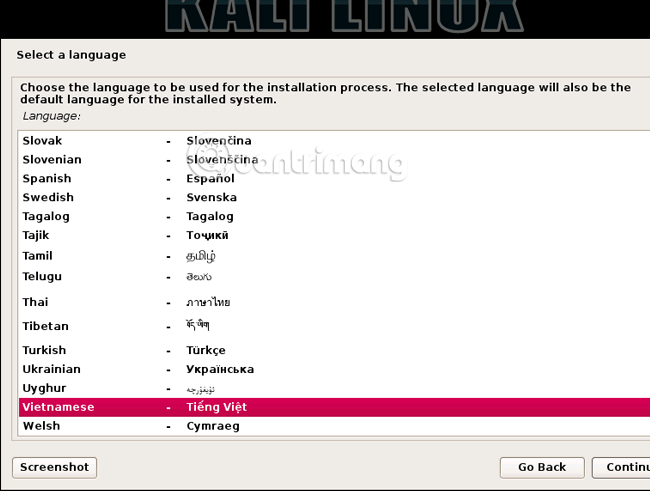
Click Continue to continue
Step 03:
Yes, notice very polite by Kali Linux when you choose Vietnamese language pack when installing. That is because due to incomplete information, some messages will still display English language as default. Click Continue :
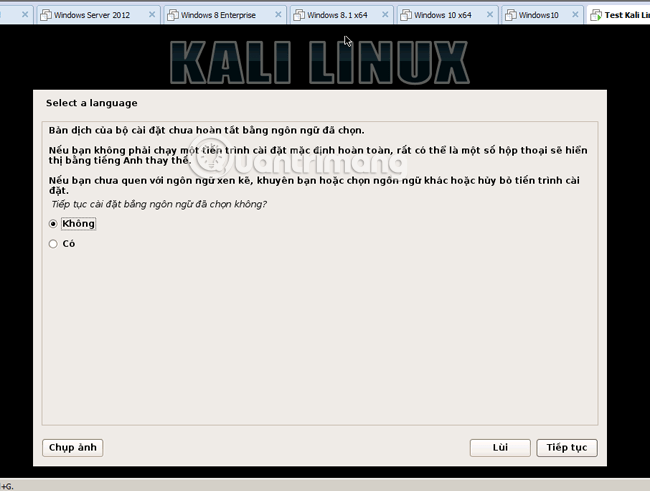
Step 04:
Select geographic location, Vietnam :
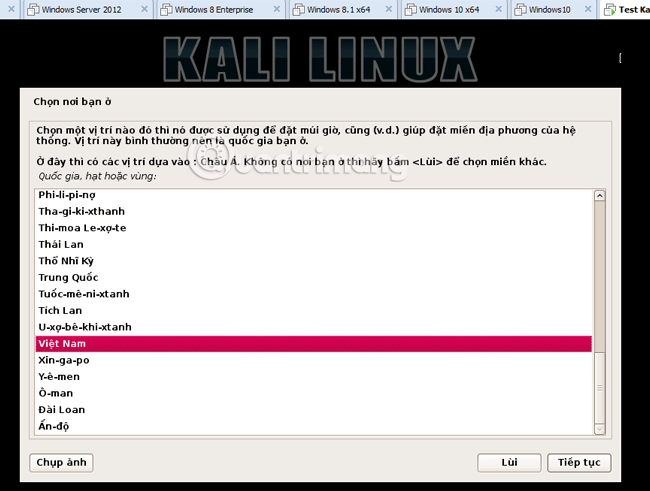
Step 05:
Select typing mode, or Configure keyboard. I recommend that you keep this part of the keyboard as English instead of other languages, because when you enter your account and password, the language system on the keyboard will change, if you are not used to it, it will I don't know which way to go:
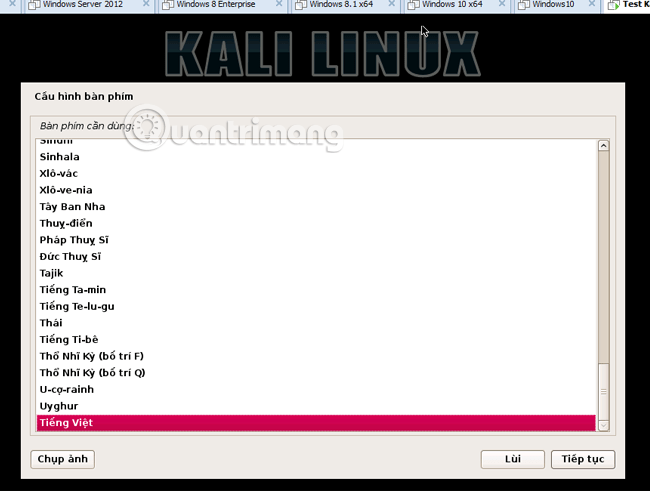
Step 06:
Click Continue, the installation process will read and write system files from the ISO file and gradually create the Kali Linux operating system. At this step, you will name the computer like naming PC Name on Windows:
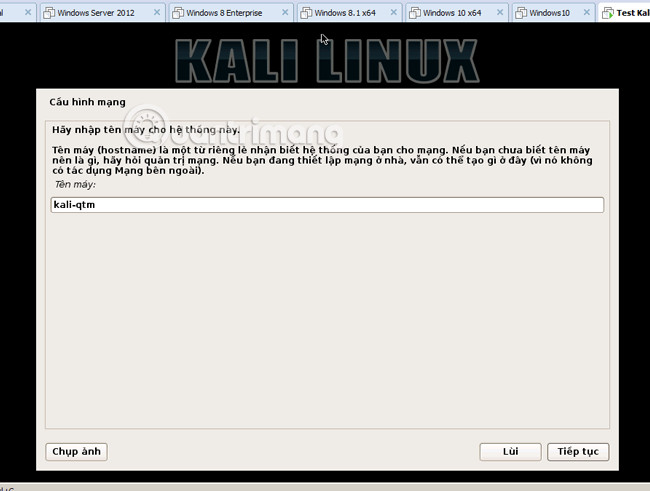
Step 07:
Next step, configure the domain . If you use a single machine, just skip this step and click Continue. The system will create a domain with the name localhost to use:
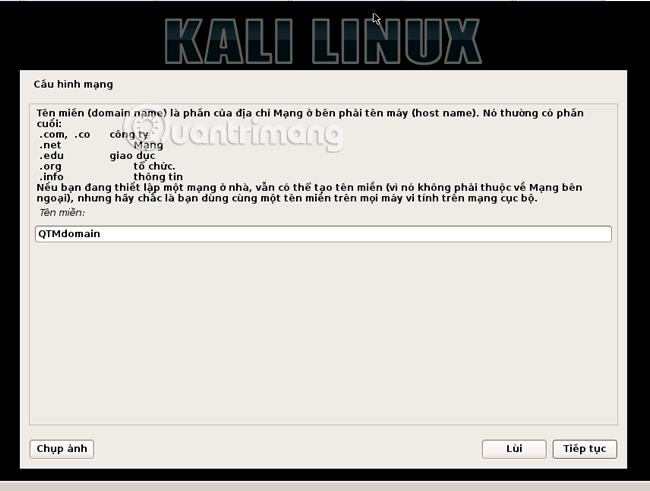
Step 08:
The system will automatically configure the network, and that setting will be done. Next is to set the admin password for the root account - here Kali Linux translates as the master account:
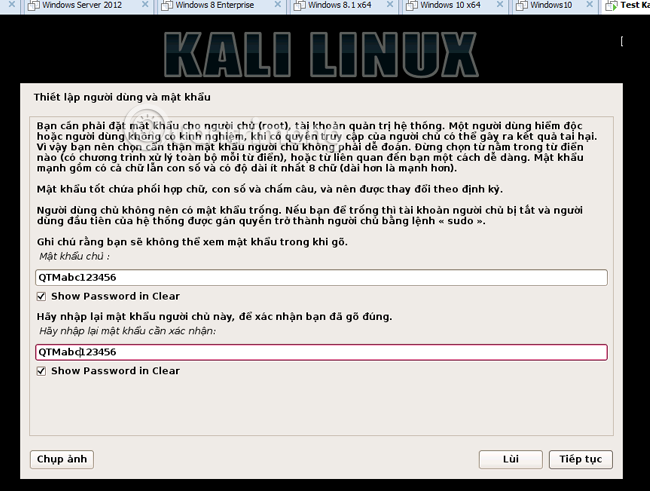
The root password requires a combination of special characters, uppercase, lowercase, numbers and letters. Here, for example, QTMabc123456
Step 09:
Next, Kali Linux will ask you to partition the hard drive format and use what parts to install. Here I choose the first, the entire hard drive , English is Use entire disk :
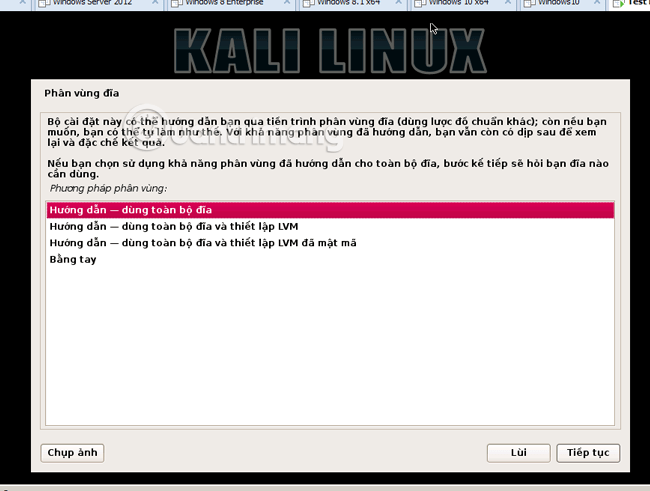
Step 10:
Select the 40GB partition we have set up in the previous step:
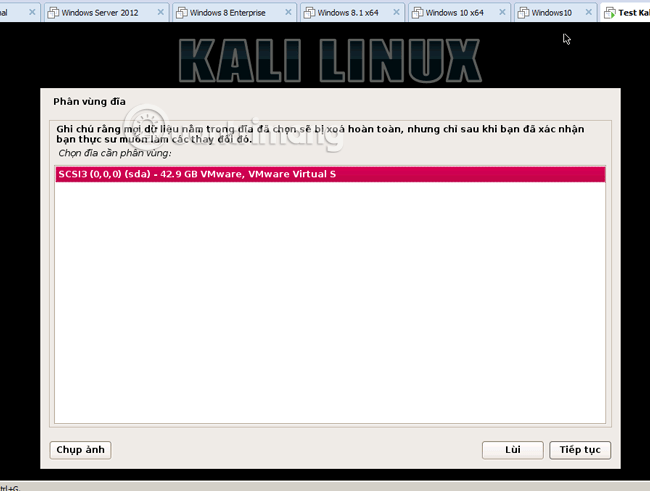
Step 11:
For new users, leave the option to throw all system files into a single partition (All files on one partition - recommended for new users) - All files in one partition (recommended for new users ):
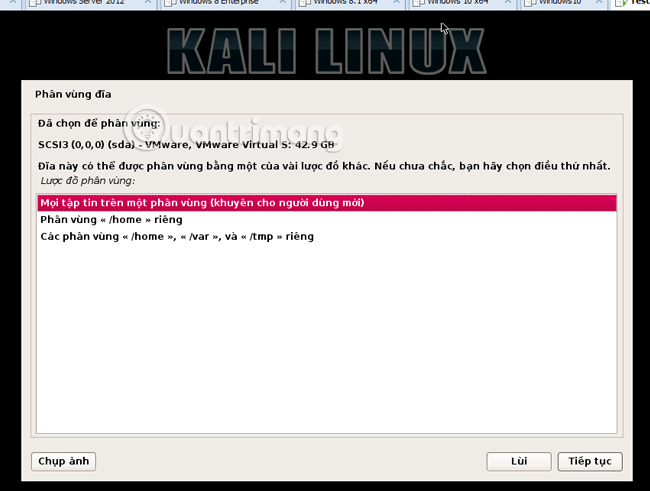
Step 12:
Select Finish partitioning and write changes to disk - Finish partitioning and write changes to disk:
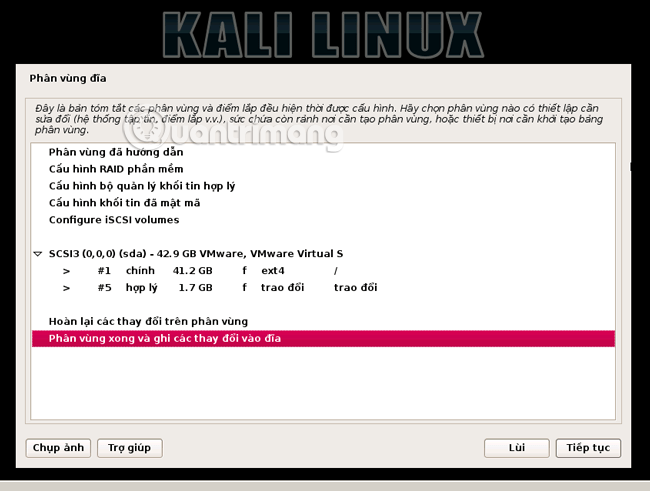
Step 13:
Save the changes. Select Yes - Yes at this step:
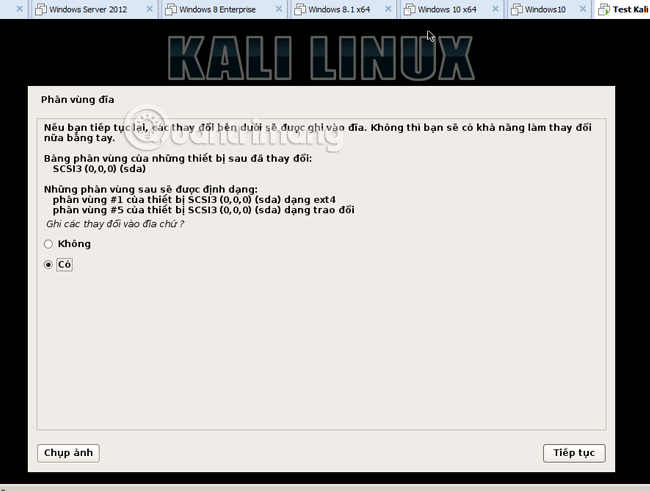
Step 14:
The process is recorded as Installing this system will take place in about 10-15 minutes. Just wait:
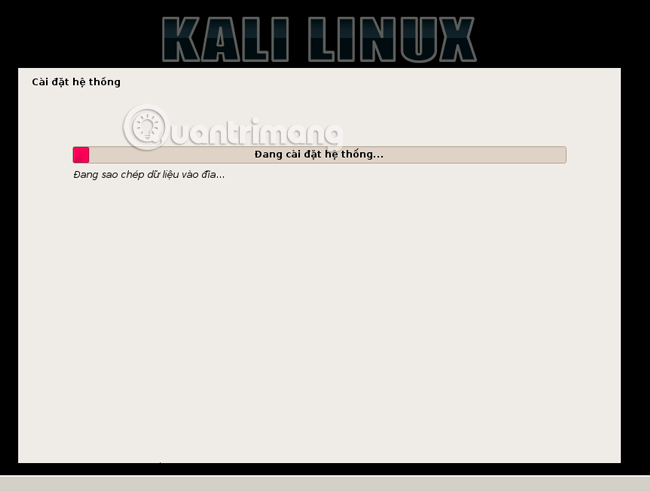
Step 15:
Next is the Network mirror configuration - the Vietnamese translation package is network mirroring . Select Yes - Yes to be able to use any network in the mirror system to update and update the software later:
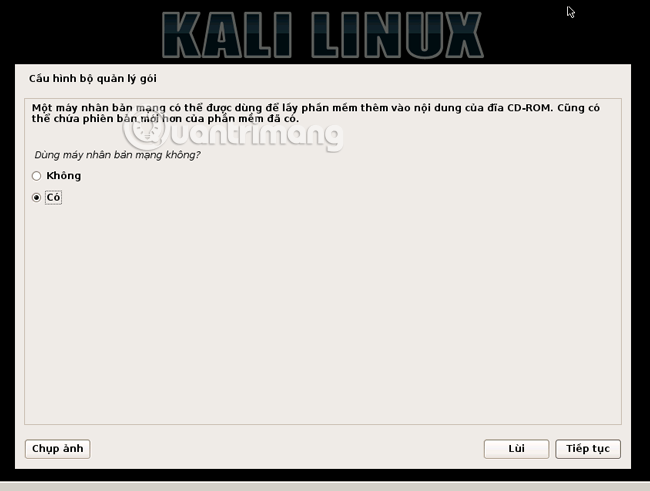
Step 16:
Leave this section blank:
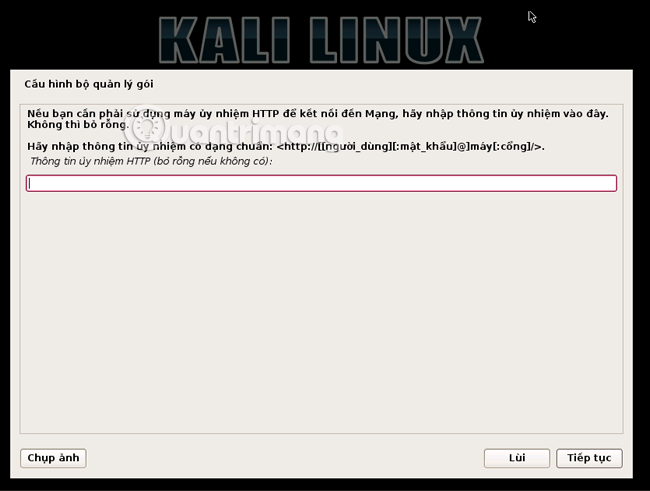
Step 17:
The configuration process will run again, it will take about 10-15 minutes. Note that this is a very important step, which is the option to load GRUB into Kali Linux's startup section, it is mandatory to select Yes - Yes:
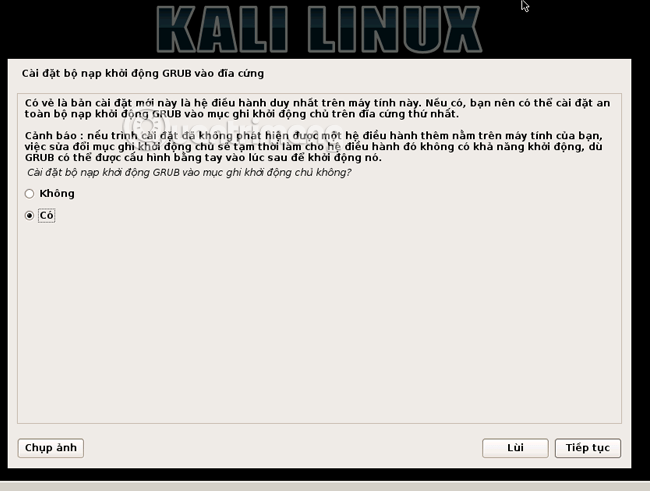
If GRUB is not selected at this step, Kali Linux will not be able to boot
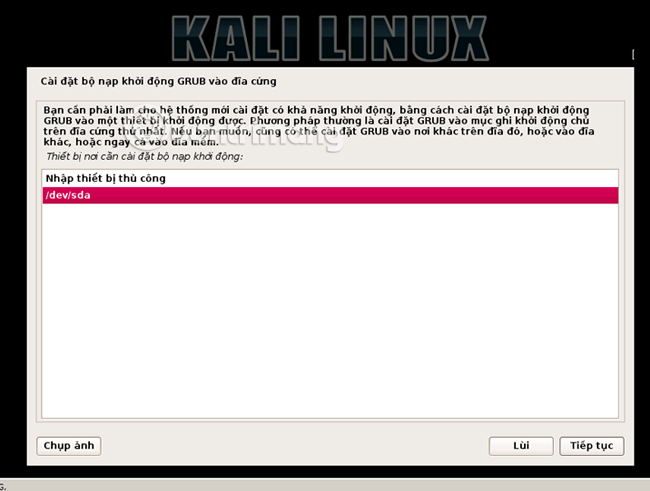
Step 18:
Select / dev / sda so that the system throws GRUB into it:
Step 19:
Then the system continues to run for another 5 minutes. Basically this is done, to this screen of Installation complete like this, you click Continue and the system will restart automatically:
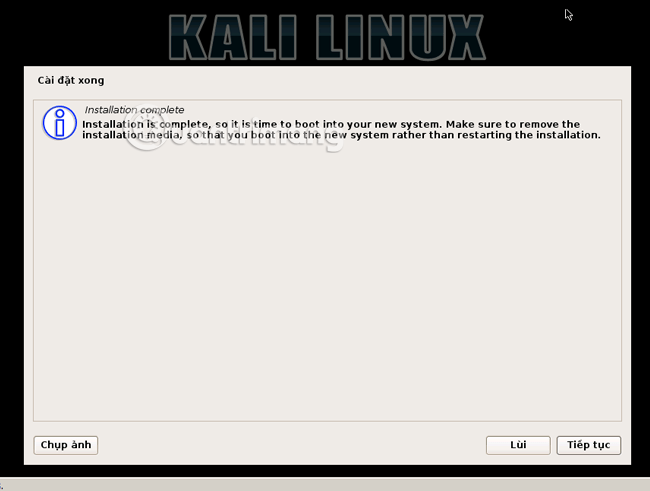
Actually, Kali Linux will run for another 5 minutes before restarting
Step 20:
When you see the login screen like this, it means that the Kali Linux installation is basically done, now we can log in to the system. This is the root account entry step, the password is initialized in the previous step:
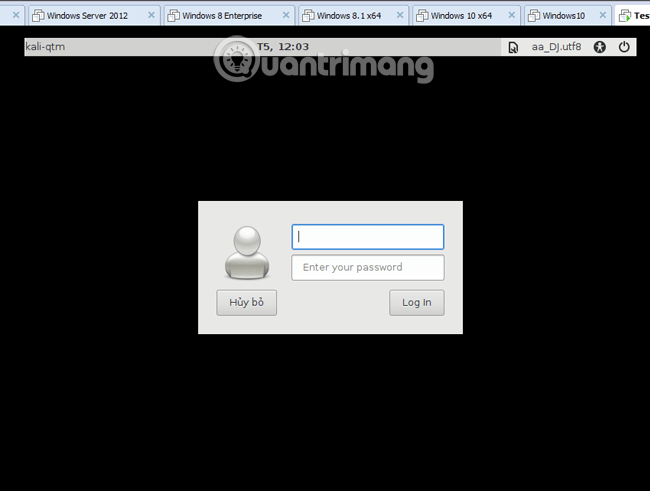
Username: root and password: QTMabc123456 is used in this test
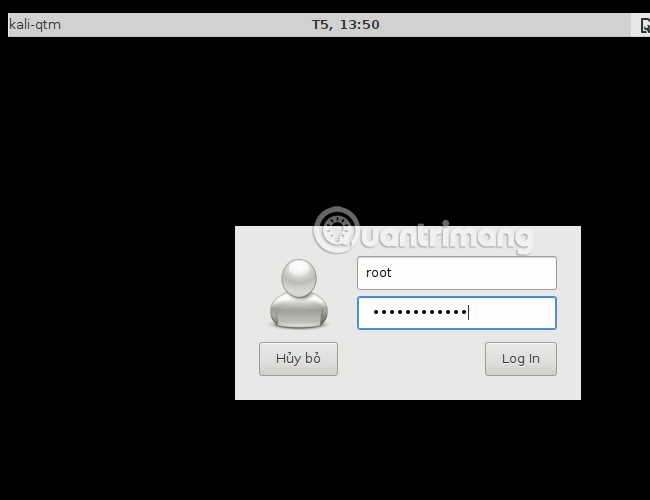
And here, the screen when I first logged into Kali Linux will look like this. Just like the message above, some dialogs are still in half Vietnamese English half:
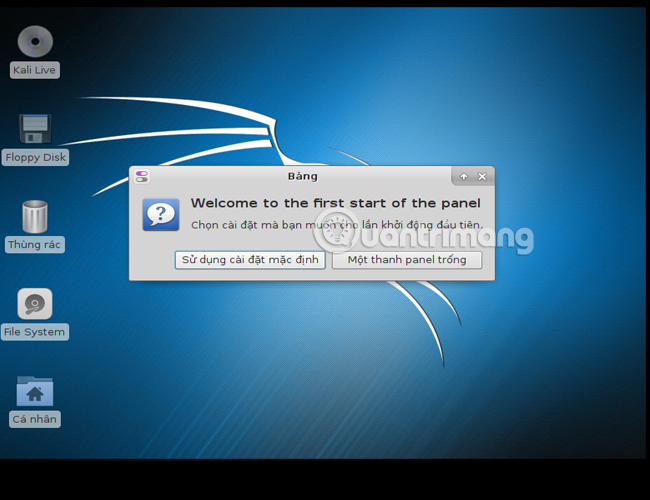
In general, Kali Linux's interface is somewhat similar to other distros of Linux such as Debian, Ubuntu, Linux Mint . All programs and applications are arranged in the Applications section at the top left corner of the screen as shown below. Here, and you can see a lot of applications that support network analysis and security .
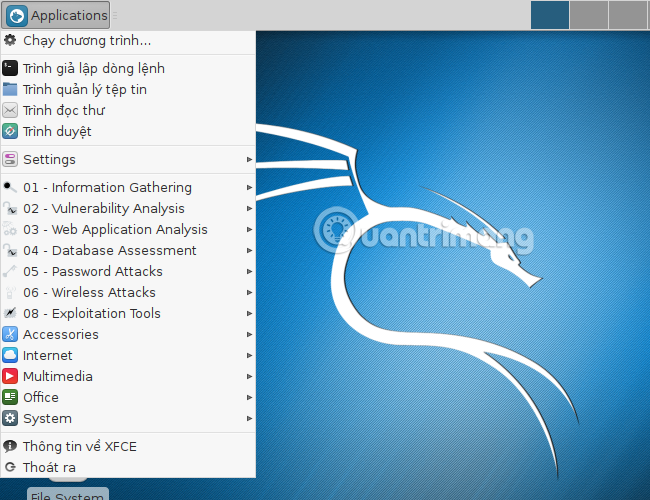
The shutdown, restart, and sleep menus are also located in the Exit section
The file browser window feels quite similar to Windows. The basic navigation buttons for windows, such as zooming, zooming, and turning off, are arranged in exactly the same way as Windows, and there is no such thing as a "Ribbon" or "reverse" hybrid version like on Mac OS X:

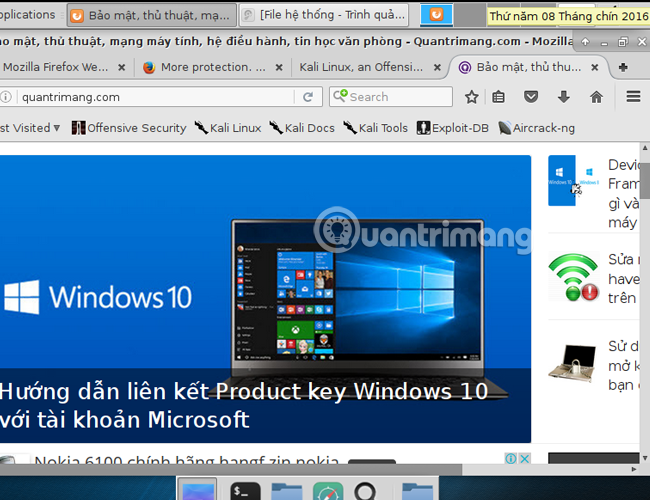
And like all other distros in the Linux family, Kali Linux's default browser is certainly Mozilla Firefox, with many add-ons that support security as shown:
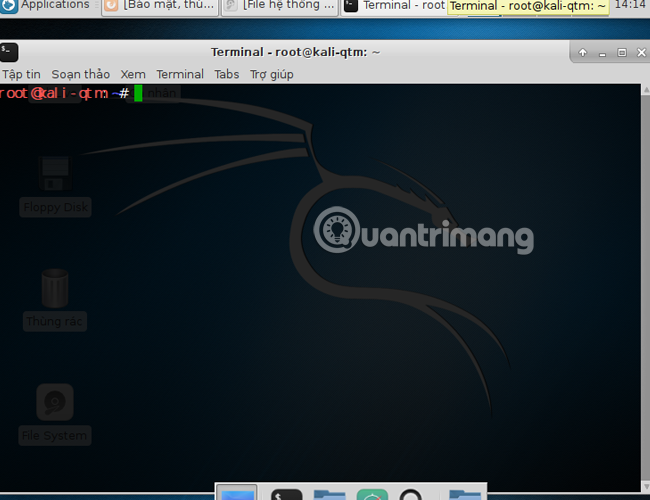
And finally, Terminal - the command line support tool is definitely indispensable in any Linux-based operating system:
Good luck!