How to take screenshots on Linux
Not as easy as taking screenshots of computers and laptops using Windows, taking screenshots on Linux will be more difficult. Below TipsMake will introduce you to 4 ways to take screenshots on Linux, including using the Gnome Screenshot utility, GIMP, ImageMagick and Shutter.
Method 1: Use the Gnome Screenshot utility to take screenshots on Linux
The PrtScn key does not work as a screenshot shortcut in all Linux distributions, but it works in most GNOME desktop environments such as Ubuntu and Linux Mint. If this key doesn't work, try one of the other methods below.
Step 1: Press the PrtScn key to take a full screen photo. Screenshot will show everything present on your device screen. And you will be notified to choose the location to store the screen image file.
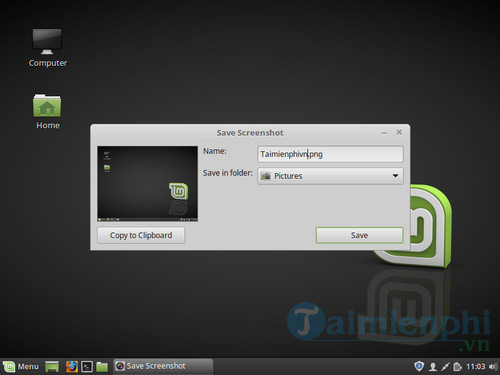
- The Print key is located in the top corner of the keyboard, usually between the F12 and ScrLk keys. Some keyboards say Print Screen, PrtScn, PrntScrn, . all are the same.
Step 2: Press the key combination Alt + PrtScn to take a screenshot of a window. Use this shortcut to take a screenshot of the active window. The image file will be saved in the Pictures folder.

Step 3: Press Shift + PrtScn to take a screenshot of the content you selected. You can click and drag the box to choose what to capture in the photo. The screen image file will be saved in the Pictures folder.

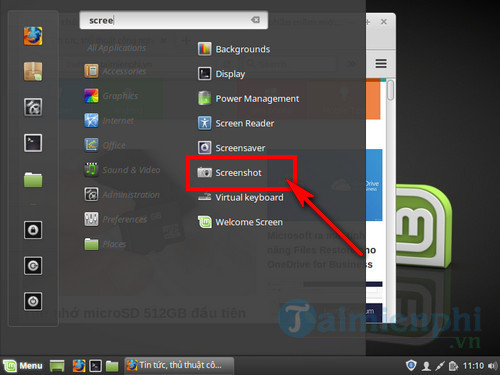
Step 4: Open the Screenshot utility. The Gnome Screenshot utility allows you to perform other additional screenshot functions, such as delaying the capture time. The Screenshot utility is located in the Accessories folder on the Applications menu .
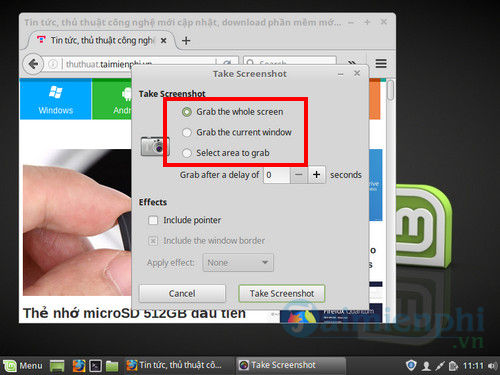
Step 5: Select screenshot mode. You can choose any of the modes introduced above: single window, full screen or custom.
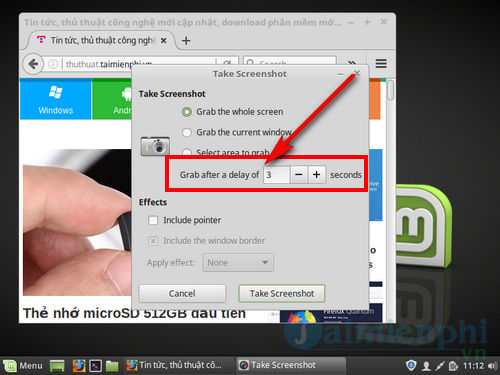
Step 6: Delay photo taking time. If your screenshot is time-dependent, you can use the Screenshot widget to slow down time before taking the screenshot. This allows you to capture exactly what you're looking for on the screen.
Step 7: Choose effects. You can choose to add a mouse pointer to the screenshot, as well as add a border if you want.

Method 2: Use GIMP to take screenshots on Linux
Step 1: Install GIMP. GIMP is a free photo editor that is installed on some Linux distributions. If you haven't installed it yet, you can download GIMP to your computer and install it here: Download GIMP for Linux
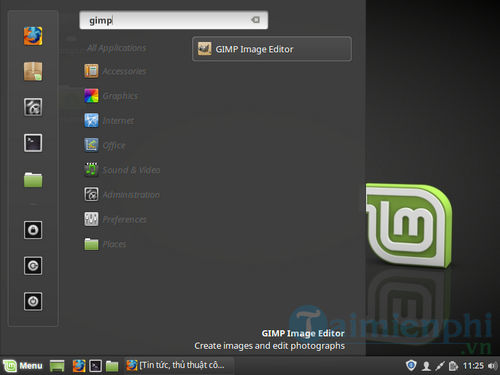
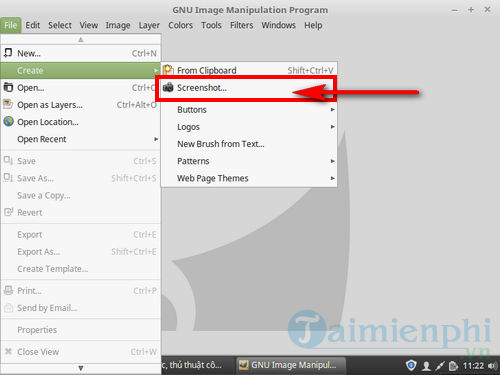
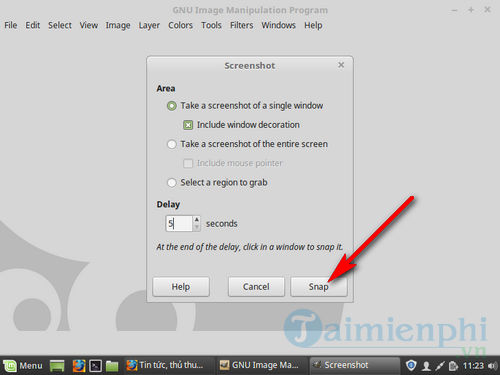
Step 2: Click menu File => Create => Screenshot . The screenshot creation tool will open on the screen. This tool is very similar to the Gnome Screenshot utility.
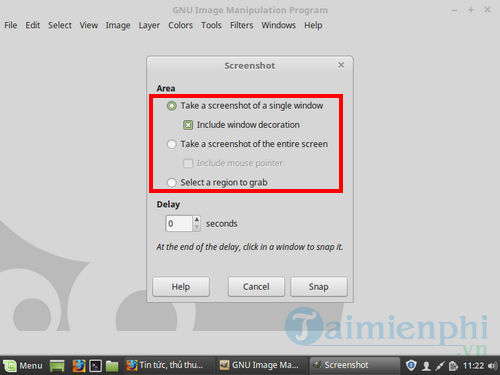
Step 3: Choose the screenshot mode you want. There are 3 different screenshot modes: single window, full screen or custom. If you choose the option to take a screenshot of a window, click to select the window you want to take a screenshot of.
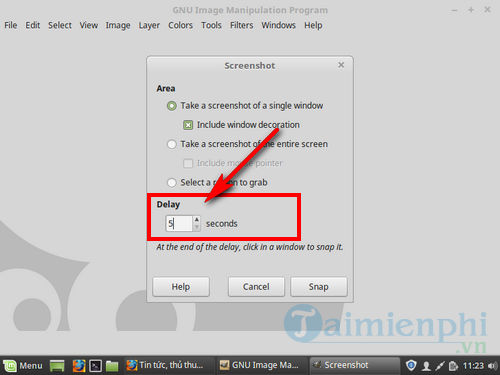
Step 4: Delay photo taking time. You can delay the photo taking time to arrange everything exactly how you want. If you choose to take a screenshot of a window or take a custom screenshot, you'll choose what to capture after the delay timer expires.
Step 5: Click Snap to take a screenshot. Depending on your settings, screenshots may be taken immediately. Once completed, your screenshot will open in the GIMP editing window.
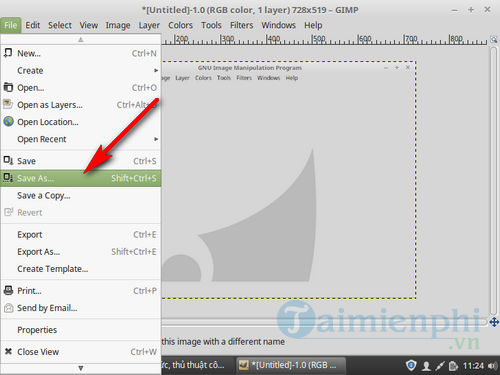
Step 6: Save the screenshot. If you don't want to make any edits to the screenshot, you can save the image to your hard drive. Click the File menu and select Export . Name the screenshot and choose a location to store it. Click the Export button again.
Method 3: Use ImageMagick to take screenshots on Linux
Step 1: Open Terminal. ImageMagick is a command line utility used to take screenshots. Many Linux distributions have ImageMagick pre-installed, however if the distribution you are using does not have it installed, you can download ImageMagick to your computer and install it.
Download ImageMagick to your computer and install it here: Download ImageMagick for Linux
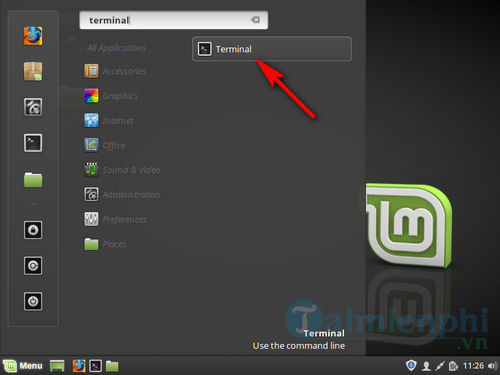
To quickly open Terminal in Ubuntu and other distributions, press the key combination Ctrl + Alt + T .
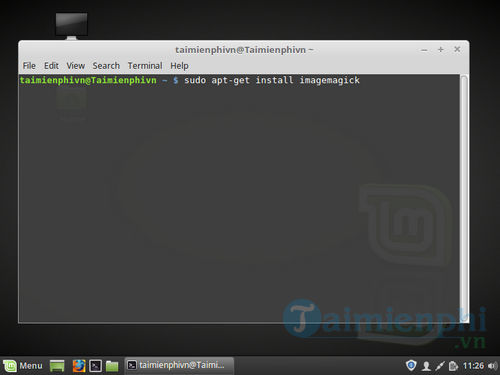
Step 2: Install ImageMagick. Type sudo apt-get install imagemagick into the Terminal window and press Enter. You will be asked to enter the admin password. If ImageMagick is not installed, it will begin downloading and installing. If the add-on is already installed, you will be notified.
Step 3: To take a photo of the entire screen. Type import -window root Pictures/fileName.png there and press Enter. Note to replace fileName with the name you want to give the screenshot.
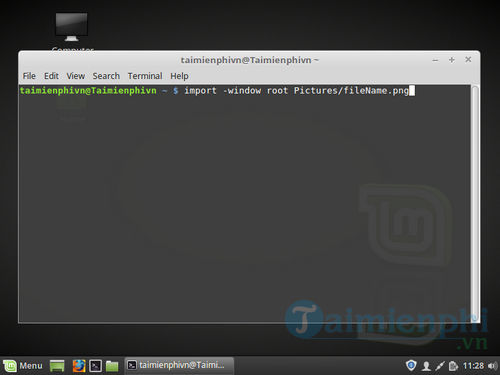
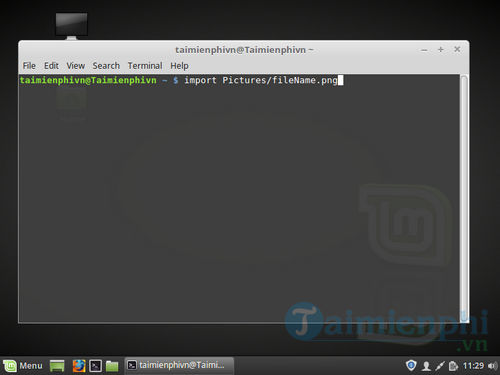
Step 4: To take a screenshot of a specific window. Type import Pictures/fileName.png there and press Enter. Note to replace fileName with the name you want to give the screenshot. The cursor will turn into a cross, and you can click on the window you want to take a photo of.
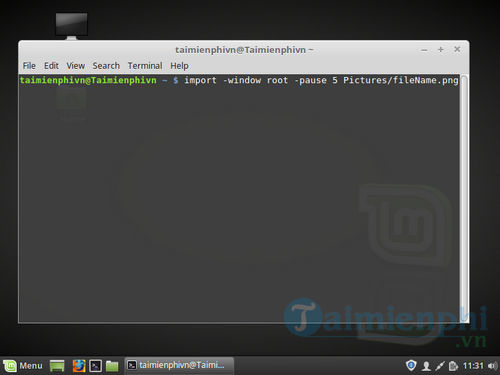
Step 5: Delay screenshot time. Type import -window root -pause # Pictures/fileName.png there and press Enter. Note to replace # with the number of seconds you want to wait before taking a photo. Once the timeout ends, a screenshot will be taken and you will be returned to the Terminal window.
Method 4: Use Shutter to take screenshots on Linux
Step 1: Install Shutter. Shutter is a popular screen capture program that includes a number of advanced photo editing and downloading features. If your job requires you to regularly take photos and share your screen, Shutter is the program you should try.
- You can search Shutter through most distributors' package managers. Simply search for Shutter and install the program.
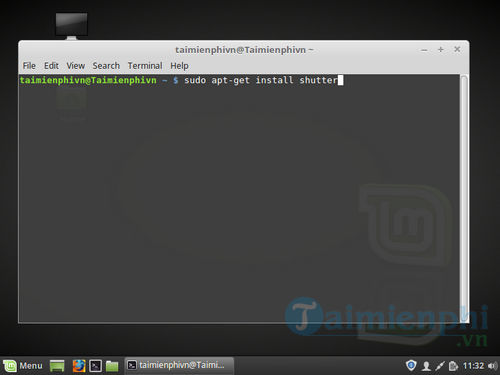
- To install Shutter from Terminal, enter sudo add-apt-repository ppa:shutter/ppa there and press Enter. Update your repository by entering sudo apt-get update, then install Shutter by entering sudo apt-get install shutter.
Step 2: Choose the screenshot mode you want to take. Along the top of the Shutter window, you'll see three options: Selection, Desktop , and Window . Click one of these three buttons to select the screenshot mode you want.
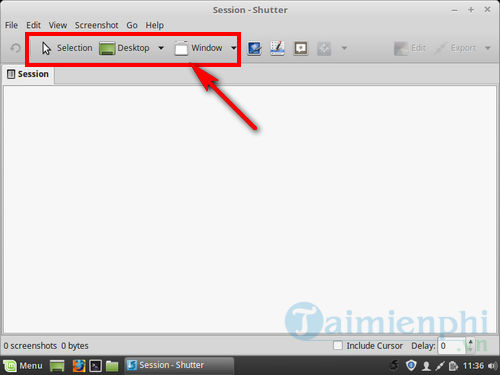
Step 3: Take a screenshot of your screen. If you select Desktop mode , your screenshot will be taken automatically. If you select Selection , the screen will be dimmed, and you can click and drag to create a box to select photo content. Everything inside the box will be photographed. If you choose Window, click to select the window you want to take a photo of.
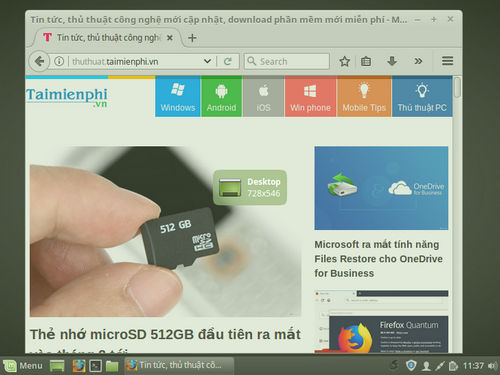
The screenshot will be saved in the Pictures folder.
Step 4: Edit the screenshot. After taking a screenshot on Linux, open the image for preview in the Shutter window. Click the Edit button to open the Shutter editor window. You can use the editor to highlight content on the screenshot or add annotations. Click Save after completing.
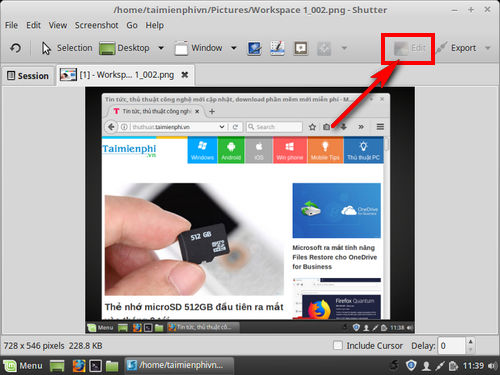
Step 5: Export screenshot. You can send screenshots to a photo upload service, or add an FTP server to upload photos. Click the Export button to open the Export menu.
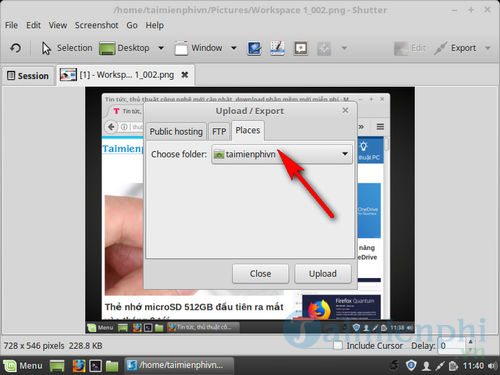
- In the Public hosting tab , you can choose to upload screenshots to your Dropbox account or a variety of other online photo storage sites. You will be asked to log in your account information.
- In the FTP tab , you can enter the connection information for the FTP server, useful in case if you upload screenshots to blogs or websites.
- In the Places tab , you can move screenshots to other locations on your computer or network.
So TipsMake has just provided you with 4 ways to take screenshots on Linux . Hopefully after this article, readers will know some more ways to take screenshots on Linux. Good luck.