How to Format USB on Ubuntu
Use Disks Utility
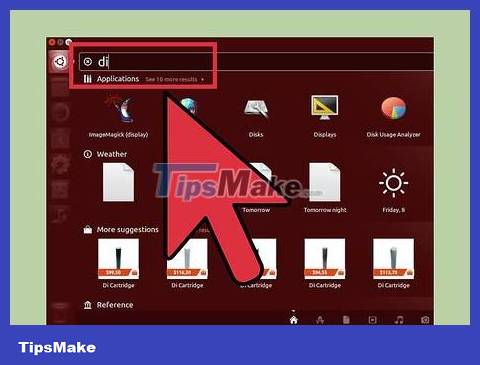
Click the Dash button and look for "disks" . Disks will appear in the returned application list.
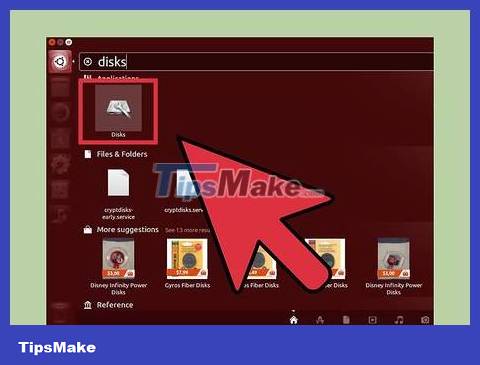
Run Disks from the search results. A list of connected devices will appear in the left pane.
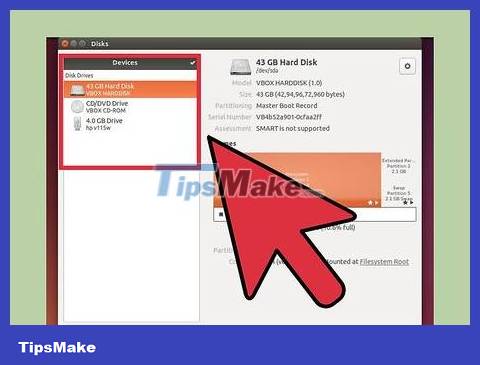
Select your USB from the device list. Detailed information of the USB will appear in the right pane.
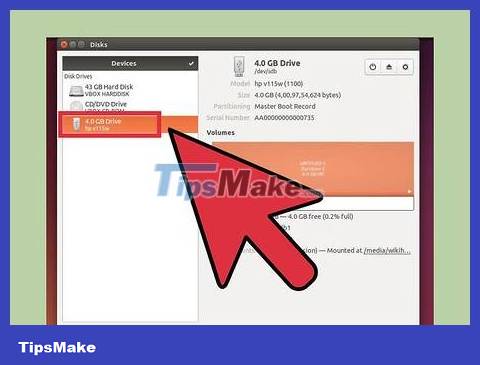
Select at least one drive. Most USBs have only one drive, but if your USB has more than one drive, you can choose one or all.

Click the Gear button below the drives and select "Format . " Format options will be displayed.

Select the content you want to delete. The Quick format option will erase all data on your drive. The Slow format option will erase all data and check for errors on the USB.

Select file system format. There are several formats for you to choose from. However:
To maximize compatibility with other devices, select "FAT" (FAT32). This format is compatible with all computers and almost all devices that work with USB.
If you plan to use USB for Linux, select "ext3". This format gives you advanced Linux file access and write permissions.
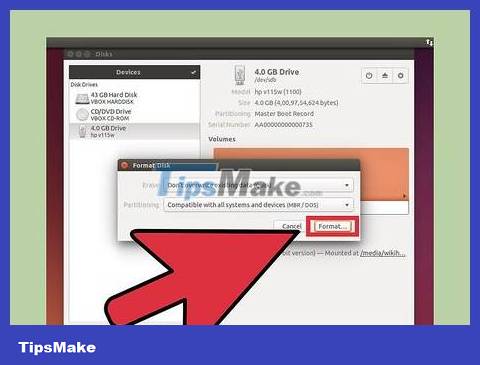
USB format. Click the format button and wait for the USB to finish formatting. With large capacity USBs, this process may take a while and deleting any data on it will further increase the waiting time.
Use Terminal
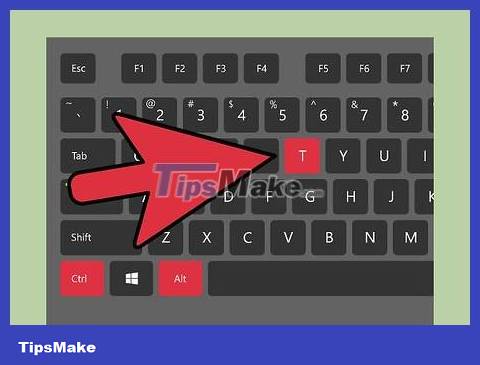
Open Terminal. You can open Terminal from the Dash toolbar or with the key combination Ctrl+ Alt+ T.
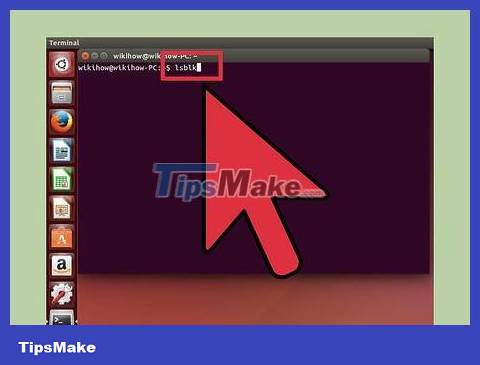
Type . lsblk and press ↵ Enter. A list of storage devices currently connected to the computer will be displayed.
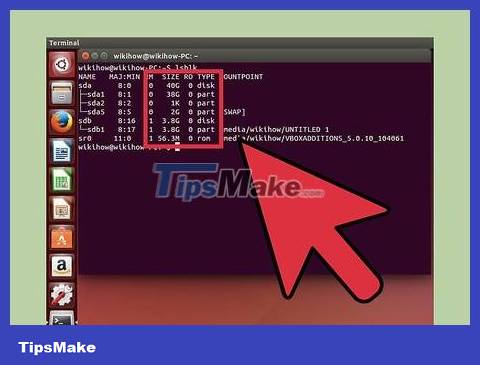
Identify your USB. Use the SIZE column to find the USB in the list.
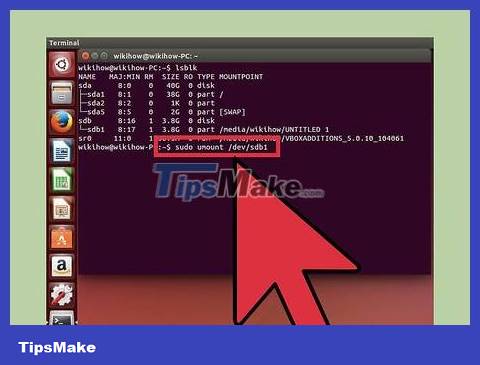
Unmount the partition on the USB. You will have to disconnect before proceeding to format the USB. Type the following command and replace it sdb1with the USB partition name.
sudo umount /dev/sdb1
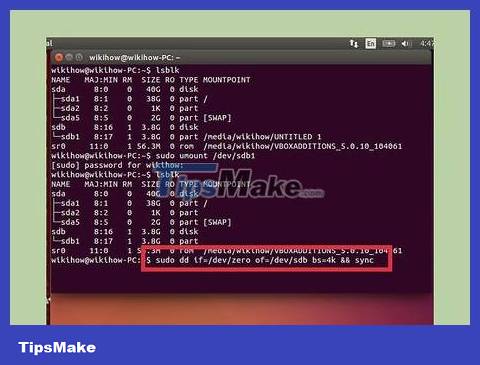
Erase all data on the USB (optional). You can erase everything on the USB by entering the following command. Replace sdbwith your USB name.
sudo dd if=/dev/zero of=/dev/sdb bs=4k && sync
This process will take a while and your computer may freeze for a bit.
For Ubuntu 16.04 and later: .sudo dd if=/dev/zero of=/dev/sdb bs=4k status=progress && sync
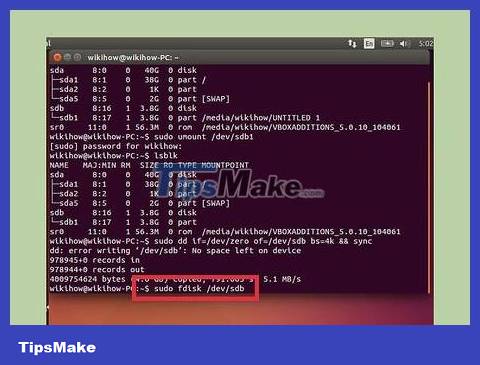
Create a new partition table. The partition table controls the drives on the USB. Enter the following command, replacing it sdbwith your USB name.
Type and press . Click to create an empty partition table.sudo fdisk /dev/sdb↵ EnterO
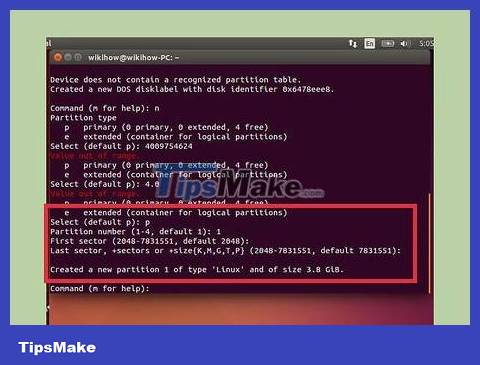
Press . N to create a new partition. Enter the size of the partition you want to create. If you only want a single partition, enter the full size of the entire USB.
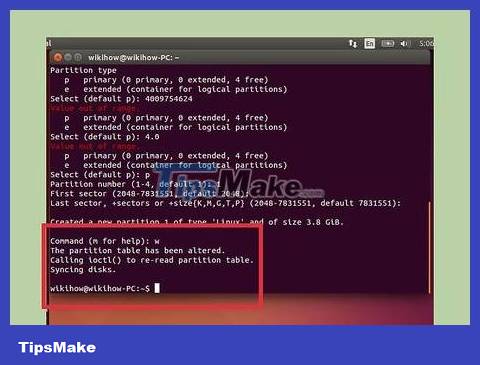
Press . W to write the table and exit. This process may take a while.
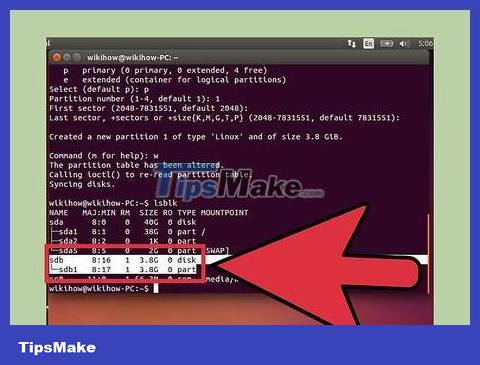
Run . lsblk again to test your new partition. This partition will be listed under the USB name.
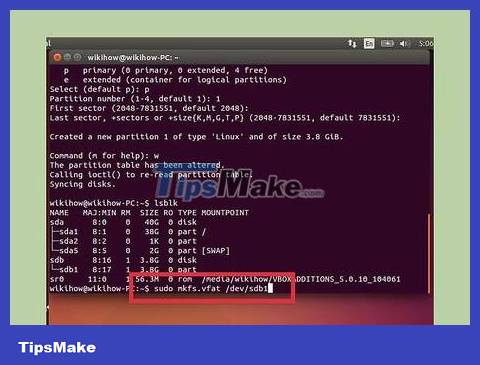
Format the new drive. Now that the new drive has been created, you can format it with the type of file system you want. Enter the following command to format the USB as FAT32 – the most compatible file system format. Replace sdb1with your partition name:
sudo mkfs.vfat /dev/sdb1
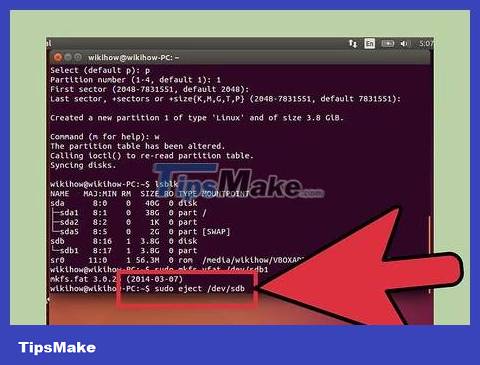
Disconnect the USB when finished. Once formatting is complete, you can safely disconnect the USB:
sudo eject /dev/sdb
You should read it
- ★ Paragon Partition Manager - Download the latest Paragon Partition Manager
- ★ EASEUS Partition Master - Download the latest EASEUS Partition Master
- ★ This is how to delete Recovery partition and Recovery partition 450 MB on Windows 10
- ★ Fix error that cannot install Windows, cannot Format computer
- ★ 3 ways to hide recovery partition (Recovery) on Windows 10 / 8.1 / 7