How to install multiple Java versions on CentOS 8
Java is one of the most widely used high-level programming languages. Java was first developed by Sun Microsystems. It is used to create a complete application or system that can run on computers or in distributed server environments. In addition, Java is also used to create a small application or applet, which is part of a web page.
In this article, readers will learn how to install different versions of Java on CentOS 8.
Install Java on CentOS 8
Perform the following steps to install Java on CentOS 8:
1. First, you need to log in as an administrator or root user on the system.
2. Open a terminal with keyboard shortcuts Ctrl+ Alt+ T.
Install OpenJDK 11
The best way is to install the latest Java version JDK 11. Some Java-based applications may need a specific version of Java, so in this situation, you need to read the application documentation first.
You will run the following command to install OpenJDK11 on CentOS 8 system:
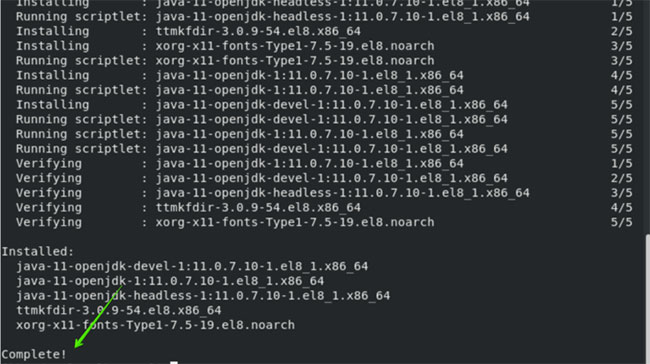
$ sudo dnf install java-11-openjdk-develDuring installation, a confirmation prompt from the user will be displayed on the Terminal. Click Y, and then click Enterto allow the installation of Java packages on the system.
You should see the Complete status displayed for the installation of OpenJDK 11 on the Terminal.
 You should see the Complete status displayed for the installation of OpenJDK 11 on the Terminal
 Check the Java version
After installation is complete, you can now verify Java installation by displaying the installed Java version. For this purpose, you need the following command:
$ java -versionAt this stage, Java has been successfully installed on the CentOS 8 system.
You can also install a headless Java version on CentOS 8, which supports the minimum Java runtime required for application execution, without the use of a GUI (i.e. without a mouse or keyboard). and the support of the monitor system). Better headless version for server applications.
You need to type the following command to install only Headless OpenJDK 11 version on the system:
$ sudo dnf install java-11-openjdk-headless Install the headless OpenJDK 11 version on the system
 Install OpenJDK 8
Similarly, you can install OpenJDK 8 on your system. The default CentOS 8 repository contains the latest two major versions of Java LTS, Java 8 and 11. OpenJDK 8 is also a commonly used version. To install Java 8, you need to execute the following command:
$ sudo dnf install java-1.8.0-openjdk-develAfter completing the installation of Java 8, you can now verify it by checking the version information as follows:
$ java -versionYou can also install headless versions of Java 8.
Set the default version of Java
If there are multiple versions of Java installed on CentOS 8, in this case, you can use the default version of Java (that is, when you type java on Terminal, which version will be used as the default) like after:
$ java -versionIf you want to change the version above with new alternatives, execute the following command:
$ sudo alternatives --config java A list of installed Java versions is displayed
 After running the above command, a list of installed Java versions will be displayed on the Terminal. Now, choose the number that corresponds to the version you want to set as the default.