How to Install Gimp Brushes
One advantage that GIMP has over the competition is its open-source nature. This gives it a flexibility its higher-budget competitors lack. It is easy to add brushes, whether downloaded from the Web or created yourself. Recent versions of...
Table of Contents
Method 1 of 2:
Installing a Pre-made Brush
-
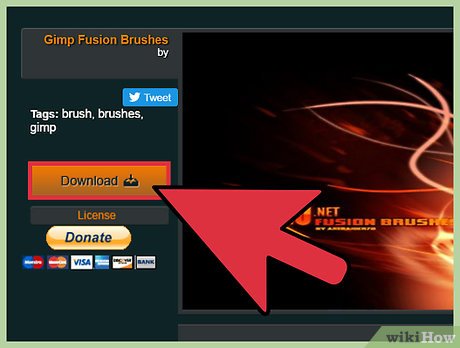
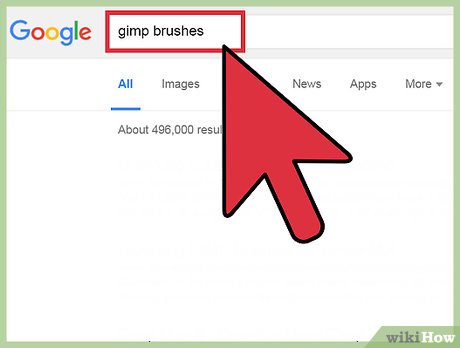 Download a GIMP brush or brush pack. There are many that can be found on the Internet. Just do a search for 'GIMP Brushes'. Both dedicated sites like GIMPbrush.com and artist sites such as DeviantArt feature GIMP brushes. GIMP brushes end in the extensions '.gbr', '.gih', or '.vbr'. [1]
- Simple brushes for other programs, such as Photoshop, also often work for GIMP by simply changing the file extension to '.gbr'. Note that recent versions of GIMP will actually convert Photoshop brushes automatically. [2]
- The more complex the brush, the less likely it is to be convertible to GIMP. Procedural brushes, which change shape depending on how they are used, generally can't be converted.
-
 Place the brush in the brush search path. The proper place for this is in your personal 'Brushes' folder, generally found at 'C:Documents and Settingsmyusername.gimp-2.6brushes'. The exact filename will vary according to the version of GIMP you are using.
- There is a general brushes folder that is not separated by user, but GIMP advises that you do not edit that folder in any way.
-
 Click the 'Refresh Brushes' button. This is a button near the bottom right of the brushes display that shows two arrows, each pointing at the beginning of the other. This should cause GIMP to detect and display your brushes.
Method 2 of 2:
Creating a Brush
-
 Create the image you want as a brush. Use GIMP to draw your brush for you. It can be literally any image, but some work better than others. A brush will basically make a stamp of the image over and over in rapid succession as you move the mouse, so complex can create an undesirable effect where the intended image is obscured. Open the file with appropriate settings for the size and shape of the brush you want. Use black pencil to draw the image, and zoom in to ensure you get a pixel-perfect shape. [3]
- Note that you can also just copy a selected portion of the image, and GIMP with create a brush from the selected area for the current window. You'll have to save the selection as a brush for it to remain available, however.
- For a simple brush with variable colors, use black for the brush itself, and pure white for any transparent spaces. You can select the color of this type of brush via the normal color selection process, and draw using its shape in any color you please.
- For a brush that cycles through shapes or colors, you will need to open a file with transparent fill. Make each different image you want the brush to cycle through on a separate layer. When you draw with it, each time the brush repeats the image it will use only one of the layers, giving you a closely repeated pattern as you draw. The colors of this type of brush are set when it created, so unlike variable-color brushes, you can't select a different color from the color selector before drawing.
-
 Save your image. Use the '.gbr' extension for simple brushes, '.gih' for brushes that cycle through images. Save it to 'C:Documents and Settingsmyusername.gimp-2.6brushes', or the analogous folder for your version of GIMP.
 -
 Click the 'Refresh Brushes' button. This is a button near the bottom right of the brushes display that shows two arrows, each pointing at the beginning of the other. This should cause GIMP to detect and display your brushes. [4]
Was this article helpful?
Your feedback helps us improve.
Related Articles
 How to arrange brushes in GIMP with tags5 minutes read
 Don't miss out on these 11 beautiful free brushes for GIMP7 minutes read
 8 best GIMP plugins and how to install them11 minutes read
 How to install GIMP on Ubuntu 18.044 minutes read
 Instructions for installing Brush on Photoshop3 minutes read
 4 plugins that help GIMP become a professional tool.5 minutes read
Reader Comments 0
Sign in with email or Google to join the discussion.