Photoshop CS: How to create and use Brush (The end part)
Previous post TipsMake.com showed you how to use the Brush tool, this next lesson we will show you how to create your own new Brush
III. How to create your own brush.
In case, you have a brush or download a brush from the net, remember that the file extension must be ". Abr ", then Photoshop can be loaded.
- To load a brush into the Brushes Palette, click Window -> Brushes . On the Brushes palette -> Click the pop-up menu -> Load brush -> and navigate to the "*. Abr " file on your local computer.
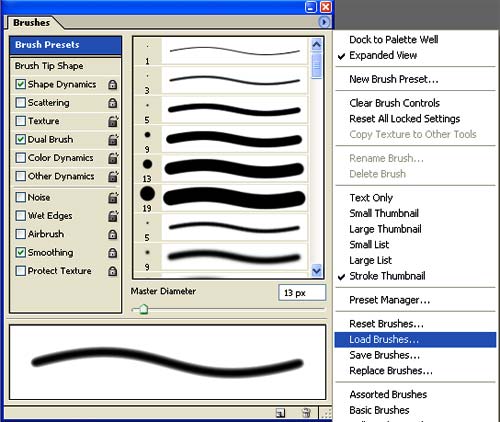
Figure 1
If you create a drawing according to your own preferences, or inadvertently you see a certain angle quite attractive. You want them to become a brush to be more flexible for their use, how do you do it? Work is simple!
You try to practice the following exercise with me .
Lesson 1 . Open an image you like
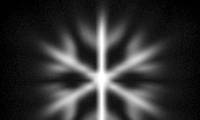
For example, I have the following picture.

Figure 2
Select the part you want to create the brush

Figure 3
Click Edit -> Define Brush Preset .

Figure 4
Name the brush
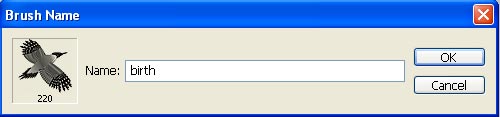
Figure 5
Check back on the Brush palette
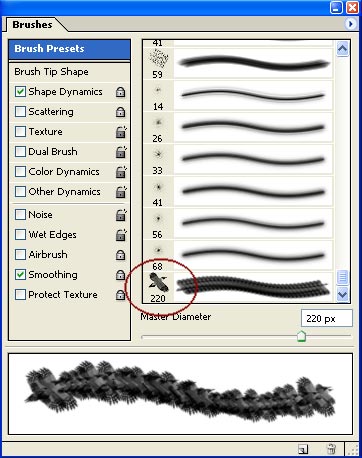
Figure 6
Try applying the brushes to the specific image. My result is

Figure 7
Was this article helpful?
Your feedback helps us improve.
Related Articles
 How to rotate 'brushes' in Photoshop in just 5 seconds with this tip3 minutes read
 Photoshop CS: How to create and use Brush (Part 1)5 minutes read
 Tutorial to create a sparkling snow effect using Photoshop Brush3 minutes read
 How to use Photoshop CS5 - Part 6: Digital art8 minutes read
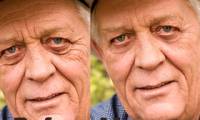 How to use Photoshop CS5 - Part 15: Remove wrinkles with the Healing Brush tool5 minutes read
 Don't miss out on these 11 beautiful free brushes for GIMP7 minutes read
Reader Comments 0
Sign in with email or Google to join the discussion.