Photoshop CS: How to create and use Brush (Part 1)
Working with brushes is an important part of using Painting and Editing tools. In this lesson, I will show you how to create and use simple brushes in Photoshop ...
Working with brushes is an important part of using Painting and Editing tools. In this lesson, I will show you how to create and use simple brushes in Photoshop.
I. Use brushes in a library of Photoshop brushes
- Select the Brush tool

Figure 1
- On the " Options " bar, the properties of the brush will appear.

Figure 2
- Click on the small down arrow to select the appropriate brush strokes.

Figure 3
+ Master diameter : choose a large or small pen stroke
+ Hardness : choose a pen stroke, hard or soft.
+ Click on the circle button icon with triangle, there will appear a window containing a combination of names of brush strokes (such as natural brush, square brush .)
You can choose for yourself but the pen strokes are suitable.
II. Use the Brushes palette ( Palette Brushes )
- To blur the brushes palette, you can do two ways:
+ Window -> Brushes
+ Click Toggle the brushes palette located on the right side of the Options bar

Figure 4
- Feature options on the Brushes Palette .
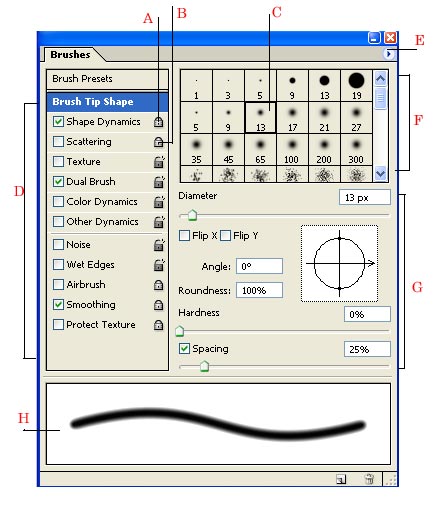
Figure 5
The Brushes palette with brush stroke options is shown as follows:
- A : lock an attribute
- B : Open properties
- C : Choose brush strokes
- D : Composite area of attributes
- E : The pop-up menu selects different burshs.
- F : Shape of pen strokes (it only shows when you select " Brush tip Shape ")
- G : select properties for each brush
- H : Preview the brushes
III. Application exercises
1. Use the temp brush included in photoshop.
Lesson 1 . Draw roses .
- Open a new document with 500 x 500 px size. white background (#ffffff)
- Select the Brush Tool
- Open the Brushes palette -> click the pop-up menu -> select Special effect brushes
- Click on the rose brush, set the attributes according to the following picture
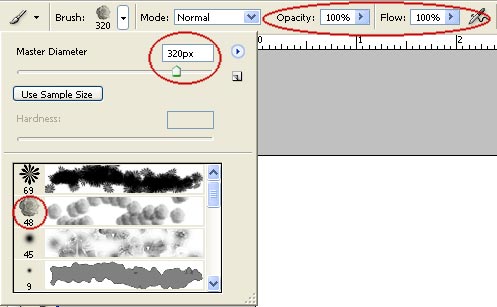
Figure 7
- Create a new layer ( Layer -> new -> layer )
- Press "D" to return to default Foreground and Background colors (black and white)

Figure 7.1
- Draw the rose brush on the new layer (remember only one click) - name this layer "hoahong"
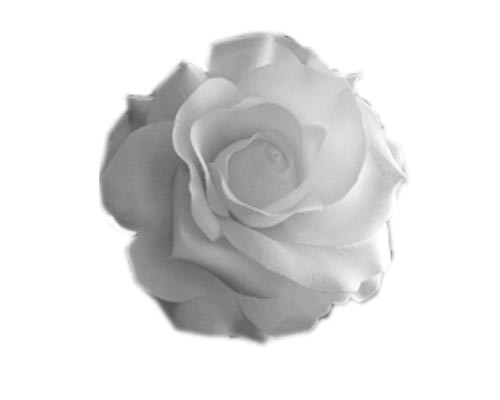
Figure 8
- Start coloring the roses (here I like blue roses, because I have never seen real flowers in real life. You can choose the color you like when painting your rose)
- Right click " hoahong layer " -> choose Blending options :
- Set Inner Shadow properties, and Outer Glow as shown below
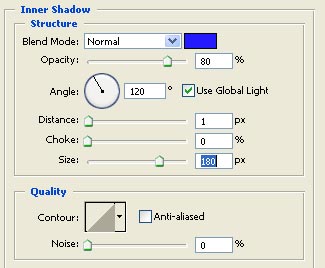
Figure 9
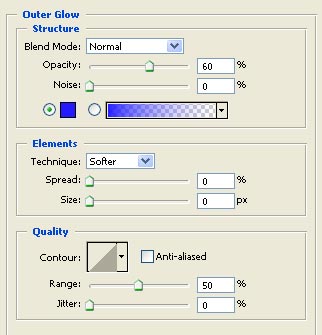
Figure 10
Remember to set the Blend mode : Normal. and Color of the same Inner shadow and Outer Glow to create the brightness and smoothness of the rose wings (for this example I set color: # 241AFC), the result is:
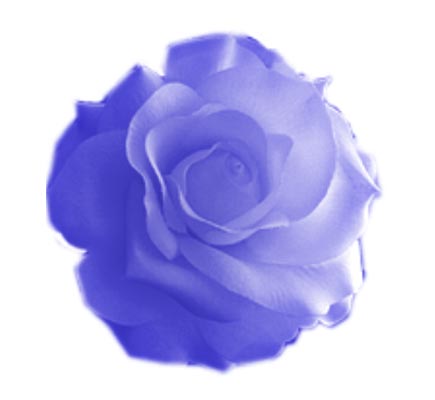
Figure 11
Lesson 2 : Drawing Snow Flowers :
- Open a new 400 x 400 px document, black background (# 000000)
- Select Brush tool
- Open the Brushes palette -> pop-up menu -> select Assorted brushes
- Choose snowflake brush
- Select the properties as follows
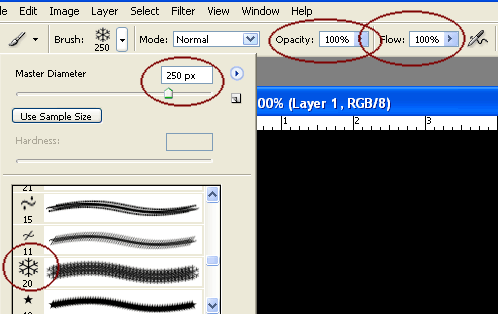
Figure 12
- Press "D" key -> press "X" key to switch to white and black foreground and background colors
- Create a new layer, name it "hoatuyet"
- Draw a cough brush on the layer (Click once)

Figure 13
- Right click "hootuyet layer" -> select Blending options
- Set the following Inner shadow attribute - the purpose of lightening the snowflake
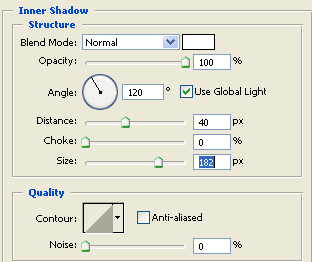
Figure 14
- Filter -> blur -> radial blur -> set properties
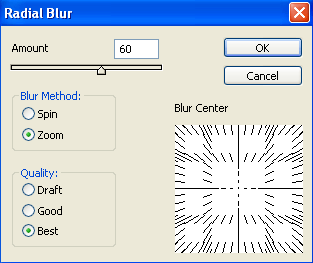
Figure 15
You can repeat Radial blur step by pressing " Ctrl + F " key combination .

Figure 16
- Click Effects under the layer layer -> open the layer style
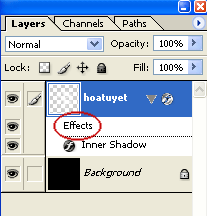
Figure 17
- Set the outer glow attribute for the layer layer as shown below
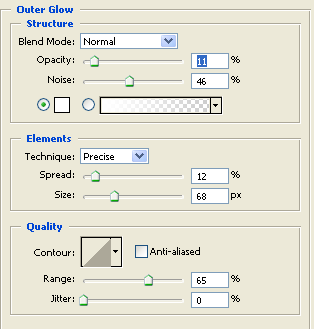
Figure 18
- And results:
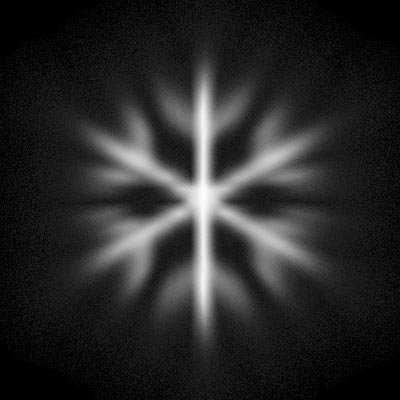
Figure 19
Lesson 3 : Draw the leaf .
- The above steps repeat lesson 1, 2
- Select the Inner Shadow attribute, and the Outer Glow brush for the leaves as follows
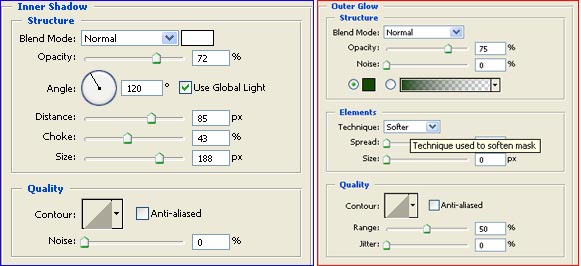
Figure 20
- Result:
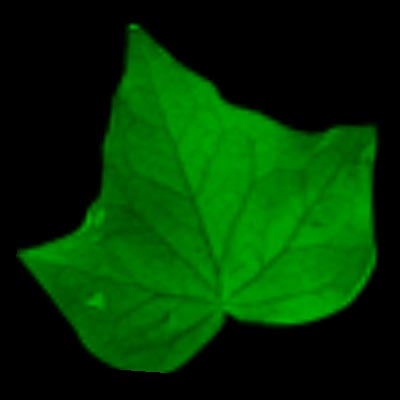
Figure 21
-------------------------------
Ngọc Lan (Translating lesson from Photoshop Help , and performing manipulation of illustrated applications)
( Also )
- Tutorial to create a sparkling snow effect using Photoshop Brush
- How to use Photoshop CS5 - Part 6: Digital art
- How to use Photoshop CS5 - Part 15: Remove wrinkles with the Healing Brush tool
- Don't miss out on these 11 beautiful free brushes for GIMP
- How to install Brush into Photoshop
- Very nice brushes for Photoshop - Download now for free


 Overview of the Forefront TMG 2010 management interface
  Microsoft System Center Service Manager - Part 4: Use
  Install and configure email handling solutions on TMG 2010 Firewall - Part 2: E-Mail Policy
  Check the TMG 2010 virtual private network server - Part 2: Configure TMG Firewall as the PPTP Remote Access VPN Server
  Troubleshoot problems with Kerberos in SharePoint - Part 2
  Configure Web Services URL of Exchange Server 2007