How to Outline Text in GIMP 2
PhotoShop users may have it easy with their ability to add a stroke to the outline of the text simply by right-clicking. However, there's a way to outline text in GIMP 2 as well. It's not immediately obvious nor as easy as right-clicking...
Table of Contents
Method 1 of 2:
Using Color Selection and Stroke Weight
-
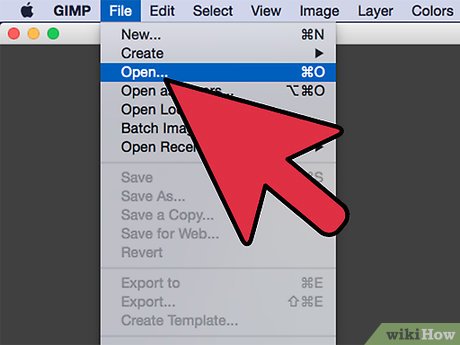
 Have a GIMP file open. Have it ready to work on in front of you prior to selecting text by color and adding a stroke to the selection.
 -
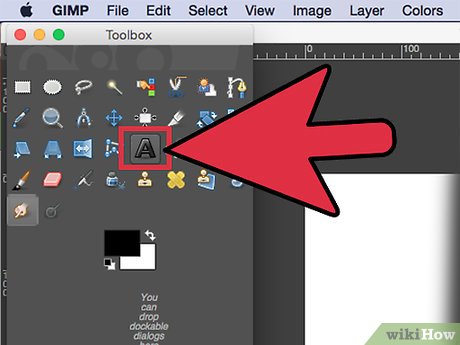
 Select the text tool from your Toolbox. It's the bold letter 'A' button. You can also click on the Toolbox, and type 't' to select text.
 -
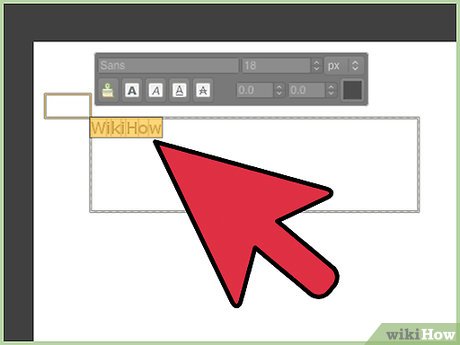
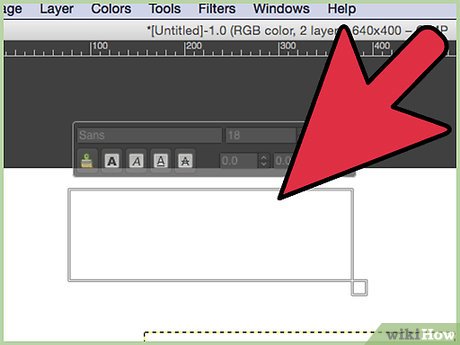 Create the text layer. Do so by clicking and dragging the area for your text on your GIMP file.
 -
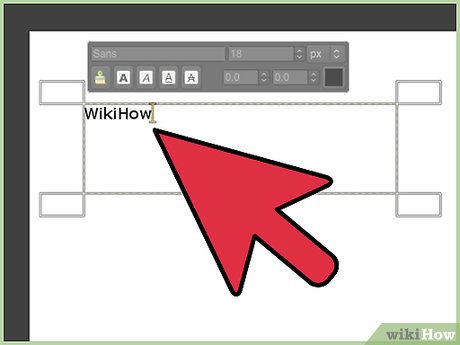 Type your text. Do so in the GIMP Text Editor box that appears.
 -
 Highlight the text in the GIMP Text Editor box.
 -
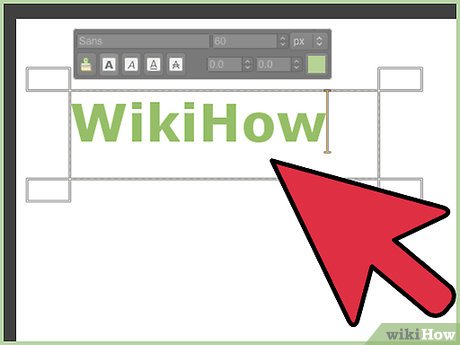
 Set the text parameters in the Toolbox. Adjust the font and color to how you would like them to look.
 -
 Proofread! You won't be able to edit the text after you put an outline around it.
 -
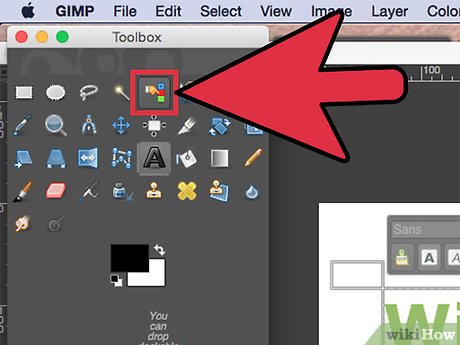
 Click the 'Color Selection Tool' in your Toolbox. It's the button with the stacked red, blue, and green boxes. You can also click your Toolbox, and type Shift + O.
 -
 Click your text. It should all highlight.
 -
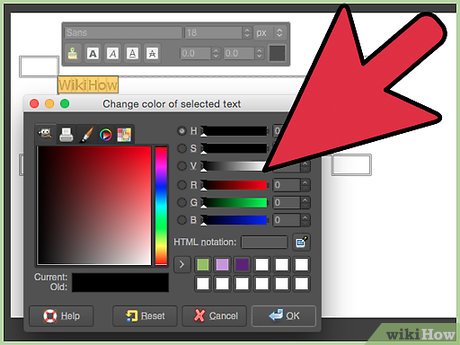
 Set the foreground color. Simply go to your Toolbox to set the foreground color to the color you'd like your border to be.
 -
 Set the stroke width. In the file menu bar, just click on 'Edit,' and then select 'Stroke Selection." Here you will be able to set the stroke width (5 pixels is pretty standard). Once you've set it, click 'Stroke.' You're done!
Method 2 of 2:
Growing a Selection
-
 Have a GIMP file open. Have it ready to work on in front of you prior to selecting text by color and adding a stroke to the selection.
 -
 Select the text tool from your Toolbox. It's the bold letter 'A' button, or you can click on the Toolbox, and type 't' to select text.
 -
 Create the text layer. Do so by clicking and dragging the area for your text on your GIMP file.
 -
 Type your text. Do so in the GIMP Text Editor box that appears.
 -
 Highlight the text in the GIMP Text Editor box.
 -
 Set the text parameters in the Toolbox. Adjust the font and color to how you would like them to look.
 -
 Proofread! You won't be able to edit the text after you put an outline around it.
 -
 Decide if you're happy with the text. Afterwards, click the 'Color Selection Tool' in your Toolbox by selecting the button with the stacked red, blue, and green boxes or by clicking on the Toolbox and typing Shift + O and selecting the text.
 -
 Click on 'Select' in the file's menu bar, and select 'Grow.'
 -
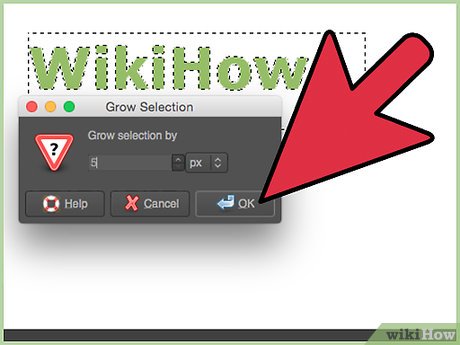 Set the amount you want to grow the selection. Do this in the dialog box. This equates to the stroke weight, or size of the text outline. Five pixels is pretty standard.
 -
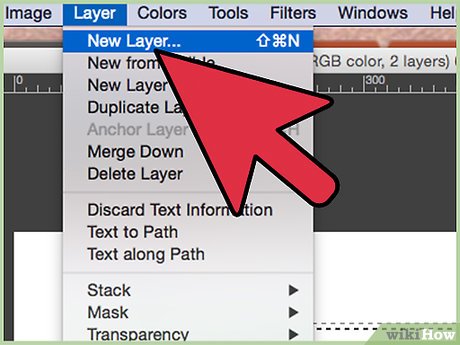 Create a new transparent layer. Simply click on 'Layer' in the menu bar to create one.
 -
 Place the new layer under the first layer. To do this, in the 'Layers, Channels, Paths, Undo' box, click the new layer you just created, and drag it below the text layer you had created earlier.
 -
 Set the background color. This can be any color you wish the outline to be. Click 'Edit' in the menu bar of the file, and select 'Fill with BG Color.'
 -
 Finish outlining the text. Right-click the text layer in the 'Layers, Channels, Paths, Undo' box, and select 'Merge Down.' Your text should now be sporting an outline.
Was this article helpful?
Your feedback helps us improve.
Related Articles
 How to draw borders for text in GIMP3 minutes read
 How to add text with GIMP2 minutes read
 Outline in CSS5 minutes read
 How to create a poster with the Text Portrait effect in GIMP10 minutes read
 Learn what is Outline in Word and the fastest way to use it?3 minutes read
 New features of GIMP version 2.1010 minutes read
Reader Comments 0
Sign in with email or Google to join the discussion.