How to fix DXGI_ERROR_DEVICE_REMOVED error in Windows 10/11
The DXGI_ERROR_DEVICE_REMOVED error sometimes occurs when users try to start certain Windows games or when playing them. Players have reported this bug for games like FIFA 2022, Prepar3D, Need for Speed Rivals, Apex and Crysis 3, among others. This DirectX error message says: "DirectX function 'GetDeviceRemovedReason' failed with DXGI_ERROR_DEVICE_REMOVED".
As a result, Windows games don't launch at all or crash frequently due to the DXGI_ERROR_DEVICE_REMOVED error. The error message clearly states that there is a problem with your graphics card. Therefore, these potential solutions can fix the DXGI_ERROR_DEVICE_REMOVED error in Windows 10/11.
1. Modify registry key GraphicsDriver
Modifying the GraphicsDriver registry key is the most widely confirmed potential fix for the DXGI_ERROR_DEVICE_REMOVED error. This solution involves adding DWORD TDR (Timeout Detection and Recovery) to the GraphicsDrivers key. Setting that DWORD to 0 disables TDR detection. You can apply this registry edit as follows:
1. Press Win + S , type regedit inside the search engine and click Registry Editor.
2. Next, navigate to the GraphicsDrivers key at this registry location:
HKEY_LOCAL_MACHINESYSTEMCurrentControlSetControlGraphicsDrivers3. Right-click GraphicsDrivers and select the New > DWORD options in the context menu.
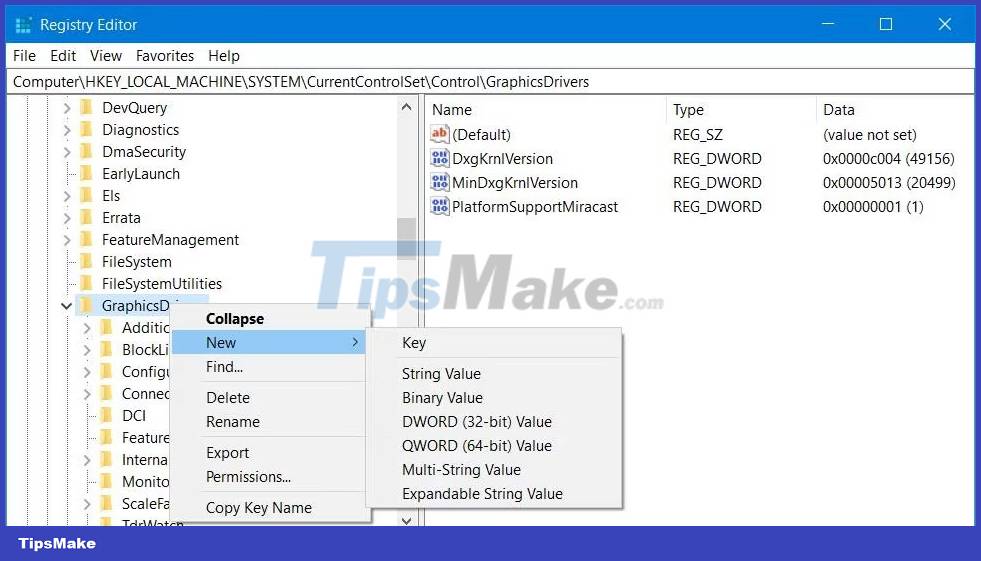
4. Enter a TdrLevel title for the DWORD.
5. Double-click TdrLevel to activate the Value box.
6. The DWORD value has been set to 0 by default. However, change that value to 0 and click OK.

7. Now close Registry Editor, click Start and select Power > Restart .
Some users also confirmed that deleting TdrDelay QWORD in the same key can also fix the DXGI_ERROR_DEVICE_REMOVED error. If you can see TdrDelay QWORD in the GraphicsDrivers key, try removing it. To do so, right-click on the TdrDelay QWORD and select Delete. Select Yes to confirm the deletion.
2. Disable Antialiasing . setting
Antialiasing is a graphical setting that smooths jagged lines when enabled. However, this graphical effect can sometimes cause crashes like the DXGI_ERROR_DEVICE_REMOVED error. Here's how you can turn off Antialiasing in the NVIDIA Control Panel:
1. Right-click the NVIDIA logo in the system tray area and select NVIDIA Control Panel.

2. Click the Manage 3D navigation option in the sidebar.
3. Select the Global Settings tab of the NVIDIA Control Panel.
4. Next, click the Antialiasing – Mode option and select Off.
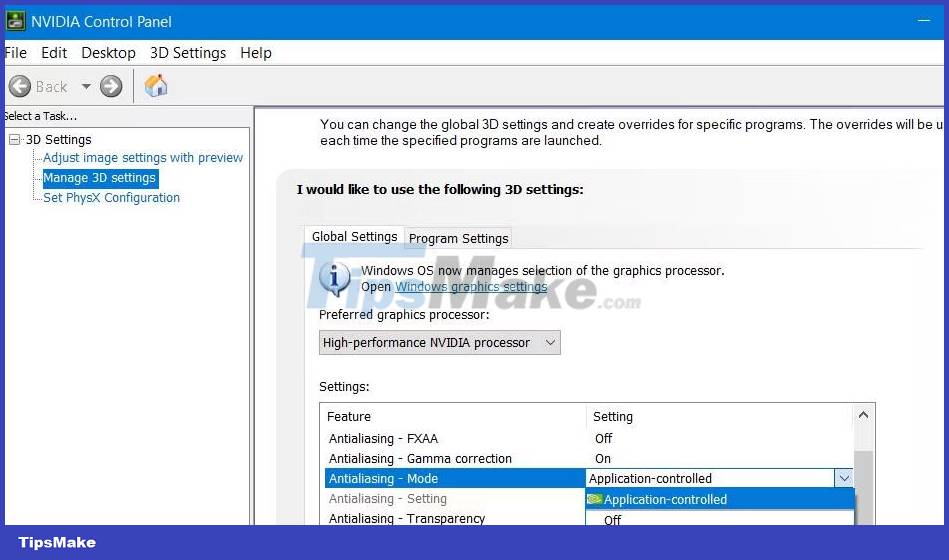
5. Repeat the previous step for the Antialiasing options – Transparency, FXAA and Gamma .
6. Then select Apply to set the new graphics options.
You can also turn off Antialiasing for AMD GPUs in the Radeon software. Check out the guide on how to tweak AMD Radeon settings for more details on how to disable Antialiasing there.
3. Disable NVIDIA ShadowPlay (Overlay)
GeForce Experience's ShadowPlay feature for game recording can put a significant burden on the GPU. Therefore, the article recommends that you disable that feature to fix the DXGI_ERROR_DEVICE_REMOVED error. You can disable NVIDIA ShadowPlay in GeForce Experience as follows:
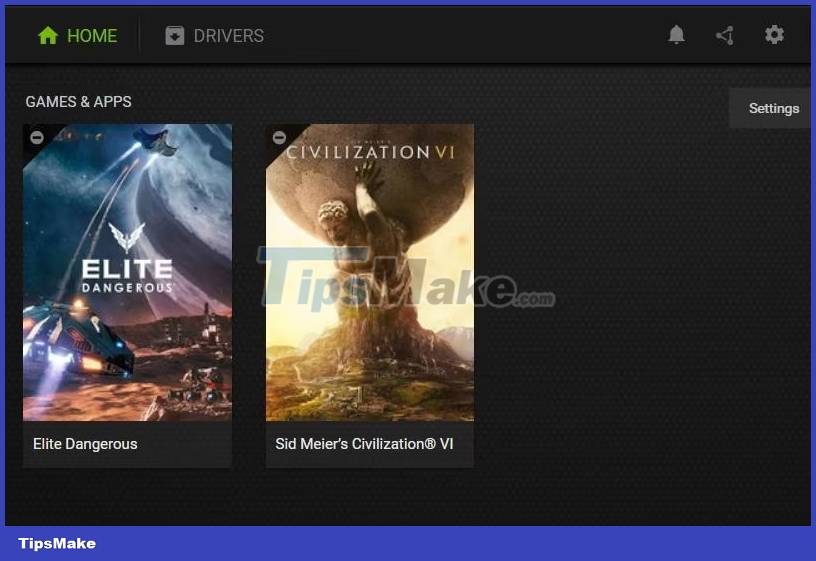
1. To open GeForce Experience, right-click the NVIDIA system tray icon and select the software on the context menu.
2. Then click the cog button (Settings) to access other options.
3. Turn off the In-Game Overlay option .
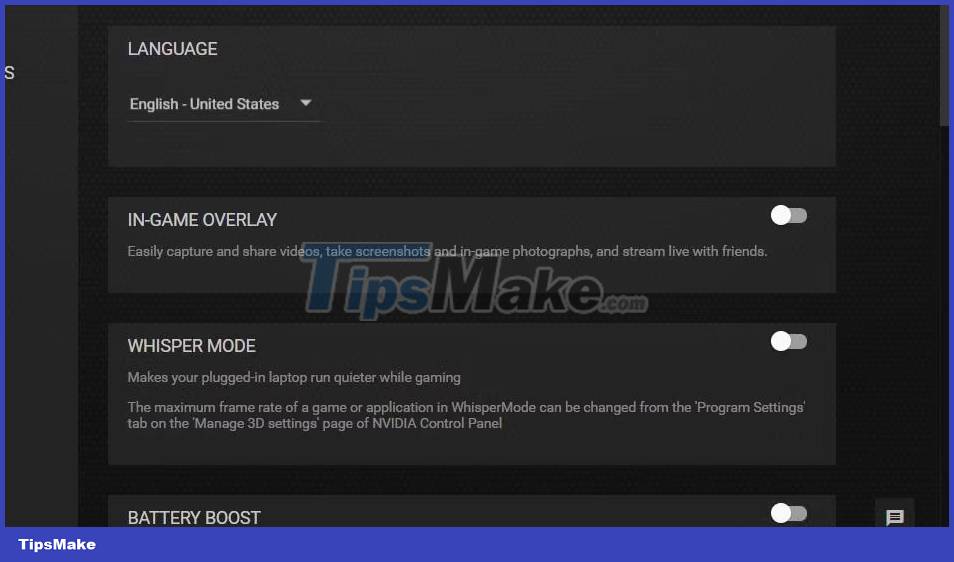
4. Exit the GeForce Experience software and try playing your game with ShadowPlay disabled.
4. Disable DLSS . graphics settings
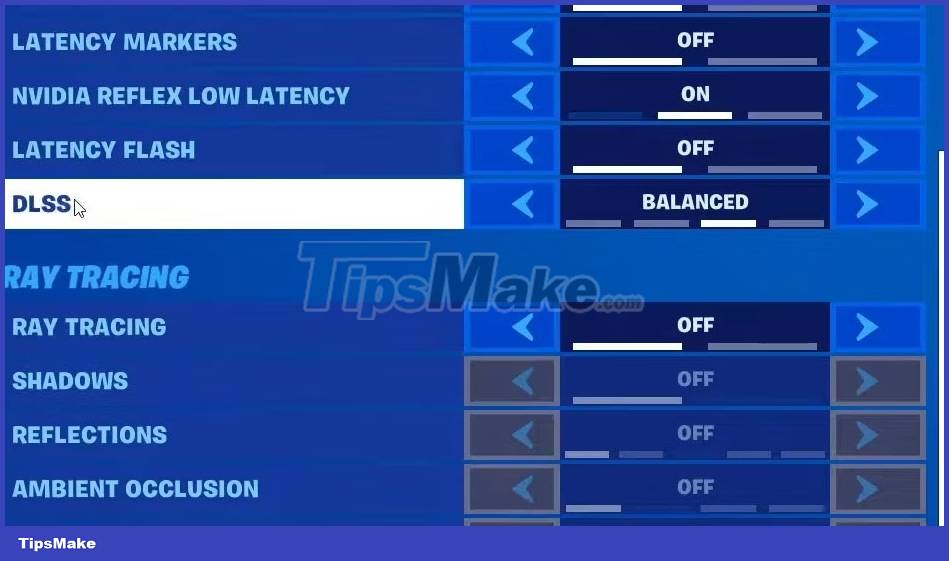
Some players confirmed that disabling the DLSS graphics setting in the game fixes the DXGI_ERROR_DEVICE_REMOVED error. If the affected game doesn't always crash when you start it up, try disabling that game's DLSS option. You can usually find that setting in the game's graphics or video tab options.
5. Undo Overclock
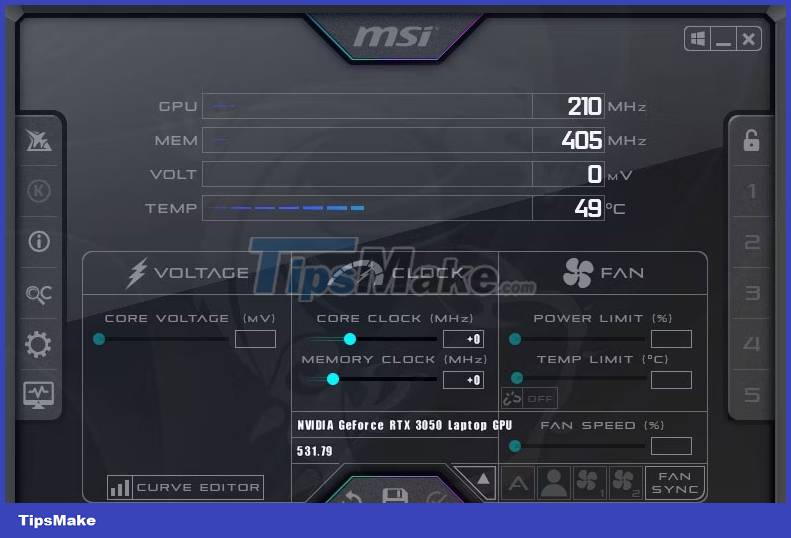
Have you done any GPU or processor overclocking on your PC? If so, this overclock may have caused the DXGI_ERROR_DEVICE_REMOVED error. Undo the software overclock you applied. Or you can undo the overclock by resetting the BIOS (Basic Input Output System).
6. Run DirectX Web Installer
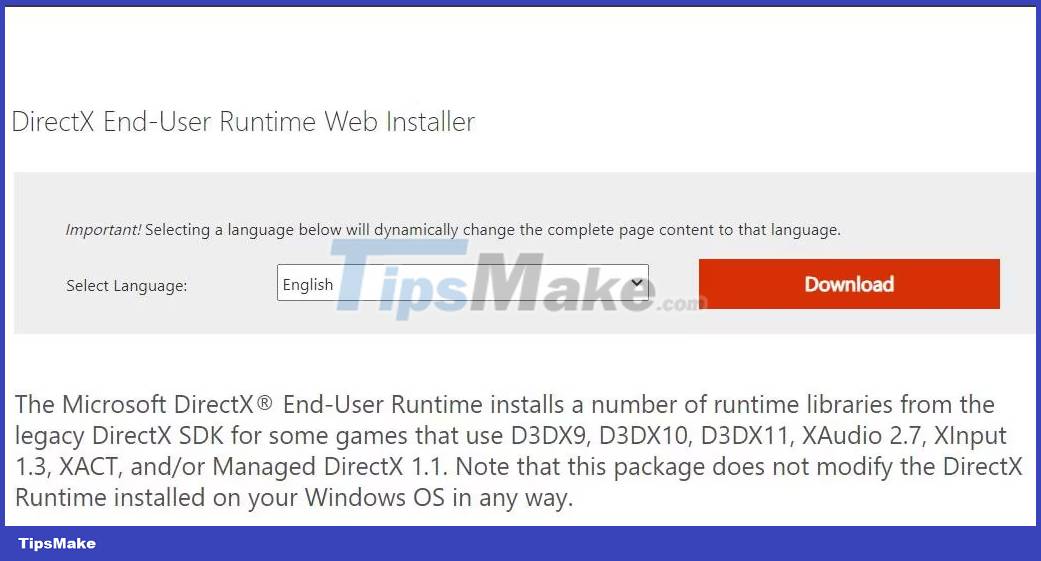
DXGI_ERROR_DEVICE_REMOVED can occur because of DirectX issues. For example, some required DirectX components may be missing from your PC. You can work around that by downloading and running the DirectX Web Installer as follows:
1. Open this DirectX download page.
2. Click the orange Download button to get the DirectX installation file.
3. To view File Explorer, hold down the Windows logo button and press E . Then, open the folder containing the Microsoft DirectX End-User Runtime package.
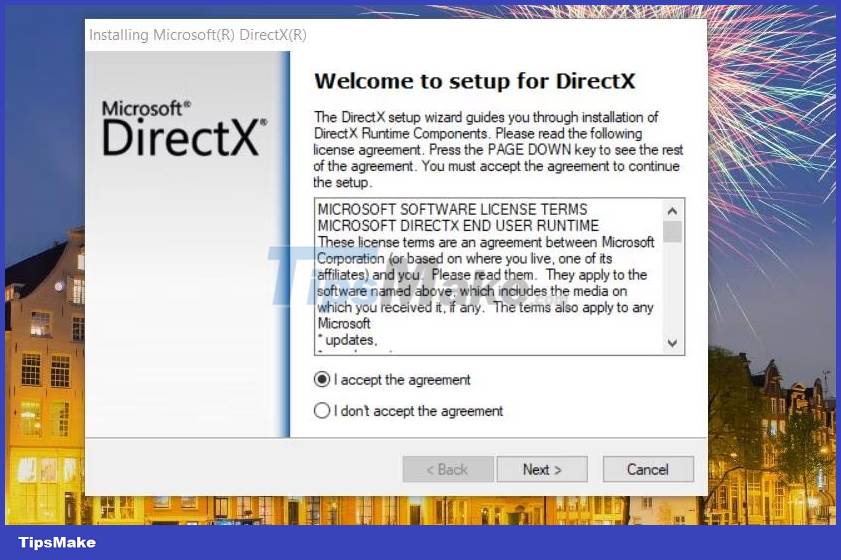
4. Double-click dxwebsetup.exe to display the Installing Microsoft (R) DirectX (R) window.
5. Click I accept the agreement > Next .
6. If you don't want the Bing Bar, uncheck the Install the Bing Bar option .
7. Select Next to install the DirectX components.
You should read it
- ★ Speed up Windows 7 computers, this is all you need to do
- ★ How to try it, Windows 10 test right on the real computer, using the available VHD file of Microsoft
- ★ Ways to turn off Windows 10 computer
- ★ Instructions for scheduling a Windows 10 computer shutdown
- ★ How to Uninstall Windows 7 from Your Computer