Table of Contents
This practical guide explains how to handle the error windows 11 does not receive enough ram with clear steps and useful context. It also covers common requirements, potential problems, and the details that can help you get better results.
What is the solution to handle the error of not receiving enough RAM on Windows 11? Let's go find out now.
What Is RAM? How RAM Works
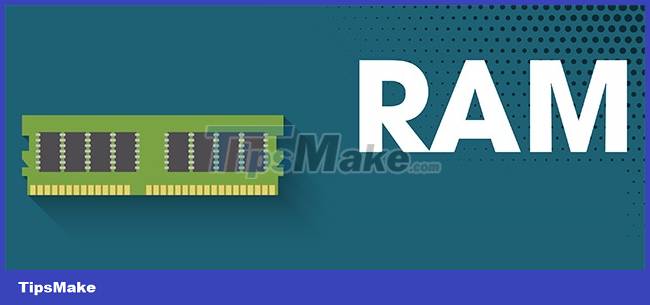
RAM or full name is Random Access Memory, plays an indispensable role for a computer. It is responsible for making temporary memory, allowing the machine to store information that is being used so that the CPU can filter, retrieve, and process data.
Because it only acts as a temporary memory, when the power supply to the computer is cut off, all data on RAM will be erased.
Note Before Fixing the Error of Not Receiving Enough RAM in Windows 11
Before proceeding to fix the error of not getting enough RAM on Windows 11, make sure you check these things.
- Make sure your RAM is firmly plugged into the motherboard of the machine.
- The RAM you are using is still in good working order, not damaged.
- The RAM you use is compatible with the Mainboard.
- The BIOS version you are using is official.

How to Handle the Error Windows 11 Does Not Receive Enough RAM
Step 1:
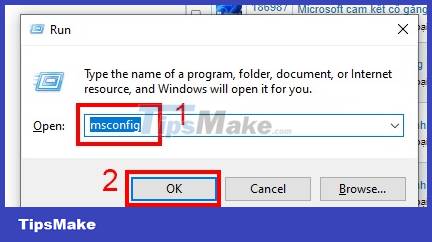
Press the Windows + R combination on the keyboard
Step 2:
Enter msconfig in the pop-up window that pops up. Press OK.
Step 3:
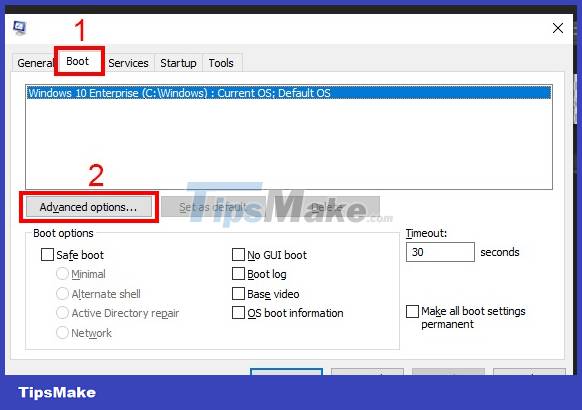
A new pop-up window will appear. Select Boot. Then click on Advanced Options.
Step 4:
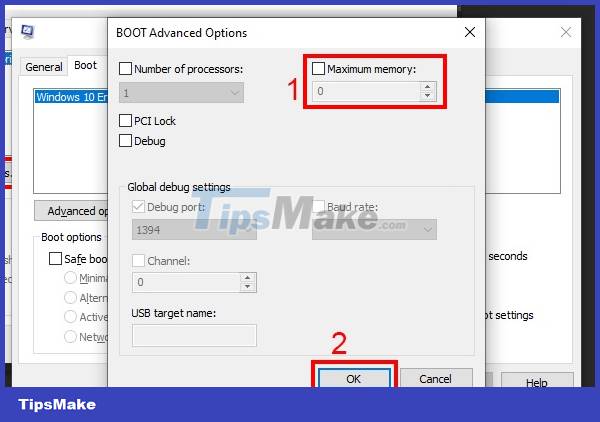
Here, remove the tick in the Maximum memory section and then click OK. Ticking Maximum memory will cause the amount of RAM in your device to be limited to the corresponding milestone as shown in the blank box below.
Step 5:
Proceed to restart the computer. After the machine restarts, the error Windows does not receive enough RAM on Windows 11 will be completely resolved.
Step 6:
Once the computer has finished restarting you can right-click My Computer (This PC). Click Properties to view RAM information.
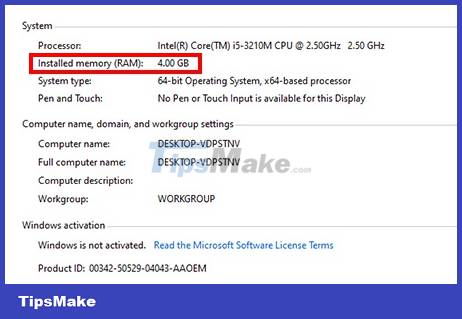
Fixing the problem of RAM errors on Windows 11 is relatively simple, in addition, you can also refer to some ways to fix other errors on your computer here.
Conclusion
Understanding Windows 11 Error Does Not Receive Enough RAM makes it easier to compare options, avoid common mistakes, and apply the information in this guide more effectively. Review the relevant requirements before making changes or choosing a solution.
FAQ
How do you handle the error windows 11 does not receive enough ram?
Follow the steps in this guide in order, confirm the required settings or tools, and verify the result before making additional changes.
Is it safe to handle the error windows 11 does not receive enough ram?
It is generally safe when you follow the recommended instructions, use trusted tools, and avoid changing settings you do not understand.
What should you do if the process does not work?
Recheck the requirements, restart the device or application when appropriate, and review each step for missed settings or compatibility issues.
Related Articles
 Handle I/O Error 112 on Hjsplit3 minutes read
 Fix Frozen Windows Update Error: Step-by-Step Guide7 minutes read
 How to Fix Windows 11 Not Getting Enough RAM3 minutes read
 How to Set Up the Xbox One Gaming Console on Windows 108 minutes read
 How to Fix Error 0x8007045a Error_dll_init_failed When Using3 minutes read
 Summary of Errors That Occurred During the Process of Updating13 minutes read
Reader Comments 0
Sign in with email or Google to join the discussion.