Taskbar on Windows 10 does not work, this is a fix
A Taskbar error that is suspended, unresponsive or inactive is one of the common errors that many Windows 10 users have. To fix this error, please refer to the following article of Network Administrator.
1. Restart Windows Explorer
This is one of the simplest solutions to restore the Taskbar to work properly. To restart Windows Explorer, follow the steps below:
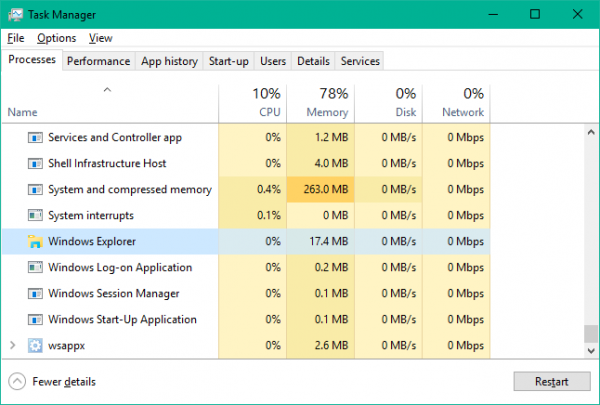
1. Press the Windows + R key combination to open the Run command window. The next step is to enter taskmgr.exe into the Run command window and press Enter to open Task Manager.
2. Next in Task Manager window, at Process tab scroll down to find Windows Explorer option.

3. Click to select Windows Explorer, then click Restart in the bottom right corner of the screen.
4. This solution is simply to kill the process of Windows Explorer and restart Windows Explorer.
2. Check Addons Explorer error
Perform Clean Boot to start your Windows 10 computer, then use all kinds of methods such as trial and error to find the "culprit" is The cause of Taskbar error does not work.
Sometimes a File Explorer addon interferes with the operation of explorer.exe and causes an error. If you can identify those addons, then disable or delete those addons to fix the errors.
Refer to the Clean Boot steps here.
3. Re-register (Re-registering) Taskbar
If you have applied the above solutions and still cannot fix the errors, then you can ask for the support of Windows PowerShell. PowerShell is a command used to configure system settings and automate tasks on Windows.
The first is to create a system restore point.
Refer to the steps to create backup and restore points (Restore Point) on Windows 10 here.
Then follow the next steps below:
1. Press Windows, then enter Powershell and Search frame. On the search results list, right-click Windows Powershell (Desktop app) , select Run as Administrator.
On the UAC popup window, click Yes.
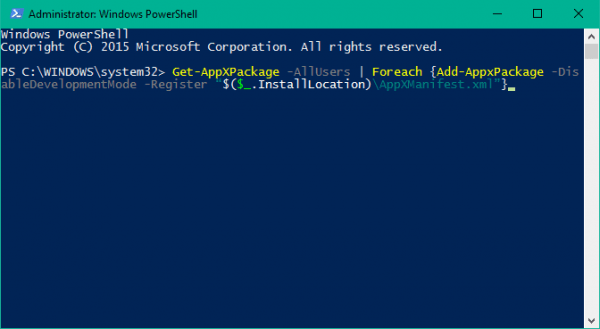
2. Next, on the PowerShell window, copy and paste the command line below and press Enter:
Get-AppXPackage -AllUsers | Foreach {Add-AppxPackage -DisableDevelopmentMode -Register '$ ($ _. InstallLocation) AppXManifest.xml'}

3. After the command is successfully executed, navigate to the folder named Account Username in Explorer. Make sure you have enabled the option to display hidden items on Explorer.
C: / Users / name / AppData / Local /
4. Scroll down to find and delete the folder named TileDataLayer.

If you cannot delete the TileDataLayer folder, run services.msc to open Services Manager, then scroll down to find and "stop" service Tile Data model server. You can now delete the TileDataLayer folder.
5. Finally, check to see if the Taskbar on your Windows 10 computer is working.
Refer to some more articles below:
- Instructions to transfer Microsoft account to Local account on Windows 10 / 8.1
- How to hide, show hidden files, folders and file extensions on Windows 7/8/10?
- On Windows 10 you should disable these features
Good luck!