How to Enable SSL 3.0
This wikiHow teaches you how to turn on SSL 3.0 support in Firefox for Windows and macOS, as well as Chrome, Edge, and Internet Explorer for Windows. SSL 3.0 is already enabled in Safari for macOS and cannot be turned off. Open Firefox on....
Method 1 of 3:
Firefox for Windows and macOS
-
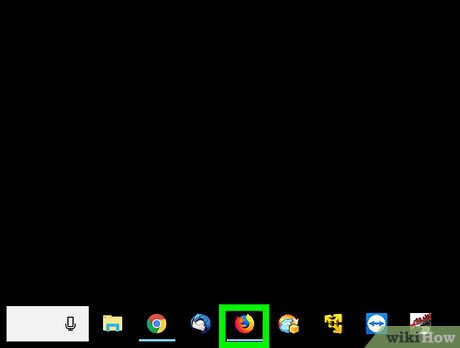 Open Firefox on your PC or Mac. You'll usually find it in the All Apps area of the Start menu (Windows) or in the Applications folder (macOS).
 -
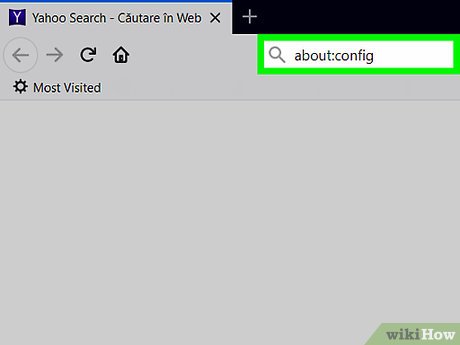 Type about:config into the address bar and press ↵ Enter or ⏎ Return. A warning page will appear.
 -
 Click I accept the risk!. It's the blue button at the center of the page.
 -
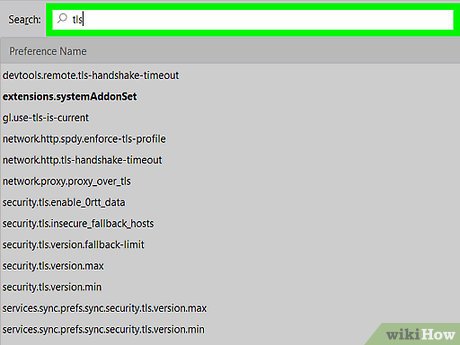 Type tls into the search bar. It's the wide search bar at the top of the screen. The list of options below will now be filtered to show only matching results.
 -
 Double-click security.tls.version.max.
 -
 Enter 0 as the integer value.
 -
 Click OK. SSL 3.0 support is now enabled in Firefox.
Method 2 of 3:
Chrome for Windows
-
 Open Chrome on your PC. You'll usually find it in the All Apps area of the Start menu.
- This method will only work on a PC.
-
 Click ⁝. It's at the top-right corner of Chrome.
 -
 Click Settings. It's near the bottom of the menu.
 -
 Scroll down and click Open proxy settings. The Internet Properties screen will appear.[1]
 -
 Click the Advanced tab.
 -
 Scroll down and check the box next to 'Use SSL 3.0.' It's toward the bottom of the list.
 -
 Click OK.
 -
 Restart your PC when prompted. Once Windows starts back up, SSL 3.0 will be supported in Chrome.
Method 3 of 3:
Microsoft Edge and Internet Explorer for Windows
-
 Press ⊞ Win+S. This opens the search bar.
 -
 Type internet options. A list of matching results will appear.
 -
 Click Internet Options.
 -
 Click the Advanced tab. A list of check boxes will appear under the 'Settings' header.
 -
 Scroll down and check the box next to 'SSL 3.0.'
 -
 Click Apply. It's at the bottom of the window.
 -
 Click OK. It's next to the Apply button.
 -
 Restart your PC as prompted. Once Windows starts back up, Edge and Internet Explorer will both support SSL 3.0.