How to Enable USB Booting on a Chromebook
Today's TipsMake will show you how to enable USB booting on your Chromebook. This setting is only available after you enable Developer Mode, which will erase all data on your Chromebook.
Table of Contents
Enable Developer Mode
Back up data on Chromebook. When activated, Developer Mode will erase all your data and any custom changes you make on your computer.

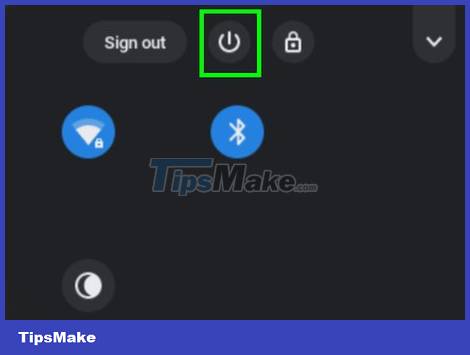
Turn off your Chromebook. To proceed, click the account picture in the menu and select Power.

Press Esc+F3 simultaneously with the power button. Your Chromebook will turn on and ask you to connect to recovery media.
Some models may require you to insert a paper clip or pointed tool into the small hole on the side of the device while the power button is pressed. If you find a small hole on the side of the camera body labeled "Recovery," apply this.

Press Ctrl+D on the ″Insert recovery media″ screen (Connect recovery media). A confirmation message will appear.

Press ↵ Enter to confirm. Chromebook will restart. After the conversion is complete, the message ″OS verification is OFF″. From now on, you'll see this screen every time you start your Chromebook.
Press Ctrl+D on the ″OS verification″ screen. So Chromebook has entered Developer Mode.
Enable booting from USB
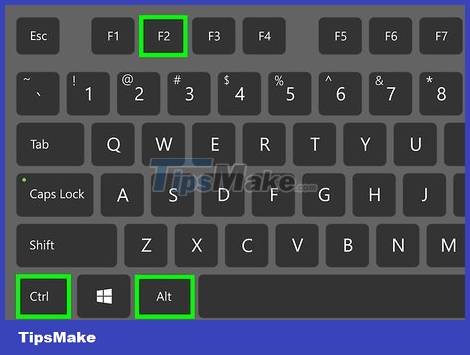
Press Ctrl+Alt+F2 on the main screen. A control panel window with a black background and white text will appear.

Type sudo crosssystem dev_boot_usb=1 at the command prompt.
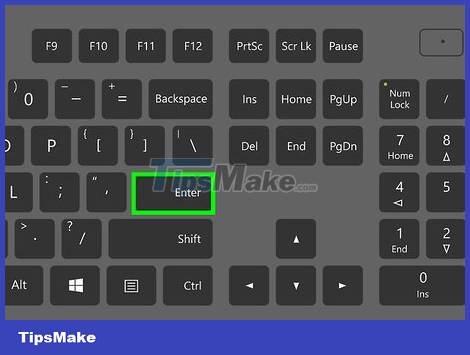
Press ↵ Enter. The command will be executed.
Plug in the USB you want to use as the boot point. Once booting from USB has been enabled, you can use the console window and reboot the machine from this drive.

Press Ctrl+U on the ″OS verification″ screen. Your Chromebook will reboot from the connected drive.
Was this article helpful?
Your feedback helps us improve.
Related Articles
 How to enable Dark Mode on Chromebook6 minutes read
 The best Chromebook models in 20145 minutes read
 HP Chromebook 11 supports LTE 4G2 minutes read
 What is a Chromebook and how is it different from a Laptop?6 minutes read
 Samsung updates Chromebook2 minutes read
 How to enable boot sound on Chromebook3 minutes read
Reader Comments 0
Sign in with email or Google to join the discussion.