How to enable hard drive compression on Windows operating system
Instructions on how to use the hard drive compression feature on Windows operating systems to save hard drive space. Enable disk compression on Windows computers
Table of Contents
At the present time, it is very normal for a computer to have a hard drive with a capacity of several hundred GB to several TB.
Although the capacity of the hard drive is already quite large, you should not use it in vain, because the images, videos or data today are also heavier and heavier.
Currently, I'm using a 320GB hard drive, but I often encounter a shortage of space because I download files a bit too much, use them but don't delete them, and partly because there's too much software on my computer.
Moreover, for computers using SSD hard drives, the capacity is actually still very limited, because the cost of SSD hard drives is still quite expensive compared to HDD hard drives. So computers with 128GB or 256GB SSD hard drives are still the most popular.
And to fix this problem, I will show you how to compress the drive to save hard drive space on Windows operating systems, you can apply this way for Windows 10 and Windows 11.
#first. How to compress the drive to save computer hard drive space
This drive compression function also works similar to when you use file compression software like WinRAR or 7-Zip to compress files and folders on Windows.
BUT, this function allows you to view, edit, or delete… directly the file in the compressed drive, you don't need to go through the decompression step like with other compression software, it will be done by Windows. hidden in the system.
However, decompressing and compressing files in the background of Windows will slow down the writing of data on the HDD, because it will have to go through many more steps. But if you are using an SSD, it will not be affected much
That's what you have to trade when using this function to save hard drive space on Windows operating systems.
Perform:
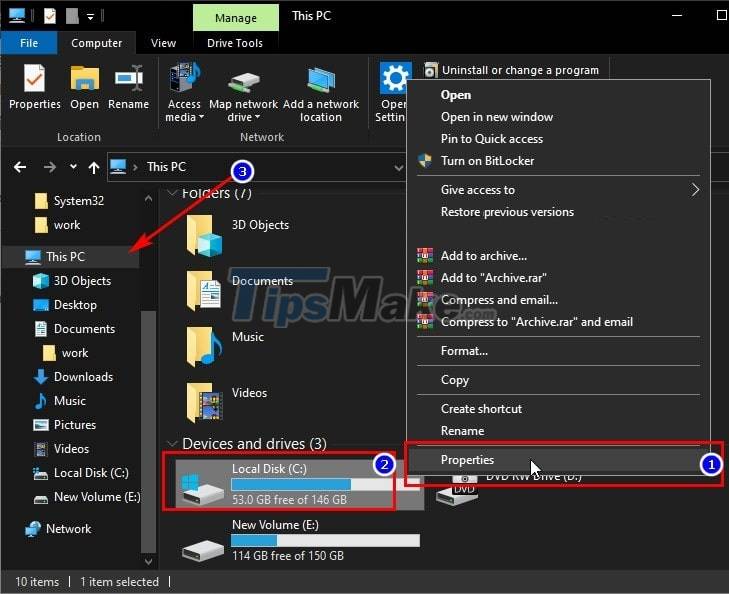
You open File Explorer by using the Windows + E key combination, or click the File Explorer icon under the Taskbar => then select This PC in the left folder tree to display a list of available partitions on Windows.
Now, right-click on the hard drive partition you want to compress to save space => then select Properties.
For example, here I will choose the C: drive, because I mainly install games and software on it, but it's almost full (Free 50GB).
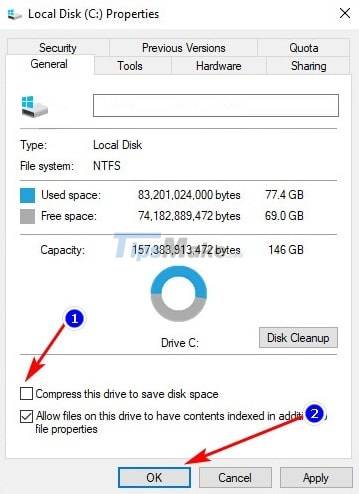
In the Properties window, go to the General tab, look to the bottom you will see the line Compress this drive to disk space is unchecked => please tick and then click Apply => OK to enable this feature.

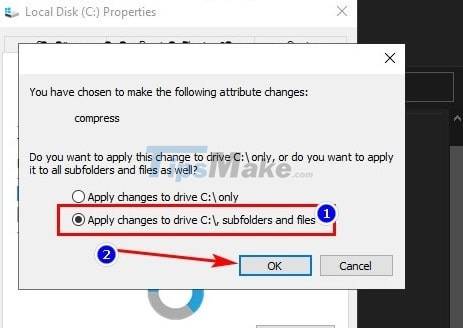
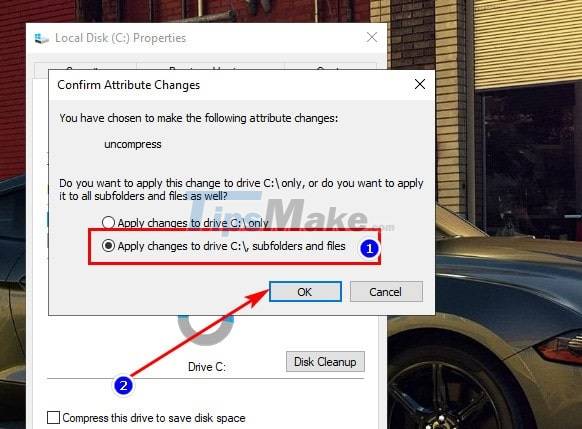
A confirmation window appears with 2 hard drive compression options, including:
- Apply changes to drive C:/ only : Only compress large folders in C: drive such as Windows, Program Files, etc. like only compressing the main folder.
- Apply changes to drive C:/, sub-folders and files. : Compress everything in the C drive:
If you use option 1, the compression time will be shorter, but the compression capacity will of course not be as much as option 2. I need more capacity, so I will choose the second one, and which one do you want to choose? then it's up to you => then click OK to confirm.
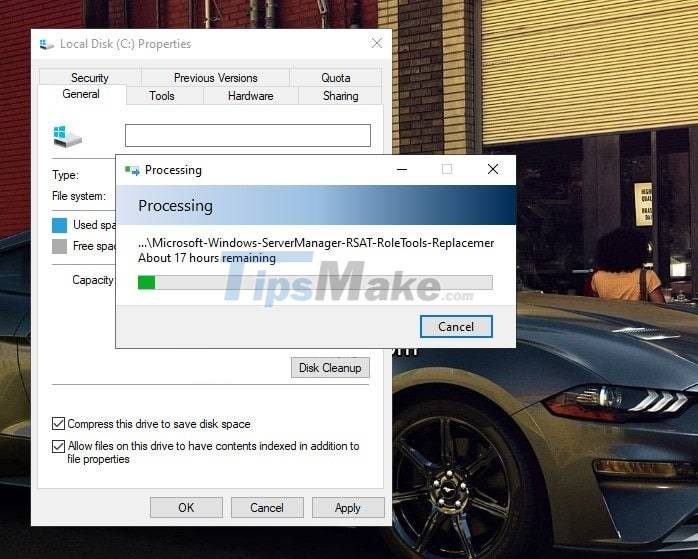
At this point, a window may appear asking for Administrator rights, just click Continue to continue if asked.
And now you can work as usual, the drive compression process will be performed by Windows itself, the long or short time will depend on the amount of data available, as well as whether the hard drive is HDD or SSD.
#2. How to disable hard drive compression on Windows?
If you want to uncompress the entire drive, it's very simple, repeat the steps in the Properties of the compressed drive as above => then put the TICK in the line Compress this drive to save disk space => then click Apply and select OK to finish.
When you confirm uncompress, you have the same 2 options as when you compress the drive. But this time you are not selected anymore but must choose the same as when you have compressed the drive.
EXAMPLE: Above, when I compress, I choose Apply change to drive C:/, sub-folders and files, when uncompressing, I have to choose the same. And if I choose Apply change to drive C:/ only, it has no effect.
Confirming uncompression also requires Administrator rights, you agree if asked. That's it ^^
#3. Epilogue
Well, that's it, I've finished showing you how to use the hard drive compression feature on the Windows operating system, you can apply the same to the remaining hard drive partitions.
After the compression is complete, my C:/ drive is reduced from 100GB to just over 75GB, that's great, isn't it. You can also save quite a bit
Was this article helpful?
Your feedback helps us improve.
Related Articles
 How to transfer Windows operating system to a new hard drive (from HDD to SSD)3 minutes read
 How to format the hard drive on Windows9 minutes read
 Computer hard drive is fast, why?5 minutes read
 Instructions for dividing hard drives right in Windows 103 minutes read
 Install Win 7 from your hard drive, no need for USB, install Win disk6 minutes read
 6 software to monitor Windows 10 hard drive activity9 minutes read
Reader Comments 0
Sign in with email or Google to join the discussion.