How to Boot Your Computer from an External Hard Drive
Today's TipsMake will show you how to set up your computer to boot from an external drive instead of the built-in hard drive. This is useful when you need to run another operating system (such as Linux) or install something that requires the internal hard drive to be offline.
Table of Contents
Install an external hard drive

Locate your Windows computer's BIOS key (skip this step if you're using a Mac computer). If you want to set your computer to boot from an external hard drive, you need to access the BIOS control panel by pressing a key (usually a function key, such as F12 ) over and over as the computer boots. Normally, to know which key to use, you need:
Open a search engine (Google for example).
Enter the manufacturer name, computer model and the keyword "bios key" or "bios key".
Press ↵ Enter, select the appropriate result, and locate the computer's BIOS key.
You can also look at the manual or online documentation for your computer on the manufacturer's website.

Connect the external hard drive to the computer. Plug one end of the USB cable into an empty USB port on your computer, and the other end into an external hard drive.
On external hard drives there is usually an indicator light that will flash slowly or stay on all the time when the drive is connected.
On a Mac computer, you may need to purchase a USB to Thunderbolt 3 adapter if you don't have any USB 3.0 (rectangular) ports.

Format the hard drive if necessary. If the hard drive is not compatible with your computer, you may see a message saying the drive is corrupted or cannot be read. Reformatting the drive to match your computer's file system ( NTFS for Windows and Mac OS Extended (Journaled) for Mac) will allow you to access the hard drive.
When reformatting the drive, you should choose the exFAT file system so that Mac or Windows computers can also access the hard drive.
Depending on the type of data you will copy to the drive, you may need to format it again. For example, if you use the Live Linux tool to burn a Linux disk image to an external hard drive, the hard drive will automatically reformat again.
Reformatting will erase all data on the drive.
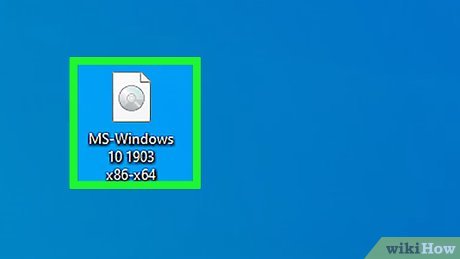
You need to make sure the drive has data. The computer cannot boot from an empty hard drive; In most cases, to boot from a hard drive, the drive needs a disk image file (or "ISO"). Files used to install Linux and Windows operating systems are examples of ISOs.
Some other examples of boot disk images include File History backups on Windows and Time Machine backups on Mac.
Third-party services like Clonezilla are also launch tools.

Copy the boot files to the external hard drive. Normally, you can click and drag the ISO file (or other files) and drop it into the external hard drive's window.
If you're using a program like the Windows 10 installation tool or LiveLinux to create an external boot hard drive, skip this step.
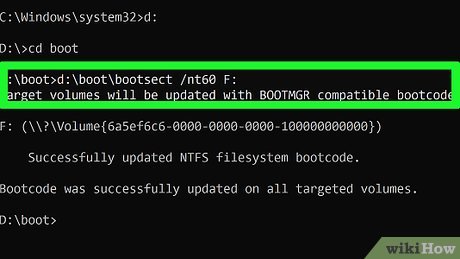
Create an external boot drive . The last step before you boot your computer from the external hard drive is to tell the computer to treat this as a boot entry. To do this, you can use Command Prompt (Windows) or Terminal (Mac).
If you are using a program like LiveLinux to burn the ISO file to an external hard drive, this drive will become the boot point in the process.
Boot the computer from an external hard drive on Windows
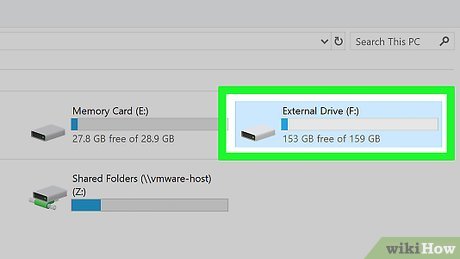
You need to make sure that the external hard drive is connected to the computer. The computer and external hard drive must be securely connected by cable, and the external hard drive must be placed in a convenient place and not resting on the cable.
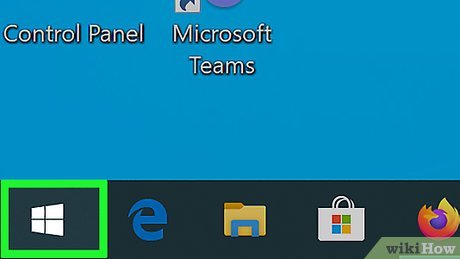
Open Start . Click the Windows icon in the lower left corner of the screen.
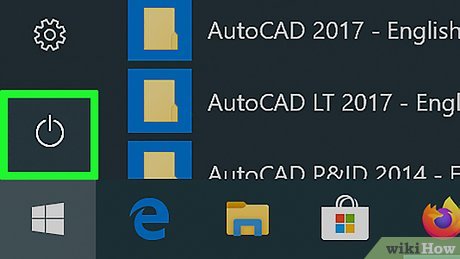
Click the "Power" icon in the lower left of the Start menu. A menu will pop up.
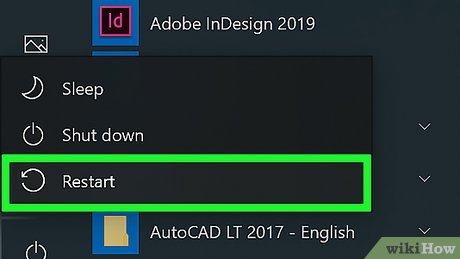
Click Restart in the pop-up menu. The computer will begin to reboot.
Start pressing the BIOS key. As soon as the computer screen turns off, you need to press the BIOS key specified by the manufacturer over and over again.

Stop pressing when BIOS appears. The BIOS is usually a minimalist interface with colored or white text on a blue or black background.
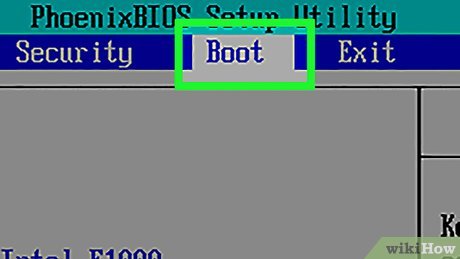
Find the "Boot Order" section. Use the right arrow key to navigate to the "Boot Order" tab, or look for the "Boot Order" option in one of the menus on the main page if you don't see the "Boot Order" tab.
You may need to select the Advanced tab first to see the "Boot Order" menu.
The BIOS on each computer is different, so don't be afraid to look for the "Boot Order" option somewhere in the menu.
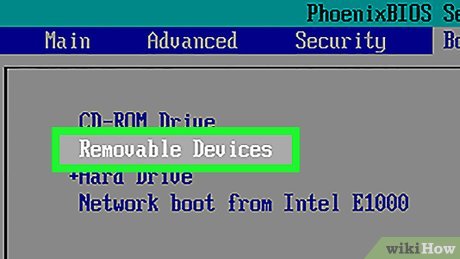
Select the external hard drive. Find the external hard drive's name or category name (such as External Hard Drive ) in the "Boot Order" list, then press the "down" arrow key until the external hard drive is selected.
In some cases, you can only select USB devices (or similar) in this menu. At that time, you need to make sure that the external hard drive is the only USB drive connected to the computer when restarting the computer from the external hard drive.
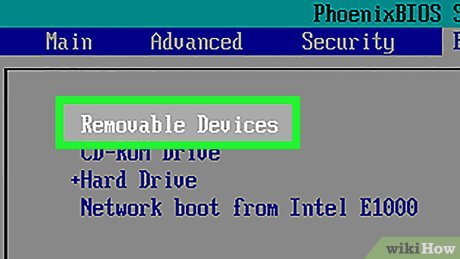
Move the hard drive to the top of the list. Press the "Move Up" key (usually the + key ) according to the key legend on the right side of the screen until the external hard drive's name is at the top of the "Boot Order" list.
In some cases, the key legend is at the bottom of the screen.
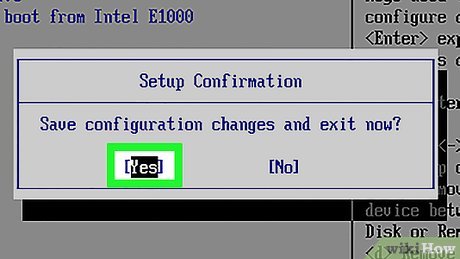
Save your changes and exit BIOS. Normally, you have to press a key to do this, so take a look at the keynote for the "Save and Exit" action.
You may need to confirm this step again by pressing another key.
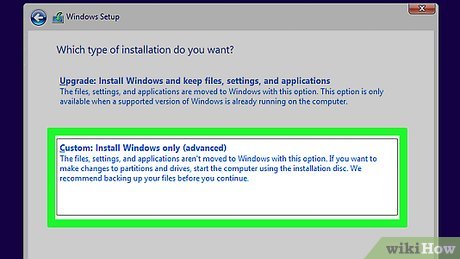
Proceed according to the instructions on the screen. Once the external hard drive is selected as the boot location, your startup program or service will open; Follow the on-screen instructions to open, install, or set up the program/service.
For example, if you are installing Linux, you will be asked to select your language and country, enter your user information, and so on.
If you have an operating system installed and set up on an external hard drive, once the BIOS setup is complete, the operating system will open.
Boot from external hard drive on Mac
You need to make sure that the external hard drive is connected to your Mac computer. The computer and external hard drive must be securely connected by cable, and the external hard drive must be placed in a convenient place and not resting on the cable.
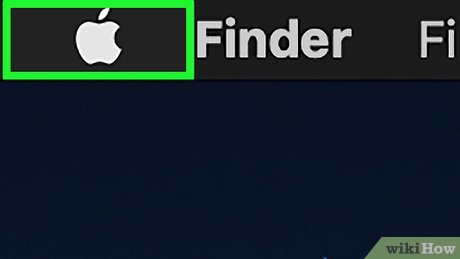
Open the Apple menu. Click the Apple icon in the upper left corner of the screen. A drop-down menu will appear.
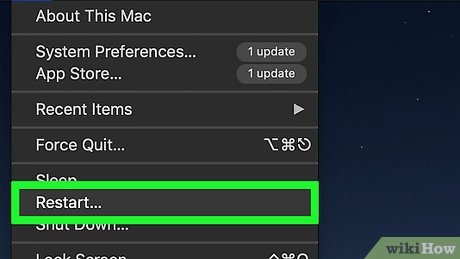
Click Restart… in the drop-down menu.
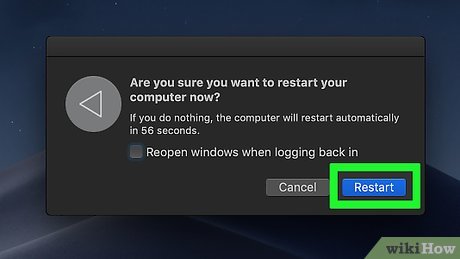
Click Restart when asked. The Mac computer will begin to restart.
Wait for the screen to turn off. As soon as your Mac computer screen turns black, you can start holding down the key ⌥ Option.

Hold down the key ⌥ Optionuntil the Startup Manager window opens.
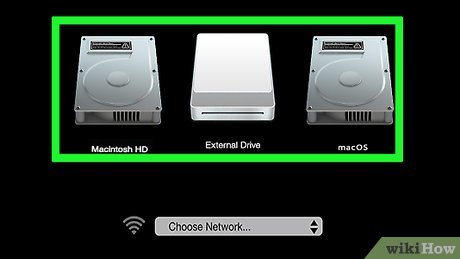
Release the key when the Startup Manager window appears. The window that appears in the middle of this screen contains a list of available boot locations.
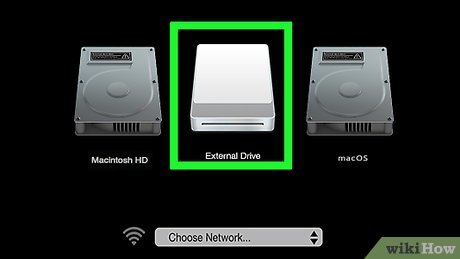
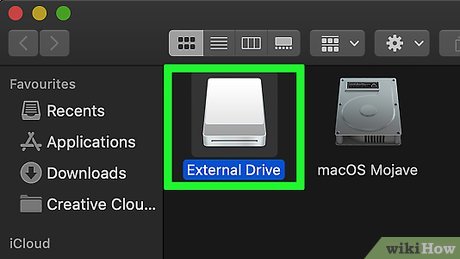
Select your external hard drive. Click the name of the external hard drive in the Startup Manager window.
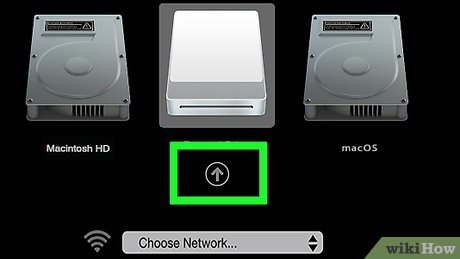
Confirm your choice. Click the up arrow below the external hard drive. The Mac will start rebooting from the external hard drive.
Proceed according to the instructions on the screen. Once the external hard drive is selected as the boot location, your startup program or service will open; Follow the on-screen instructions to open, install, or set up the program/service.
For example, if you are installing Linux, you will be asked to select your language and country, enter user information, and so on.
If you have an operating system installed and set up on an external hard drive, once the BIOS setup is complete, the operating system will open.
Was this article helpful?
Your feedback helps us improve.
Related Articles
 7 best external hard drives9 minutes read
 Pros and cons of using an external hard drive for PS48 minutes read
 How to set up BIOS to boot from USB / CD / DVD, external hard drive4 minutes read
 Boot and run Ubuntu from the USB drive8 minutes read
 5 best external hard drives of 20265 minutes read
 Know about bad sectors on your hard drive7 minutes read
Reader Comments 0
Sign in with email or Google to join the discussion.