How to Edit Images on a Mac
This wikiHow teaches you how to edit an image on a Mac computer using the Preview app. The Preview app allows you to rotate, crop, add text, adjust color, add shapes, as well as draw on images that are saved on your computer. Open Finder .....
Part 1 of 7:
Opening the Image in the Preview App
-
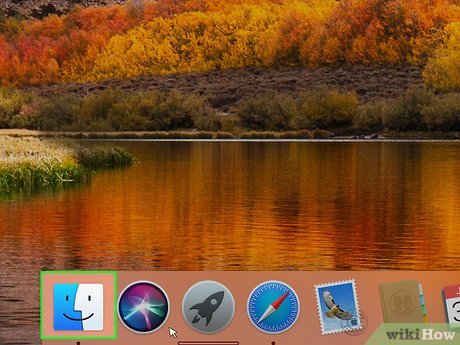 Open Finder. Open a new Finder window by clicking the icon of a blue and white smiley face located in the bottom-left of your Mac's dock.
-
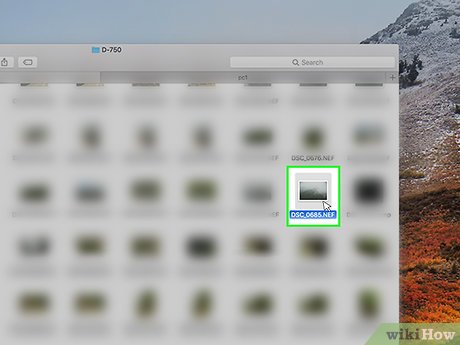 Navigate to the photo you want to edit. Click the folder that contains the image you want to edit. For example, if you downloaded the image from the internet, it might be located in the Downloads folder.
 -
 Double-click the image file. By default, this will open the image in the Preview app. If images don't open in Preview automatically, you can right-click on the image file and select Open With and select Preview.
- If you are using a Magic Mouse or a trackpad, you can perform a right-click by clicking with two fingers.
Part 2 of 7:
Arranging the Image
-
 Clickto rotate the image. It's the icon of a square with a curved arrow over its top-right corner at the top of the Preview window. This will rotate the image 90 degrees counter-clockwise.
- Click the button as many times as you need to position the image to your liking.
-
 Click Tools. It's in the menu bar at the top of the screen. This opens a drop-down menu with additional options.
 -
 Select Flip Horizontal or Flip Vertical. It's near the bottom of the drop-down menu. Flipping the image horizontally will mirror the image from right to left, while flipping the image vertically will invert the picture from top to bottom, making the image appear upside down.
- You can flip the image a second time to revert the image back to normal, or you can press ⌘ Command+Z to undo the last change.
-
 Click. It's the Markup Toolbar" button that resembles a marker tip inside a circle, located at the top of the window. This will open the Markup Toolbar displaying the various editing tools.
-
 Click. It's the icon that has the dotted outline of a rectangle. This will open a small drop-down menu.
-
 Click Rectangular Selection. It's the first option in the drop-down menu.
- You can also click to select the elliptical selection tool, or the lasso tool, which allows you to draw your own selection.

- You can also click
-
 Click and drag the rectangle tool over the image. The dotted line of the rectangle indicates how the image will be cropped. Make sure the part of the image you want to keep are inside the rectangle marquee.
- You can adjust the rectangle selection by clicking and dragging the blue dots (handles) in the corners of the rectangle.
-
 Click Crop. It's in the upper-right corner of the toolbar. This will delete everything except for what's inside the rectangle selection.
Part 3 of 7:
Adding Text
-
 Click. It's the icon of a "T" inside of a square in the Markup Toolbar. This will generate a text box in the center of the image that says "text".
-
 Click and drag the text box. You can drag the text box to any location in the image.
 -
 Type a text message. With the text box selected, type a message.
 -
 Clickto adjust the font. Click the button with the capital "A" to open a pull-down menu that allows you to change the text font, size, style, and orientation of the text.
Part 4 of 7:
Adjusting the Image Colors
-
 Click. Click the "Color Adjust" button that resembles a prism with a ray of light running through it. This will open a menu that allows you to adjust the colors of the image.
-
 Adjust the color. Adjust the colors of the images with the following options.
- Curves: The graph at this top of the menu is the curves. You can adjust the curves by dragging the three tabs below the image. You can also click "Auto Levels" to automatically detect the best levels for the curves.
- Exposure: Drag the tab in this slider bar to make the image lighter or darker.
- Contrast: Drag the tab in this slider bar to adjust the contrast between the lighter and darker parts of the image.
- Highlights: Drag the tab in this slider bar to increase the lighter parts of the image.
- Shadows: Drag the tab in this slider bar to increase the darker parts of the image.
- Saturation: Drag the tab in this slider bar to strengthen or weaken the colors in the image.
- Temperature: Drag the tab in this slider bar to give the image a "warmer" or "cooler" tone.
- Tint: Drag the tab in this slider bar to add a red or green color overlay to the image.
- Sepia: Drag the tab in this slider bar to add a golden tint to the image.
- Sharpness: Drag the tab in this slider bar to sharpen or blur the image.
Part 5 of 7:
Adding Shapes to the Image
-
 Click the shapes button. It's the button that has a square and a circle. This will display a drop-down menu with various shapes. The shapes include a line, a rectangle, a rectangle with rounded images, an ellipse, a speech bubble, a star, and a hexagon.
 -
 Select a shape. This will generate the shape in the center of the image.
 -
 Click and drag the shape. You can drag the shape to any location on the image.
 -
 Adjust the size of the shape. Click and drag the blue dots (handles) in the corners of the shape to adjust the size of the shape
 -
 Change shape color. Click the solid colored rectangle in the toolbar and select a color.
- The white box with a red line through it indicates no color.
-
 Change outline color. The outline is the line around the shape. Click the button that has a thick line in the shape of a rectangle. It's next to the solid colored rectangle button. Select a color for the outline of the shape.
- The white box with a red line through it indicates no outline.
-
 Change thickness of outline. Click the button with three lines of different thicknesses and styles.
 -
 Select a thickness. There are seven line thicknesses to choose from.
- You can also select different line styles, such as dotted lines, arrows, and textured lines.
Part 6 of 7:
Drawing on the Image
-
 Click. It's the button with an image of a pen drawing a curve line.
-
 Draw a line or a shape. You can draw anywhere on the image.
 -
 Adjust the curve. You can adjust the curve after you draw by clicking and dragging the blue dots (handles) at the end of the line, or the green dot in the center of the curve.
 -
 Change the line thickness. Click the button with three lines of different thicknesses and styles.
- You can also select different line styles, such as dotted lines, arrows, and textured lines.
Part 7 of 7:
Saving the Changes
-
 Click File. It's in the menu bar at the top of the screen.
 -
 Click Save. It's in the file menu. This will save the changes you have made to the image.