Table of Contents
This updated guide examines Video: How to Make a Movie of Yourself on a Mac and organizes the essential facts, background, and practical takeaways in clear American English.
Method 1of 3:
Making a Photo Booth Video
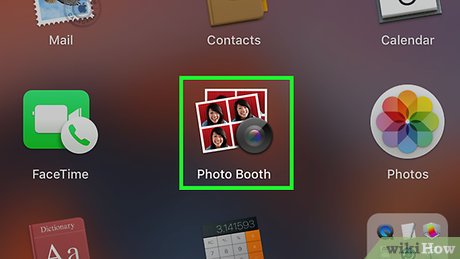 Open the Photo Booth app on your Mac. Photo Booth is a camera app that comes bundled with your Mac OS. The Photo Booth icon looks like a camera and four small photographs in your Applications folder.
- If you can't see Photo Booth in Applications, click on the magnifying glass icon in the upper-right corner of your screen, and then typePhoto Booth. It will show up at the top of the list.
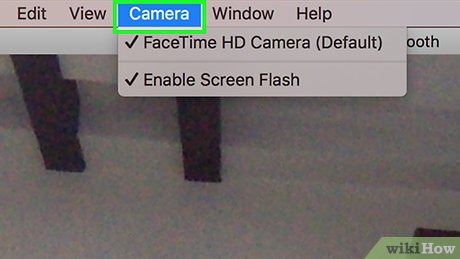 ClickCameraon the menu bar. This menu will be at the top your screen when you open Photo Booth.
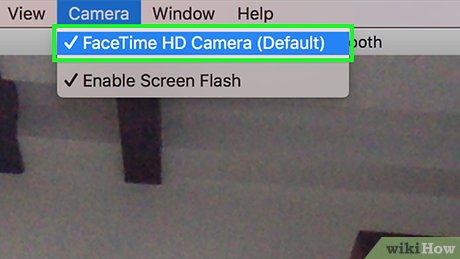 Select your camera from the menu. If you have multiple cameras connected to your Mac, you will have to select the one you want to use.
- Depending on your Mac's model and current software, your built-in camera may show up as Built-in iSight or FaceTime HD Camera . This is the default option in Photo Booth. You don't need to change it if you want to use your computer's internal camera.
 Click on the film roll icon in Photo Booth. You will see a film roll icon in the lower-left corner of your Photo Booth window. This button will switch Photo Booth from photo capture to video recording mode.
 Click theEffectsbutton. This button is located in the lower-right corner of your Photo Booth window. It will open a menu of visual effects you can apply to your video.
 Select a video effect. You can preview all video effects on the Effects menu. Clicking on an effect will apply it to your video and go back to the Photo Booth home screen.
 Click the Video Record button. This button looks like a red movie camera icon at the center-bottom of your Photo Booth window. Photo Booth will count back from 3 and start recording your video.
 Click the Stop button. This button looks like a red square button at the bottom of Photo Booth. It will stop recording and save your video to your Photo Booth camera roll.
 Click on your video from your Photo Booth roll. A thumbnail of your video will appear in your camera roll at the bottom of your Photo Booth window. Clicking on it will play the video in Photo Booth.
 Right-click on the video thumbnail. It will open a drop-down menu.
 SelectExport. This option will open a pop-up window to browse your computer. It will let you export and save your video to any folder on your computer, or on iCloud.
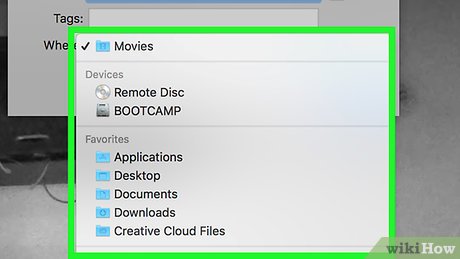 Select a folder on your Mac. Use the pop-up window to select a folder to save your video.
 ClickSave. This is the blue button in the lower-right corner of the pop-up window. It will save your video to the destination folder you chose.
- Your video will save as a MOV file. You can use QuickTime Player or different software to play it.
Method 2of 3:
Recording a Quicktime Movie
 Open the QuickTime Player app on your Mac. Most Mac computers come bundled with QuickTime Player 10 installed. It looks like a blue 'Q' logo in your Applications folder.
- If you can't find QuickTime Player in Applications, click on the magnifying glass icon in the upper-right corner of your screen, and then typeQuickTime. It will show up at the top of the list.
 Click theFilemenu. This option will be on the menu bar at the top of your screen when you open QuickTime Player.
 ClickNew Movie Recordingfrom the menu. This option will be at the top of QuickTime Player's File menu.
- You can also press the⌥Option+⌘Command+Nshortcut on your keyboard to start a new movie recording.
 Click the Record button. This button looks like a red dot in the movie recording toolbox at the bottom of your video. It will start recording a video of you on QuickTime.
- If the movie recording toolbox disappears from your screen, hover over the video with your mouse to see it again. If you want to hide the toolbox, click on the video.
 Click the Stop button. This button looks like a gray square in the movie recording toolbox. It will stop recording your video.
- The Stop button replaces the red dot (Record) button when you start recording video.
 Click the Play button. This is the arrow icon facing your right-hand side at the bottom of your video. It will play your video in QuickTime player.
 ClickFileon the menu bar.
 Hover overExport. This will let you select a video format to save your video on your computer.
 Select a video format. Depending on your hardware and current software, your options may include 1080p , 720p , 480p , iPad, iPhone, iPod touch & Apple TV , and Audio Only . Clicking on one of these options will open a pop-up window to select a folder to save your video.
 Select a folder on your Mac. Use the pop-up window to browse your computer and select a folder to save your video.
 ClickSave. This is the blue button in the lower-right corner the pop-up window. It will export your video and save it to the folder you chose.
- Your video will save as a MOV file. You can use QuickTime Player or different software to play it.
Method 3of 3:
Recording a FaceTime Movie
 Open the FaceTime app on your Mac. All Mac computers come bundled with FaceTime installed. The FaceTime app looks like a green and white video camera behind a smaller phone icon in your Application folder.
- If you can't find FaceTime in Applications, click on the magnifying glass icon in the upper-right corner of your screen, and then typeFaceTime. It will show up at the top of the list.
 Start a FaceTime call. Call a friend on FaceTime as you normally do on your Mac.
- If you need help starting a FaceTime call, this article will show you how to set it up and call your friends on your Mac.
 Open the QuickTime Player app on your Mac. Most Mac computers come bundled with QuickTime Player 10 installed. It looks like a blue 'Q' logo in your Applications folder.
- If you can't find QuickTime Player in Applications, click on the magnifying glass icon in the upper-right corner of your screen, and then typeQuickTime. It will show up at the top of the list.
 Click theFilemenu. This option will be on the menu bar at the top of your screen when you open QuickTime Player.
 ClickNew Screen Recordingfrom the menu. This option will be at the top of QuickTime Player's File menu. QuickTime will open a Screen Recording toolbox.
- You can also press the^Control+⌘Command+Nshortcut on your keyboard to start a new screen recording.
 Click the Record button. This button looks like a red dot in the Screen Recording toolbox. It will start recording your video in QuickTime.
 Click and drag your mouse to select the FaceTime window. You can make your selection bigger or smaller from the corners before you start recording.
 Click theStart Recordingbutton. This button will appear in the middle of your selection window when you select a part of your screen. It will start recording your screen as video.
 Click the Stop button on the menu bar. This button looks like a gray square inside a circle at the top of your screen. It will stop recording and open your screen recording as a QuickTime video.
- The Stop button will automatically appear on the menu bar when you start screen recording.
 Click the Play button. This is the arrow icon facing your right-hand side at the bottom of your video. It will play your video in QuickTime player.
 ClickFileon the menu bar.
 Hover overExport. This will let you select a video format to save your video on your computer.
 Select a video format. Depending on your hardware and current software, your options may include 1080p , 720p , 480p , iPad, iPhone, iPod touch & Apple TV , and Audio Only . Clicking on one of these options will open a pop-up window to select a folder to save your video.
 Select a folder on your Mac. Use the pop-up window to browse your computer and select a folder to save your video.
 ClickSave. This is the blue button in the lower-right corner the pop-up window. It will export your video and save it to the folder you chose.
- Your video will save as a MOV file. You can use QuickTime Player or different software to play it.
FAQ
What is Video: How to Make a Movie of Yourself on a Mac about?
It provides a structured overview of video, explains the main context, and highlights practical takeaways for readers.
Why does this topic matter?
Understanding the main concepts helps readers evaluate the issue, avoid common mistakes, and make better-informed decisions.
How should readers use this information?
Use the guidance as a practical starting point, confirm details that may have changed, and follow current product, safety, or security recommendations.
Related Articles
 Click: How to Make a Slideshow with Windows Movie Maker6 minutes read
 How to Make a Scary Movie on Windows Movie Maker3 minutes read
 How to Make Great Movie Trailers on iPhone6 minutes read
 Add: How to Make a Video in Windows Movie Maker8 minutes read
 How to Make a Movie Trailer on Windows Movie Maker13 minutes read
 7 Web Apps All Filmmakers Should Use7 minutes read
Reader Comments 0
Sign in with email or Google to join the discussion.