How to swap and combine faces in GIMP
In fact, this tool is very handy. Users can merge the two into one and create a completely new creation, with just some basic editing skills..
Photoshop is a comprehensive tool in terms of editing capabilities, but free GIMP software can also be very helpful. In fact, this tool is very handy. Users can merge the two into one and create a completely new creation, with just some basic photo editing skills.
Let's TipsMake.com consider what is needed to merge two images together. In short, we will align the two layers appropriately, remove the background of the top layer, place it above it, and then thin the lines between the two layers.
How to swap or combine faces with GIMP
If you have not installed this tool, download GIMP here.
Note that this tutorial is done with 'Single-Window Mode', which can be found in the 'Windows' menu .
The first task is to load both images. Do this from 'File> Open as Layers' . Select both image files, then they will be loaded into GIMP. Adjust any image at the top from the Layers dialog on the right. Drag the layer used as the image placed on top of the control panel.
Now, right-click on the top layer and click 'Add Alpha Channel'. This will activate the transparent background mode in the following steps, necessary when stacking two faces.

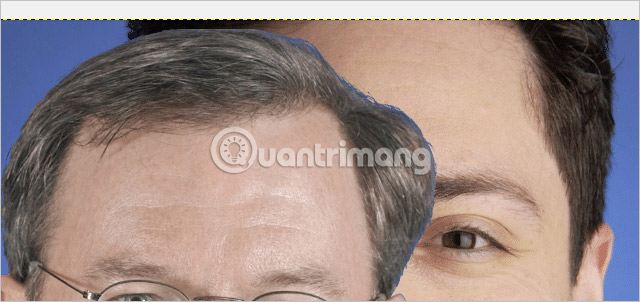
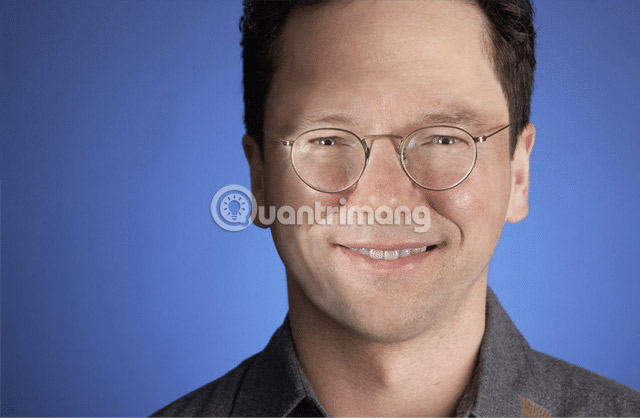
With the top layer selected, select 'Fuzzy Select Tool' from the left side of the program. Click and drag this tool below the background of the image. In this example, it will be the blue color behind the image of Eric Schmidt.
If necessary, select 'Free Select Tool' to make a better selection. This may be necessary if the background does not have a single color like here.

Click the Delete key on the keyboard to delete the background. As can be seen below, the blue background still appears around the hair section. Now, we will remove hair from the hair.
The top image may have a slightly different viewing angle or does not match the bottom layer. To create similarities between them, we will flip the image along the horizontal axis.
Do this from the 'Layer> Transform' menu.

Now, the top image has the same direction as the image below. Keep adjusting more by eliminating the characteristics of the top layer and the facial features of the image below.
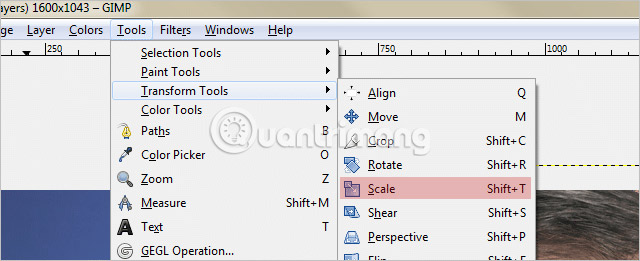
Select the aspect ratio from the 'Tools> Transform Tools' menu .
Before selecting the upper aspect ratio to match the bottom layer, limit the ratio to the small link symbol, like the following:
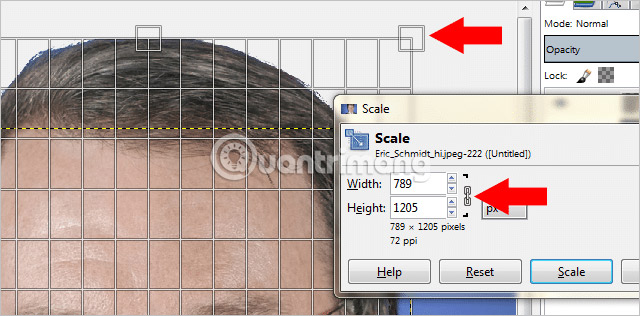
When the ratios are limited, the image will not be converted to an abnormal rate, but can still be expanded and shrunk. Drag the entire grid (as you see above) up or down to increase or decrease the overall size of the image.
Use the chain icon to drag the image to the left and right to make it more suitable for the first part available in the background.
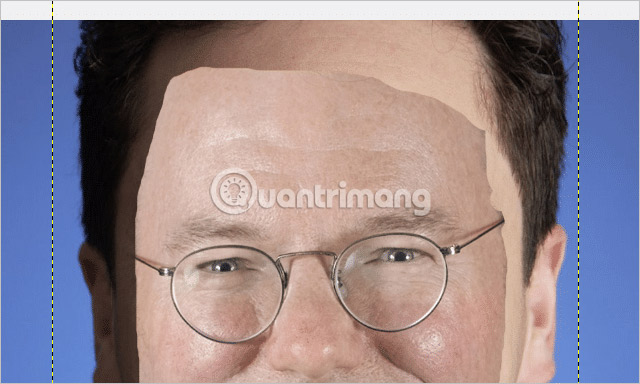
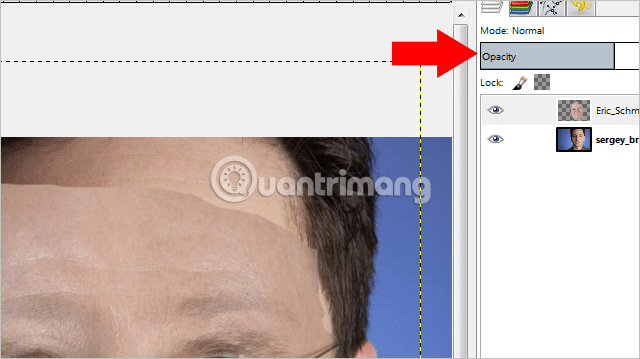
The next thing to do is to make the top layer transparent, using the Opacity tool on the right, above the layers. Move the slider to the left to make the top layer easier to see. This is necessary for the next step.
With the Eraser eraser, start drawing the edges of the image to show only the face (and glass, in this example).
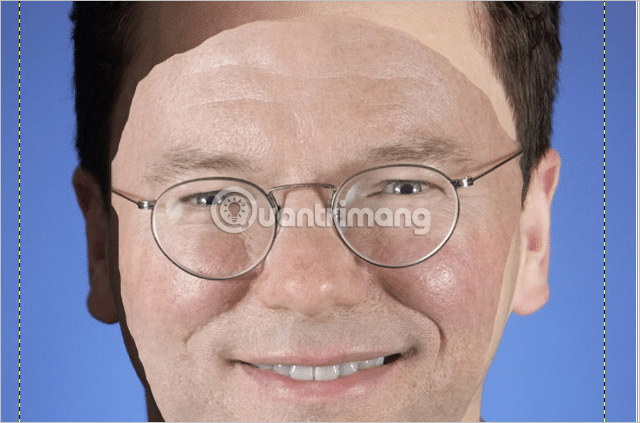
Continue to erase the edges, change the opacity of the Eraser tool itself (use the options for the Eraser tool to the left of the screen) to create a blending effect.
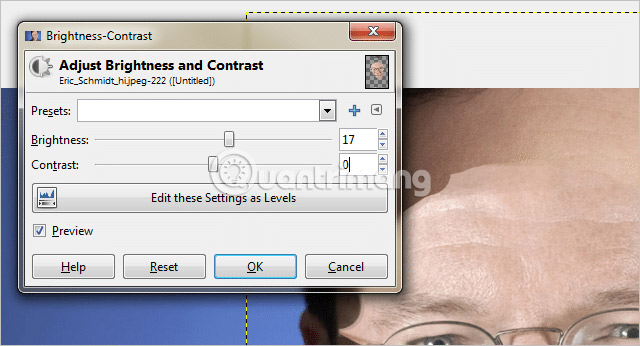
Sometimes the image needs to be adjusted brightness so that the front face matches the skin color behind it. Change the brightness of the foreground image to make the 2 images more compatible.
Change this from the 'Colors> Brightness - Contrast' menu.
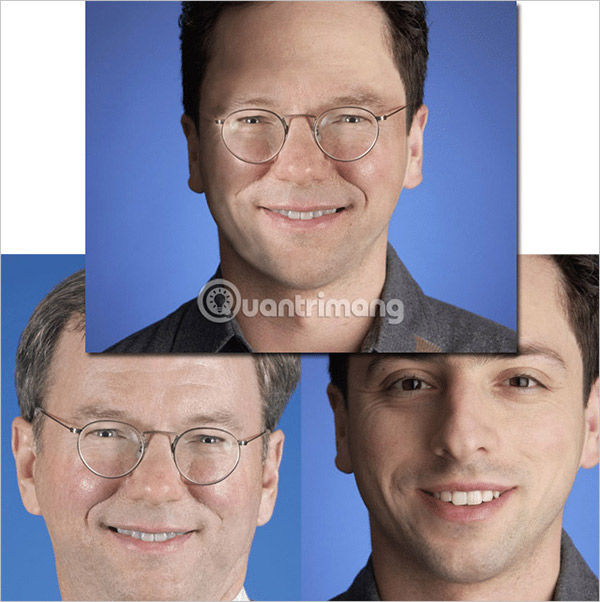
This is the final result after combining two photos of Serge Brin and Eric Schmidt into an image.
The forehead looks a bit big, but it can be better adjusted if users spend more time adjusting the image size.
It is possible to compare the original and newly created images:
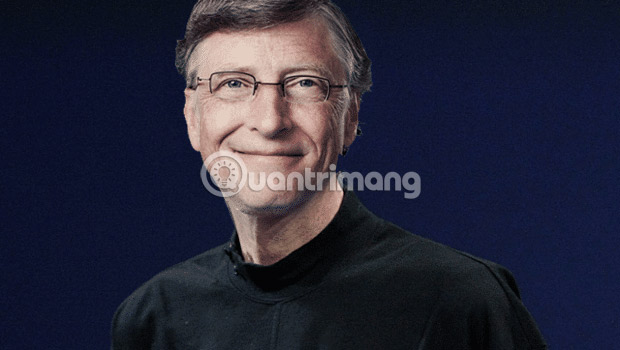
Here's another example, but this time we change the entire head instead of just the face alone. The first two photos were from Steve Jobs and Bill Gates:
The comparison results are as follows:
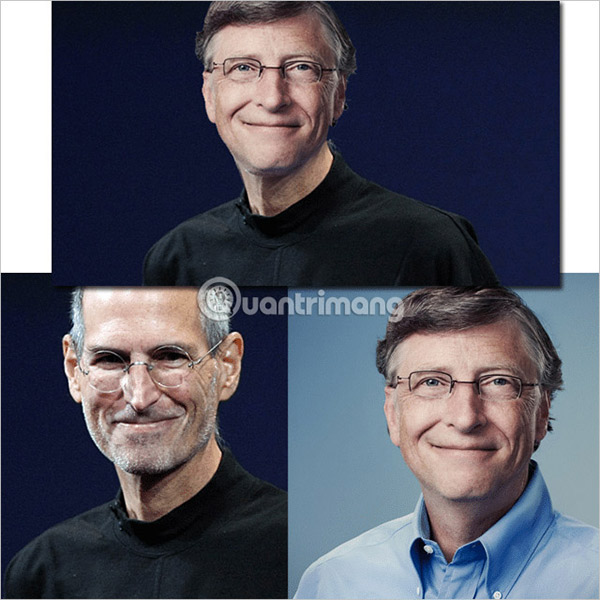
There are many methods to edit an image. Especially for entertainment purposes as above, users can swap and combine individual parts or all parts of the image as the example did with 2 pictures of Steve Jobs and Bill Gates.
Hope you are succesful.
See more:
- How to create X-ray effects in GIMP
- How to use Paintbrush in GIMP
- Instructions for drawing arrows with Gimp