How to use VSCO 'virtual magic' correction with filters
Image filters on VSCO help users to edit images in many different styles, creating magic for each image..
VSCO is a popular image editing application, used by many people. VSCO also supports image capture with many customizations, but also provides a lot of "magic" image editing tools. In it, you cannot ignore image filters on VSCO application. Each photo filter has a custom tool such as contrast, brightness, color renders, . to help you create colorful art images. Together with Network Administrator learn how to use VSCO application, especially filters to edit images in the article below.
- A set of video tutorials on how to edit photos with Lightroom
- Instructions for taking stock photos with Pitu on the phone
- Free online photo editing services should not be missed!
How to use VSCO photo editor application
First of all, please download the VSCO application for the devices according to the link below.
- Download VSCO app for iOS
- Download VSCO Android for free
Step 1:
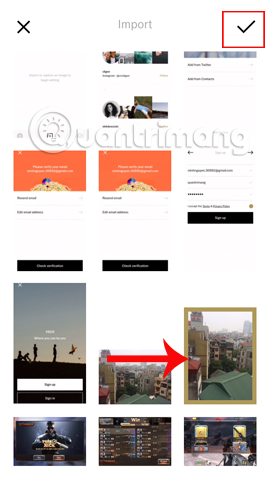
After downloading the application to the device, we proceed to launch the application. At the first interface, readers will click Sign up to register an account. Switch to the registration interface, users enter the necessary information including Email, account name and password, then click the I accept the Term & Privacy Policy button to agree to the terms of use of VSCO. After that, click Sign up to register your account.
Note to readers , the registration information when filled in with the traces as shown below can complete the registration.


Step 2:
Next, the user needs to access the registration account to confirm. In the mail content, click the Touch to Verify button.

Step 3:
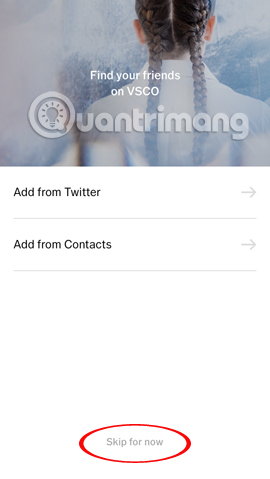
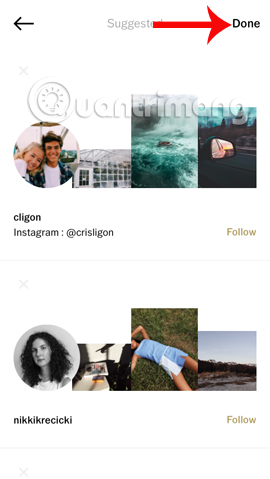
Also on the phone we need to press Check veritification to continue using VSCO. Appear the interface to add you on VSCO, click Skip for now if you have no need. Finally, click Done in the top right corner of the interface to use VSCO.

Step 4:
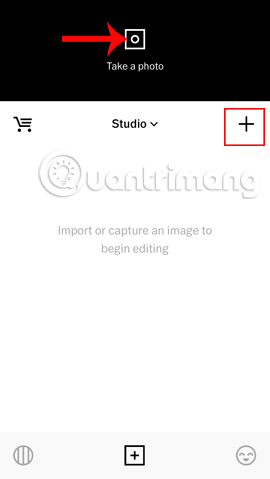
In the main interface on VSCO, press Take a photo to take a new photo, or press the plus icon to get the image available on the device.
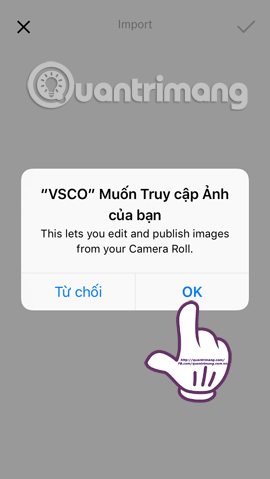
The application will ask you for permission to access the photo album , click OK . Next, we just need to select the image we want to edit, then click the tick above to use this image.
Step 5:
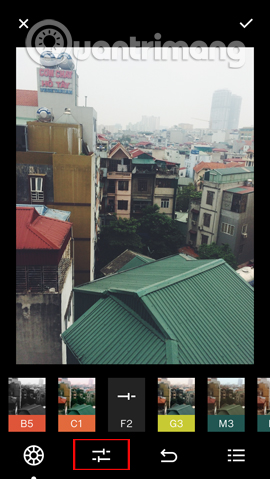
In the image editing interface, click on the image and then click on the edit icon below. A series of free filters appear below the interface for us to use.

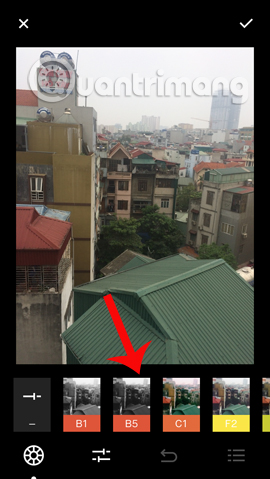
Step 6:
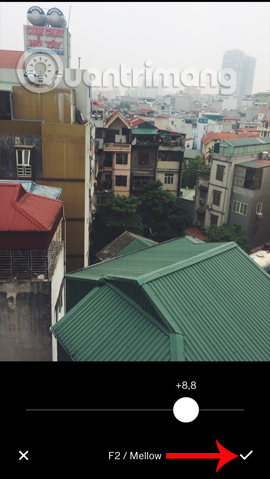
You swipe left or right to select a filter, for example, here I choose the F2 filter. Clicking F2 will come with the level adjustment interface using the color filter . Move the white circle button to 2 sides to adjust. Press the check mark to save the color level used and return to the interface.
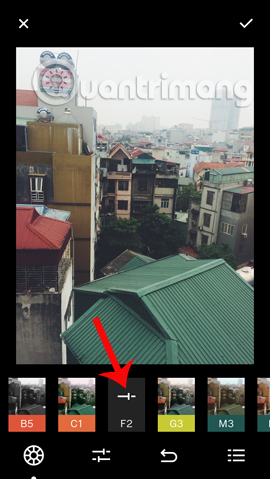
Below each filter there will be additional image editing tools, including image correction with 2-line icon , button to cancel editing with arrow icon and view the applied edits to the icon. 3 horizontal lines .
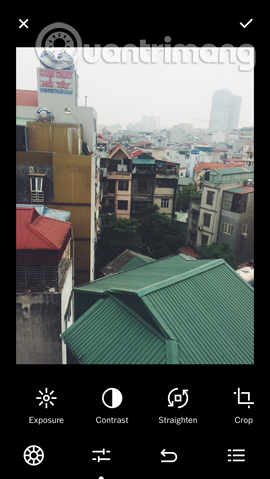
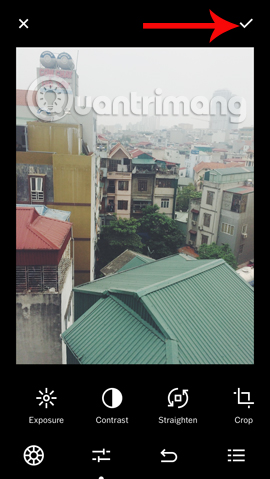
Click on the 2 straight lines icon to continue editing the image. There will be 4 photo editing tools including:
- Exposure adjusts the brightness of the image.
- Contrast to adjust the contrast level between bright and dark areas in the image.
- Straighten rotated the image in terms of angles.
- Crop to crop the image.
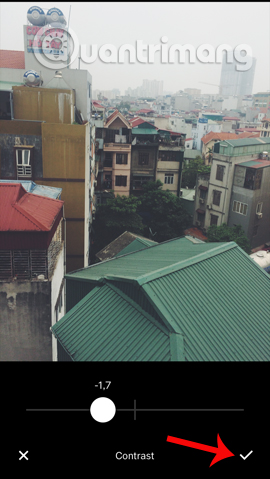
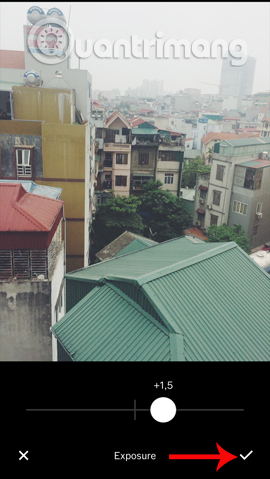
Step 7:
For example, I will click Contrast to adjust the contrast of the image. You drag the white dot dot button to the right or left, so that the contrast is as desired. Click the checkmark to save this edit. You continue with Exposure in the same way.
Step 8:
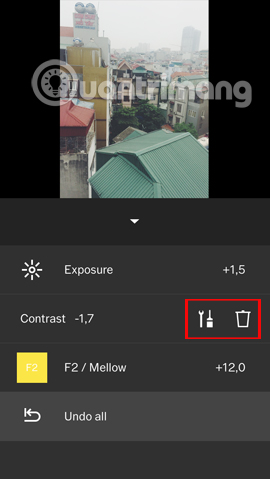
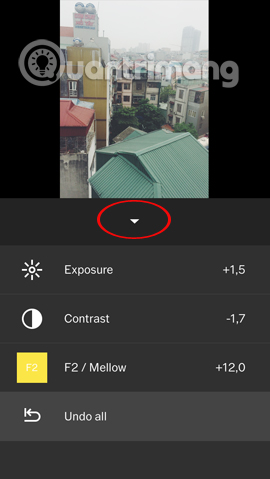
Click the 3 tiles icon to view the edited content. In this interface, if you want to edit something further, just click on the item. With the wrench icon for further editing. Trash icon to delete effects applied to images.
Finally click the drop-down arrow to return to the main image editing interface on VSCO.
Step 9:
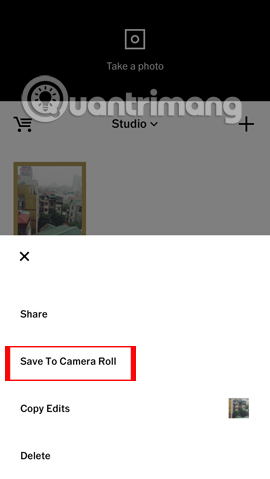
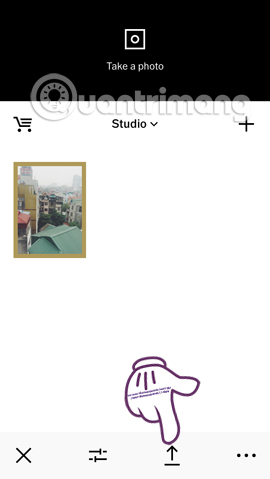
Once satisfied with your work, we click the traces icon to save any changes. To download the edited image on VSCO to the device, click the 3 dots icon.
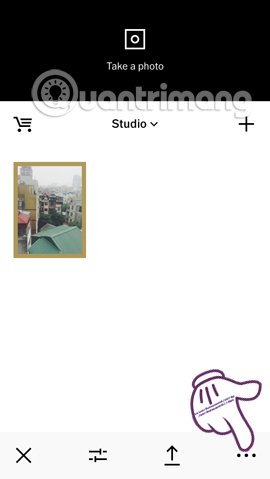
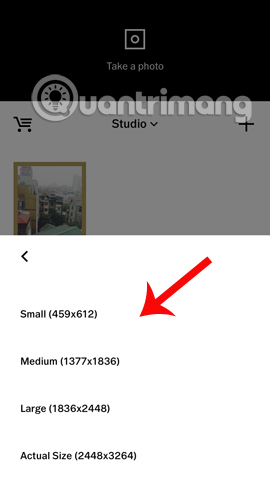
The list appears, the reader clicks Save to Camera Roll . Next, we choose the frame sizes to download the image.
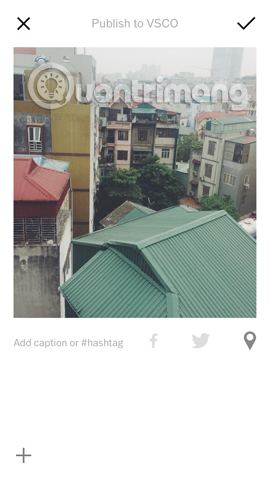
To share photos on social networks click the arrow icon , then enter any content for the photo you want to share.
Above is how to use filters on VSCO photo editing application. The application provides a lot of filters as well as editing tools, so try applying them to the image accordingly.
I wish you all success!