Table of Contents
Overview
This guide explains how to create quick messages on iPhone - create a template in clear, practical terms. It covers the key concepts, recommended steps, common limitations, and useful checks so you can make a better-informed decision.
Creating a quick message on iPhone will help us quickly reply to someone's message, or messages on Messenger, Zalo, the messaging applications that you use on iPhone. However, it is not available as a quick reply message template for calls on iPhone, to create a quick message on iPhone, you will need some supporting applications. This guide will guide readers on how to create a quick message on iPhone.
How to create quick messages on iPhone using SnippetKeys
Step 1:
First, download the SnippetKeys application to your iPhone using the link below.
Once installed, you will see instructions on how to use the SnippetKeys keyboard on iPhone.

Step 2:
At the main interface of the application, click on the plus icon on the top right edge of the screen. Next, we type the abbreviation in the Lable bar and enter the full content of the message in the box below.


Step 3:
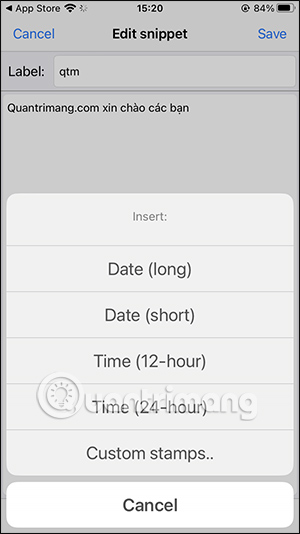
When you click on Insert stamp, it will display templates for entering time and date into messages. You click on the template you want to use for the full message content.
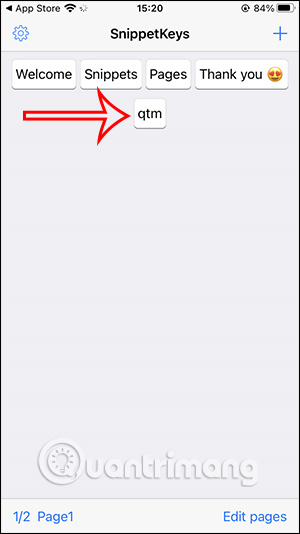
Finally, when you have finished creating a quick message on iPhone, select Save to save the message. You will see the existing messages on the application, including the newly created message.
Step 4:
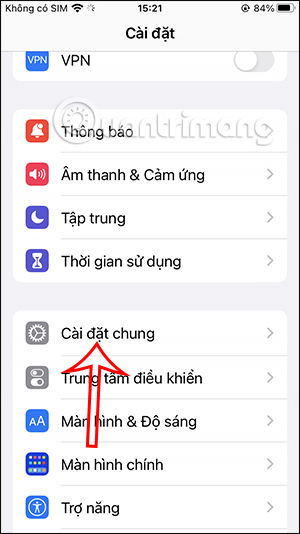
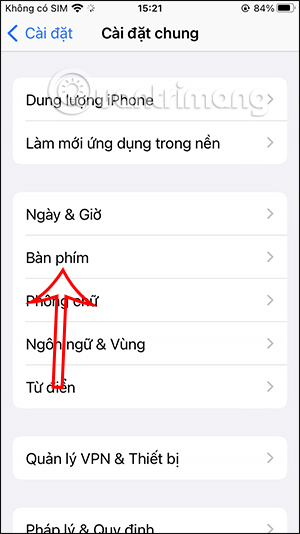
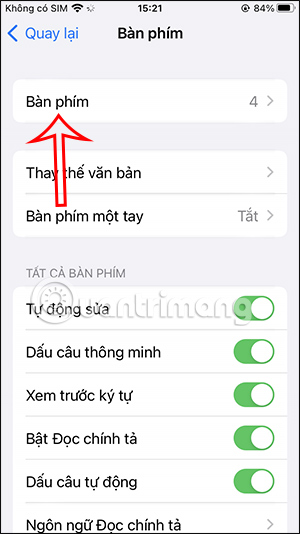
You return to the interface on the phone and click on Settings, select General Settings. Next we click on Keyboard.
Step 5:
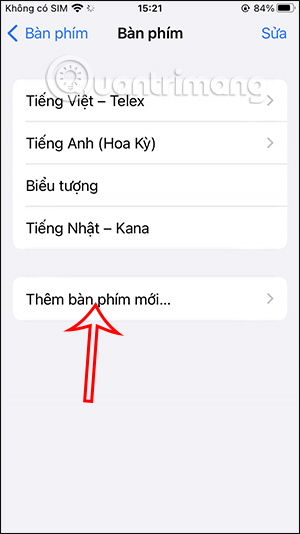
Continue to tap on Keyboards and add a new keyboard to use on iPhone. Here you will tap on Add New Keyboard. Then we will tap on the SnippetKeys application.
Step 6:
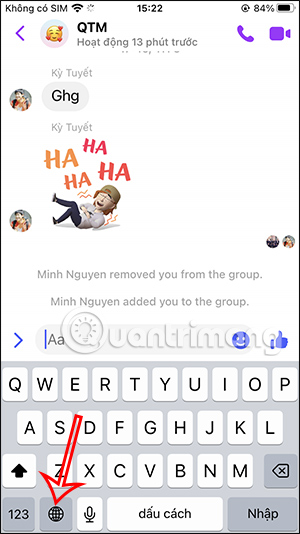
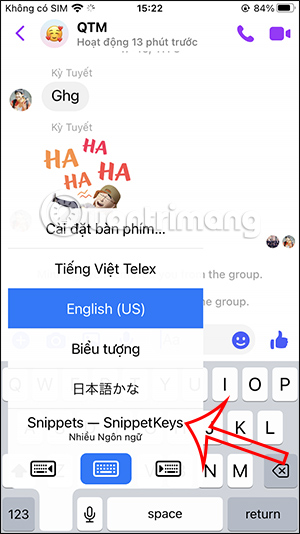
Now open any messaging app on your iPhone, like Messenger. Tap the globe icon on the keyboard and select SnippetKeys.
Step 7:
Now the user will see all the instant messages you have created on SnippetKeys. We just need to click on the instant message to send the complete message content on Messenger.
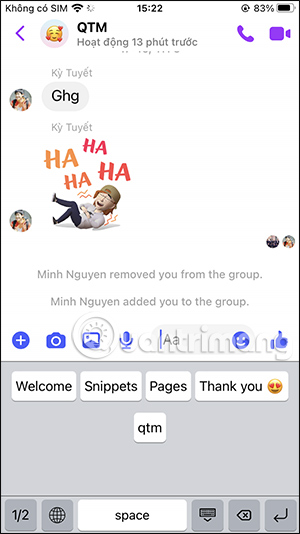
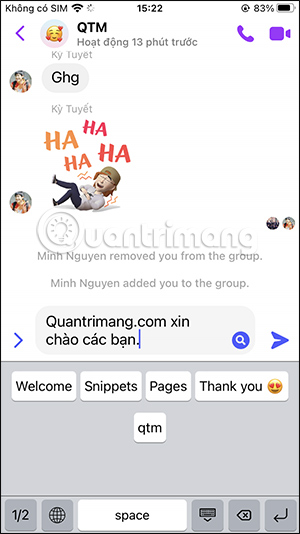
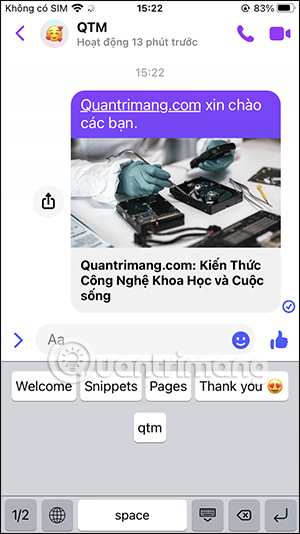
The full message content will be displayed right in the message sending frame for you to send messages on iPhone.
How to use TapText to create iPhone message templates
Step 1:
Users download the TapText application for iOS devices at the link below.
- Download the app
Step 2:
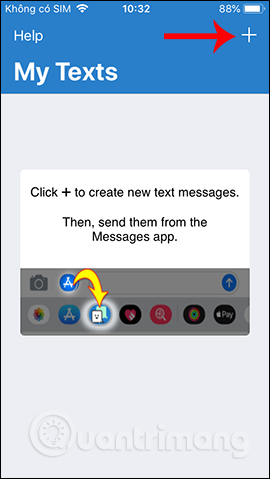
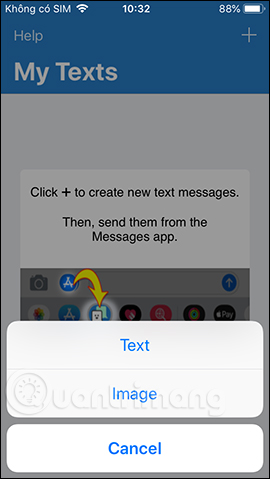
In the main interface of the application, users click on the plus icon to create a new message template. The TapText application will support creating 2 types of message templates including Text and Image.
Step 3:
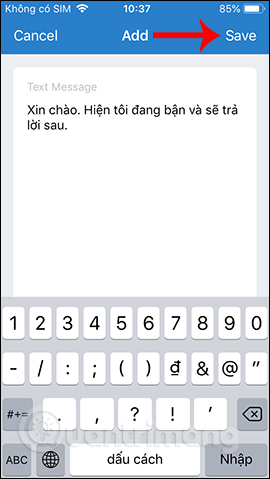
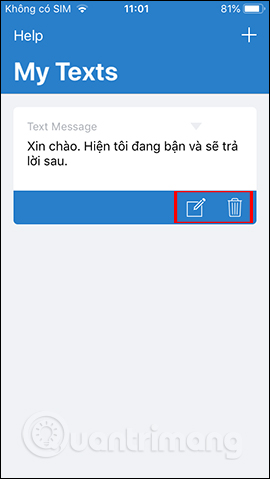
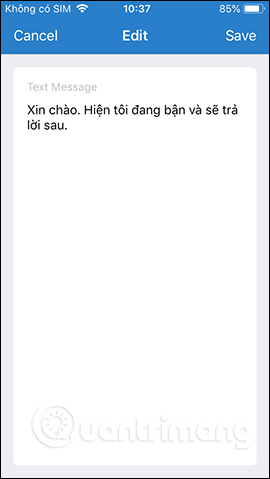
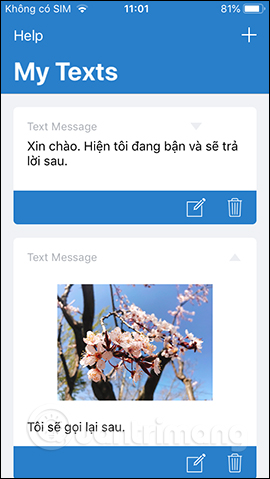
With the text message input interface, we just need to enter the message content to reply quickly when needed, then select Save to save. Return to the My Texts interface to see the created message content. We can click on the pen icon to edit the content if we want.
Trash icon to delete the created message template.
Step 4:
With the option to create a message template with an image, tap Select Image to upload an image to the app. Display the album available on the device for the user to choose the image they want to use.
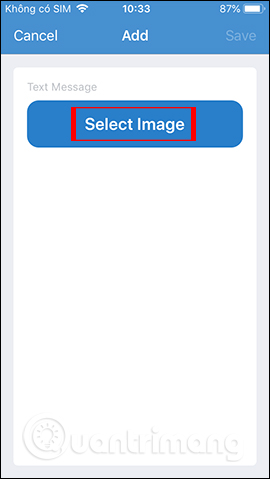
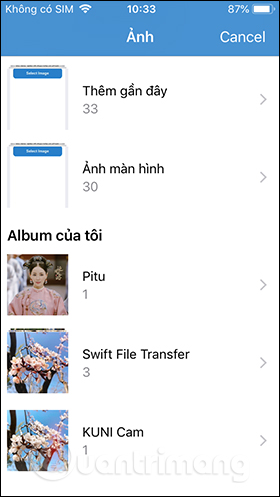
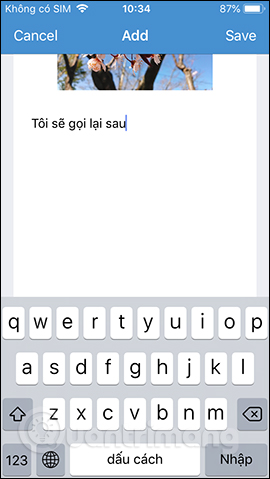
Next, the user can insert more content of this message, also select Save to save. After completing, if you want to change the image in the message template, click on the camera icon. Otherwise, select Save to save this message template.
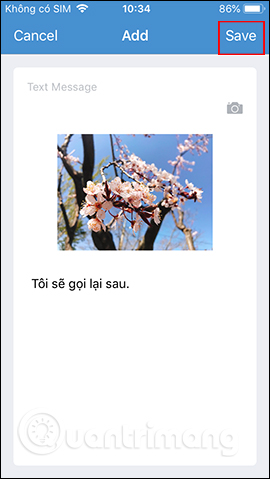
The results of the generated message templates will be displayed on the main interface of the application where you can edit or delete them.
Step 5:
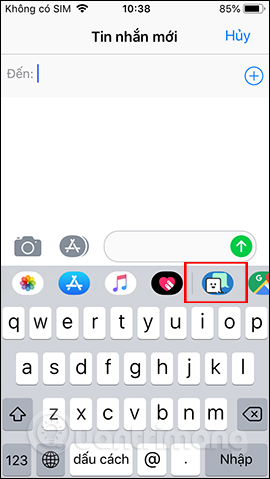
Open the messaging app on your device. In the message box, you will see the TapText application icon as shown below. Clicking on the application will display all the message templates that we have created.
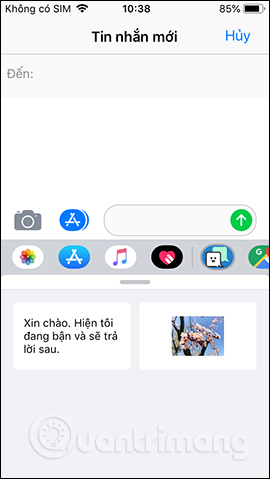
Tap the message you want to use and then send the message as usual.
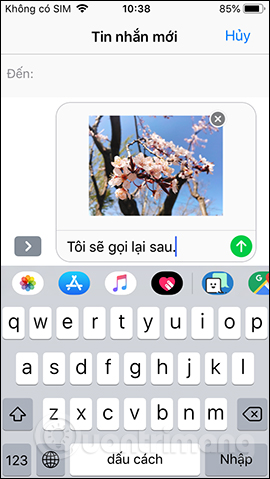
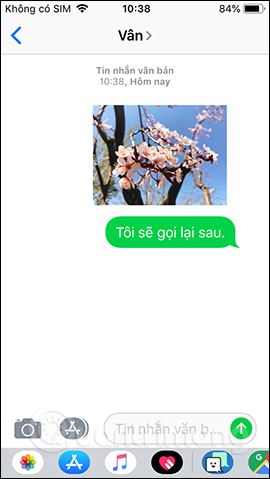
The TapText application is very helpful for users when you can immediately create many quick message reply templates for iPhone. The application is integrated right into the messaging application on iPhone, so we can use it quickly when needed.
Key Takeaways
Use the guidance above as a practical reference for how to create quick message on iPhone. Check compatibility, follow the steps carefully, and verify important details with official documentation when software, security, accounts, health, or purchases are involved.
FAQ
How do I create quick messages on iPhone - create a template?
Follow the steps in this guide in order, confirm each setting before continuing, and save, restart, or reconnect the device when the instructions require it.
What should I check before I begin?
Confirm the correct device, account access, software version, compatibility, and a current backup whenever the process could affect files, settings, or security.
What should I do if the process does not work?
Repeat the steps carefully, check for model or version differences, install available updates, and consult the manufacturer's official support documentation.
Related Articles
 How to Create a Quick Reply Message Template on iPhone6 minutes read
 How to Create Quick Reply Messages on Instagram3 minutes read
 How to Manually Create Stickers in Messages on iPhone3 minutes read
 How to Fake iPhone Messages, Create Fake Messenger Messages7 minutes read
 Create a Quick Website with HTML5 Boilerplate7 minutes read
 Template Agent IT Helpdesk5 minutes read
Reader Comments 0
Sign in with email or Google to join the discussion.