Lesson 25: Use the Template
Templates are pre-designed documents that you can use to create new documents of the same format. With templates, many decisions to design important documents, such as margin size, font style, font size and predefined line spacing.
In this lesson, you'll learn how to create a new document with a template, how to insert text, as well as basic information about how templates work in Word 2007.
Use Template in Word 2007
- Insert template
- Information about using templates
- Insert text into template
- Change the pre-filled information
- Practice!
Insert template
- Click the Microsoft Office button.
- Select New. The New Document dialog box will appear.
- Select Installed Templates to select the template on your computer.
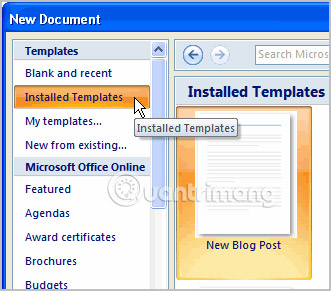
- Review the available templates.
- Left click on a template to select it.
- Click Create and the template will open in a new window.
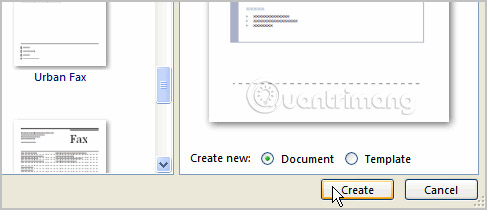
You can select any category in the Microsoft Office Online section of the New Document dialog box . This will display the free templates available online. Your computer must have Internet access to download these templates.
Information about using templates
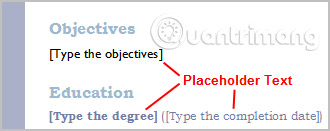
Templates include placeholder text surrounded by square brackets. Usually, placeholder text includes information about content for a specific area.
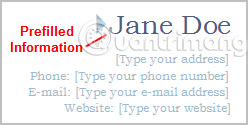
In addition, some information is pre-filled in the template. You can modify your Word Options and change the pre-populated information that appears.
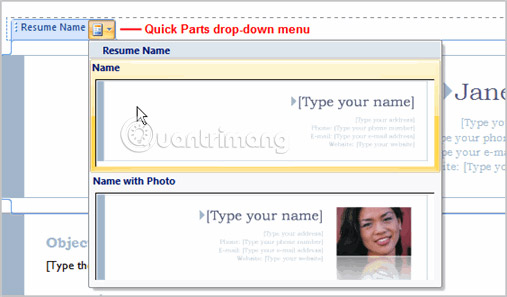
Word templates can include Quick Parts , giving you different options for templates.
Insert text into template
- Click near the text you want to replace. The text will appear highlighted and the template tag will appear.
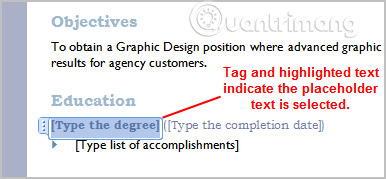
- Enter text. Placeholder text will disappear.
Change the pre-filled information
- Select the Microsoft Office button.
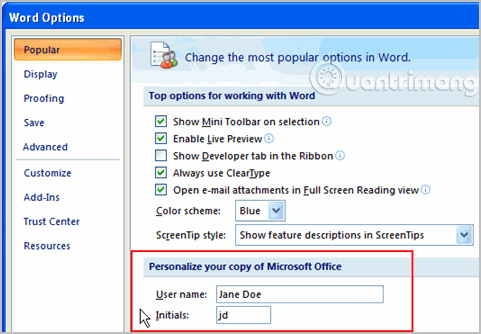
- Click the Word Options button at the bottom of the menu. The Word Options dialog box will appear.
- Enter your username and / or abbreviation in the Popular section .
- Click OK.
Practice!
- Create a new document using a template.Note : If you want to practice following the instructions, please select the Origins Resume template .
- Enter text into the template.
- Modify the username and initials for your Word version if you are using a home computer.Note: If you are using a public computer, such as a computer at the library, you do not need to change these settings.
- Save document.
>> Previous lesson: Lesson 24: Working with Shapes