How to Create an OpenOffice Macro
An OpenOffice macro can be created to combine a series of frequently repeated tasks into a single step. Macros can be effective in saving time, increasing efficiency, and improving productivity in situations where there is a significant....
Method 1 of 2:
Create a Macro for Inserting a Memo Heading in OpenOffice
-
 Enter the text for the memo heading macro. Open a new OpenOffice document and enter the text. Type "To:" and press enter. Type "From:" and press enter. Type "Date:" and press enter again. Type "RE:" and press enter twice. Then type "Message:" The text has been entered.
 -
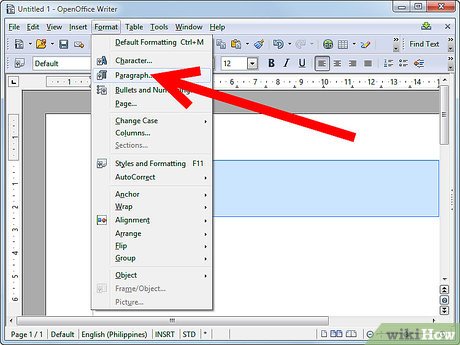
 Format the text for the memo heading. Click and drag to select the text. Click the Bold button on the toolbar. Select the Format tab on the menu bar and choose Paragraph from the pull-down menu. The Paragraph dialogue box will open.
- Click the Tabs tab and enter "1" into the Position field located on the far left. In the Type menu to the right, be sure that "Right" is selected and press OK. The inter-office memo heading has been formatted.
- Click the Tabs tab and enter "1" into the Position field located on the far left. In the Type menu to the right, be sure that "Right" is selected and press OK. The inter-office memo heading has been formatted.
-
 Remove the memo heading from the document by selecting all of the text and cutting it to the clipboard. Right click on the selected text and choose cut from the pull-down menu. The text has been removed from the document, but remains on the clipboard.
 -
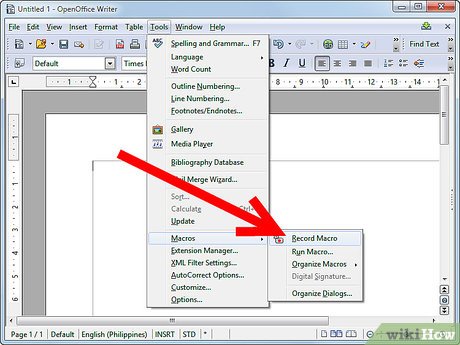 Create or "record" the memo heading macro. Select the Tools tab on the menu bar, click Macros, and select Record Macro from the pull-down menu to begin the recording process. The Record macro pop-up box will appear and the recording process begins.
- Right-click at the insertion point for the memo macro and select paste from the pull-down menu to reinsert the formatted memo text into the document.
- Click the Stop recording button located in the Record macro pop-up box. The Basic macro dialogue box will open. Enter a title for the new macro in the field on the upper-left, and click the Save button. The memo heading macro has been recorded.
-
 Test the memo macro by executing or "running" the macro. Select the tools from the menu bar, click Macros and select Run from the pull down menu. The Macros dialogue box will open. Double click My Macros located in the column on the left, then double click Standard. Double-click the title you entered for the memo heading macro.
- Click on the newly created memo macro to highlight it and click the "Run" button. The pre-formatted text for the memo heading will be inserted automatically. The memo macro has been run.
Method 2 of 2:
Create a Macro for Inserting a Signature into an OpenOffice Document
-
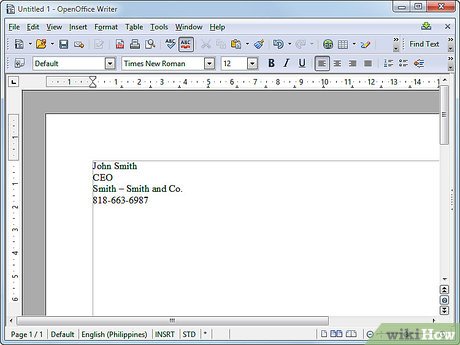 Enter the text for the signature macro. Type your name on the first line and press enter. On the next line, type your job title and press enter. On the next line, type the company name. Type your contact information on the last line and press enter again. The text for the signature macro has been entered.
 -
 Format the text for the signature macro. Select the text and click the Format tab on the menu bar. Choose Paragraph from the pull-down menu and click the Indents and Spacing tab in the Paragraph dialogue box. The text for the signature macro has been formatted.
 -
 Remove the text from the document by cutting it to the clipboard. Click and drag to select the text. Right click on the selected text and choose cut from the pull-down menu to copy the text to the clipboard while removing it from the document at the same time. The text has been removed from the document, but remains on the clipboard.
 -
 Create or "record" the signature macro. Select the Tools tab on the menu bar, click Macros, and select Record Macro from the pull-down menu to begin the recording process. The Record macro pop-up box will appear and the recording process begins.
- Right-click at the insertion point of the signature macro and select paste from the pull-down menu to reinsert the formatted signature into the document. Click the Stop recording button located in the Record macro pop-up box. The recording process is complete and the Basic macro dialogue box will open.
- Enter a title for the new macro in the field on the upper-left, and click the Save button. The signature macro has been recorded.
-
 Test the signature macro by "running" or executing the macro. Select tools from the menu bar, click Macros and select Run from the pull down menu. The Macros dialogue box will open. Double click My Macros located in the column on the left, then double click Standard. Double-click on the title you entered for the signature macro to execute or "run" the signature macro. The signature macro has been run.