Things to do when switching to Facebook's Timeline interface
Facebook's new Timeline interface has been in effect for many users. Here are the tweaks to consider when switching to this interface..
Facebook's new Timeline interface has been in effect for many users. Here are the tweaks to consider when switching to this interface.
In the past, it was impossible to review past user activities for other members. With Facebook Timeline, all users' Facebook activities are rearranged in chronological order, since they started joining Facebook. Therefore, people in your friends' lists can easily ' dig ' someone's Facebook activity history with just a few clicks.
But not everyone likes that. For many people, the past is things that should not be touched (even though they have publicly published it on social networks before . forget). The following notes for those who prefer the Timeline interface but don't want all their old activity information to be exposed to their ' friends ' eyes on Facebook.
Activate Timeline
There are 3 ways to do this. You can go to Facebook's Timeline page to activate. You can also wait for Facebook to invite you to try Timeline and activate it via instructions. Finally, for those who want to delay using this Timeline feature for as long as possible, Facebook will let you "watch" this interface for a while to decide whether to use it or not. In the opinion of writers, Timeline is a good way to re-enjoy the past activities of Facebook users. However, there are a few points you should care about before accepting this interface.
Hide old posts
In case you do not want the status updates, photo galleries, links you share or click Like . displayed on the Timeline, you need to pay attention to the upper right corner at each information / post. . Click on the pencil icon and select " Hide from Timeline ". In case you choose to hide Facebook application activities (such as the Washington Post Reader application, context menu options may differ slightly.
If you have trouble finding posts, find the slider on the right side of the screen that lists the yearly milestones. Click on the time period that you 'roughly' posted it to find. You can even search by month.
Check archived content
If you still want to keep an article on the Timeline but want to limit the viewing rights to a few people, you can change the settings for each lesson in the Activity Log section. Click on the " Activity Log " below the Timeline background image to bring up a page listing all your Facebook activities organized by date.
There are several types of information, such as what you wrote on your friend's wall (Wall), that cannot be restricted in this way but can be erased. Posts and information displayed in your page as status updates, links may restrict viewers. To do this, click the icon at the corner of this information to bring up a drop-down menu like the options menu in Facebook's privacy management. Here you can set different options as you like.
You can also choose to display which types of data are stored in Facebook activities. It will be useful in case you only want to see certain types of information such as notes, posts, ' Like ' content, but ignore the ' clumsy ' information that Facebook often brings. You need to find up on Activity Log and click on the " All " drop down menu and then set up your own filters.
Highlight information
If you want to emphasize something like a photo, event or a piece of content that you like, click on the top right corner of that information. Instead of selecting the pencil icon, click the star icon and this information will be displayed in the main Timeline column.
As soon as you choose to activate Timeline, Facebook will automatically highlight some of the information it thinks is important to you like the time of graduation or the start of work. In case you do not want to display them, simply uncheck (click on the star icon) at the corresponding information.
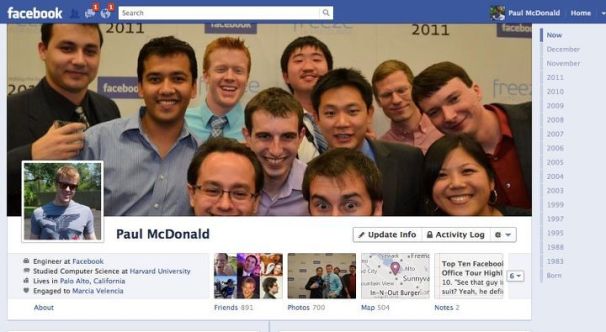
Install "cover photo" Timeline
At the top of your profile page is a large photo presence and will be the first thing to be seen on your Facebook page. You can choose any photo you like and it will take a few minutes for the picture to appear in the cover image. Note that this " cover image " is publicly displayed and any Facebook member can view it.
Check the display
After you have edited the Timeline settings, you may want to check how it looks to your Facebook visitors. To try, click the gear wheel icon (next to Activity Log) below the cover image and select " View As . ". You will then see how your Facebook interface will appear to others. To return to Facebook, click " Back to Timeline ".