How to limit data with Data Validation in Google Sheets
If you use Google Sheets to collaborate with others, you can prevent people from entering the wrong data in spreadsheet cells. The Data validation function is used to prevent users from entering anything other than correctly formatted data within a specific range. And this is how to use it.
- How to limit the value entered by Data Validation Excel
- 3 basic methods to avoid data entry errors in Excel
- How to create duplicate data entry notifications on Excel
How to use Data Validation in Google Sheets
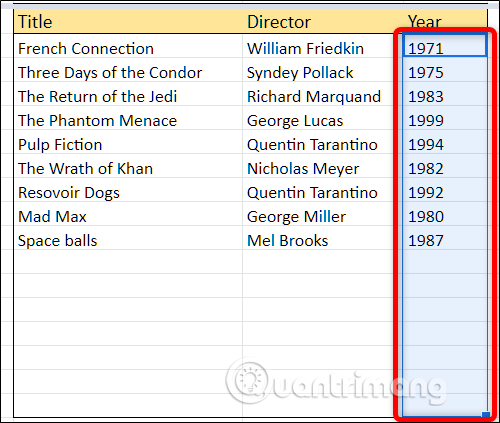
Open your browser, visit the Google Sheets homepage, open the spreadsheet and select the range you want to limit.

Click Data and then select Data Validation .

In the Data validation window that appears, click on the drop-down menu next to Criteria , select the specific input type for the selected cells. For this example, we need everyone to enter a four-digit number for the year of the movie's release, so select the Number option. You can choose other criteria such as text, date, predefined option list, item from specific scope or your custom limit formula.

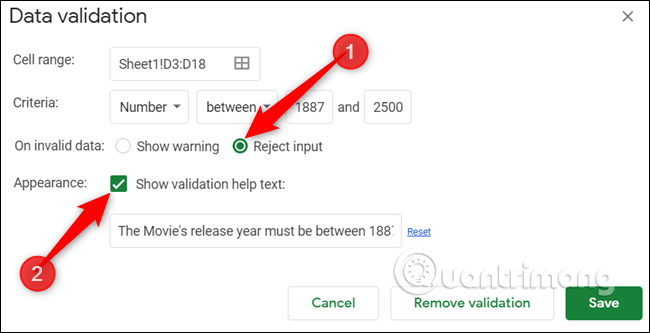
Each of these options has its own values you need to specify correctly to limit the data entered into each cell. Here, since we only want five movies to release, use the Between limit, then leave the minimum value to 1887 and the maximum value to 2500.

Next, choose between Sheets that show the message or reject the input and display an error message when the data is invalid.
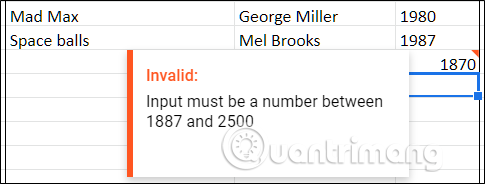
This alert notifies users that the number must be within a specific range and that the data is invalid in the box with the red message.

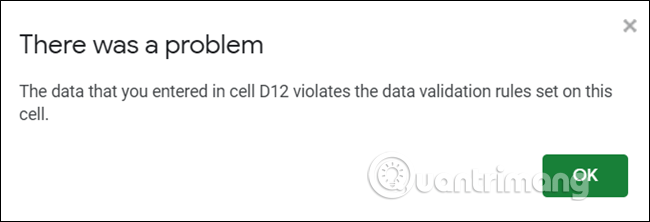
If Reject Input is selected, the user will see a window with a general error message as below after invalid data entry and will be deleted.

You may refuse any invalid input but need to notify others of the type of data requested. Click Reject Input , select Show Validation Help Text and then enter the useful warning content. Click Save to close the Data validation window.

Now, when someone enters invalid data, they will receive a useful message to correct the error.

Data validation is an essential feature when collecting information from many people and making sure they enter valid data in the spreadsheet box.
I wish you all success!