How to use Timeshift to backup and restore a Linux system
Fortunately, there are system restore tools that take snapshots of your files and settings, which you can restore on your system to bring it back to a previous operating point.
Table of Contents
As a highly customizable operating system and heavily dependent on CLI interactions, Linux is prone to system failures due to incorrect system commands or operations. So if you use Linux on your main computer, you might run into problems often.
Luckily, there are system restore tools that take snapshots of your files and settings, which you can restore on your system to bring it back to a previous operating point in the event of any manipulations. Your actions render the system unusable.
Timeshift is one such tool for Linux. And in this tutorial, Tipsmake will guide you through using Timeshift on a Linux computer.
How to Install Timeshift on Linux
Timeshift comes pre-installed on some Linux distributions. With other distributions, you need to install them manually.
1. On Ubuntu and its derivatives
If you are using Ubuntu and its derivatives like Linux Mint, elementary OS, etc…, you most likely have Timeshift pre-installed on it. And so you can start using it right away.
However, in case it's not there, you can install Timeshift on Ubuntu by running the following commands in the terminal:
sudo add-apt-repository -y ppa:teejee2008/timeshift sudo apt-get update sudo apt-get install timeshift
Alternatively, you can go to the Software Manager on your distro and install Timeshift from there.
2. On Fedora, CentOS and RHEL
Timeshift only supports BTRFS snapshots in Fedora. To get it use:
sudo dnf install timeshift
3. On Arch Linux and Manjaro
Finally, on Arch Linux, Manjaro and similar distros, you can install Timeshift with:
yay -S timeshift
Run and Initialize Timeshift
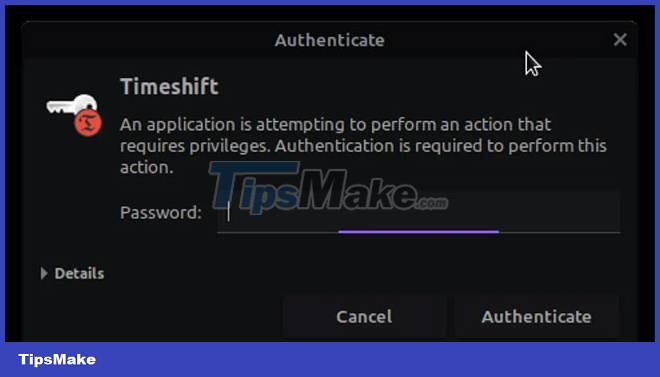
After you have installed Timeshift, open the Applications menu, search for Timeshift and launch it. It will ask you to enter the user password for authentication. Enter the password and tap Authenticate.
Now, if this is your first time running Timeshift on your computer, you will be greeted with the Setup Wizard. Here, you need to set options for a few different Timeshift settings.
First, you will have to choose between two types of snapshots Rsync and Btrfs.

The Rsync option creates snapshots using rsync and hard links. Essentially, an Rsync snapshot contains only files and directories that have been changed or modified - the rest of the files (which are unchanged) are not backed up in the snapshot. Therefore, it takes up less disk space. On the other hand, Btrfs mode is ideal for users using one of the Linux distributions that use the btrfs file system.
After selecting a suitable snapshot type, click Next.
Chờ một vài giây trong khi Timeshift ước tính kích thước hệ thống của bạn. Ngay sau khi nó kết thúc, hãy chọn một vị trí trên hệ thống nơi bạn muốn lưu snapshot Timeshift.
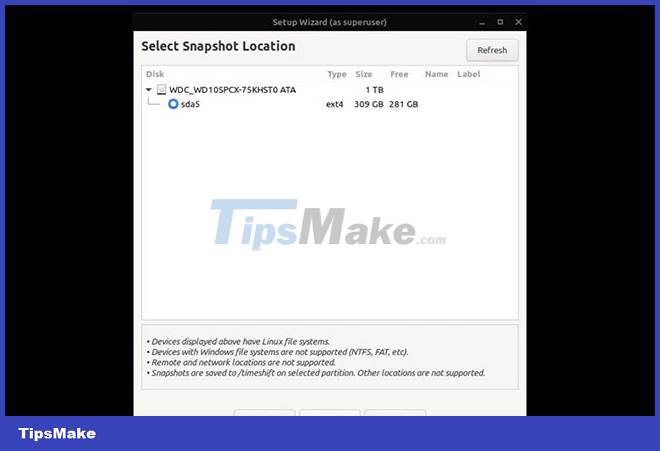
Bài viết khuyên bạn nên thực hiện việc này trên ổ cứng gắn ngoài hoặc ổ cứng HDD/SSD ngoài, vì làm như vậy có thể giúp bạn an toàn trong những trường hợp không thể khởi động vào hệ thống. Nhấn Next để tiếp tục.
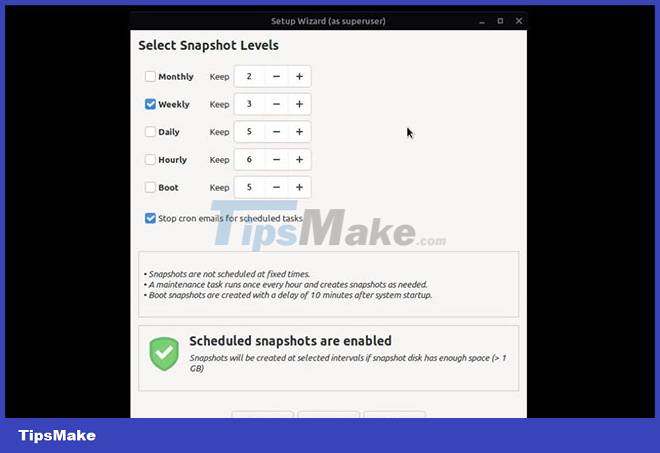
Tùy thuộc vào tần suất bạn sửa đổi các phần tử hệ thống của mình, bước tiếp theo là chọn tần suất thực hiện snapshot. Thao tác này sẽ tự động sao lưu tất cả các file và cài đặt hệ thống của bạn vào khoảng thời gian bạn đã đặt mà không cần sự can thiệp của bạn.
Đánh dấu vào hộp kiểm bên cạnh một cấp trong Select Snapshot Levels và nhấn Next.
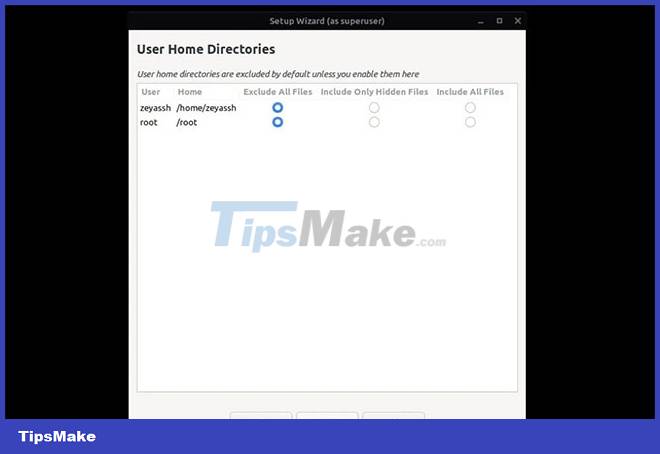
Finally, Timeshift asks if you want to back up your home directory to the snapshot. Select an option here as appropriate and click Next.
Click Finish to complete the setup.
How to use Timeshift on Linux
After successfully setting up Timeshift on your machine, you will be taken to the main window.
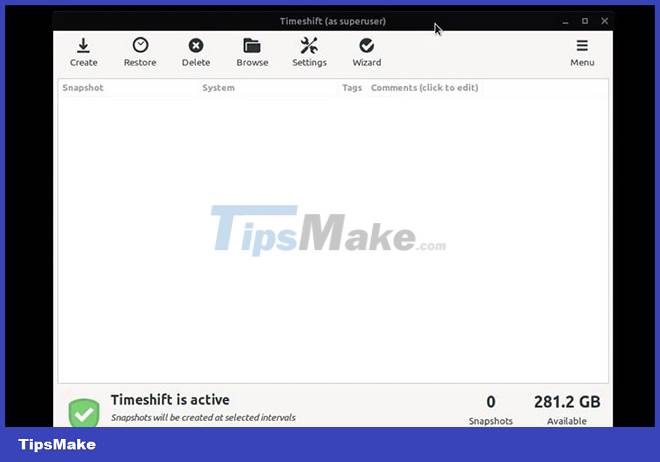
You can perform all Timeshift operations in this window, as shown in the sections below:
1. Create a snapshot using Timeshift
Press the Create button on the main Timeshift window and Timeshift will start creating a snapshot using your set options.
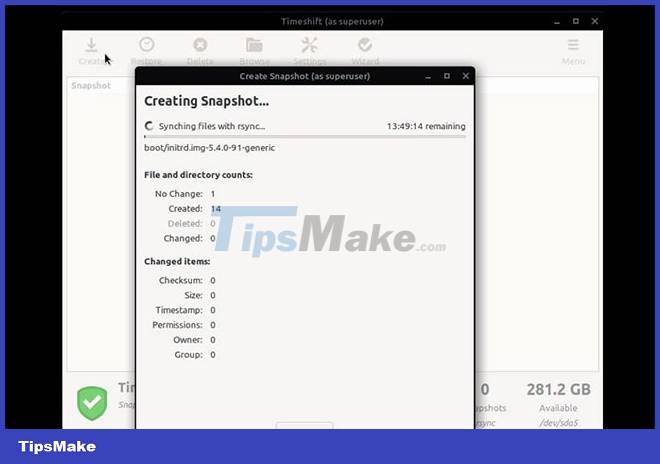
Wait for the process to complete.
Since this is your first snapshot, it may take a significant amount of time compared to the snapshots you will take afterwards. Once the snapshot is ready, it will appear in the main window.
2. Restore snapshot
You can restore the snapshot in two cases: When your system is up and when you are unable to boot into your system. In the first case, press the Restore button on the main Timeshift window and it will open a window where you need to select the snapshot you want to restore.

In addition, it will also ask you to select the destination partition to which the snapshot needs to be restored. Select it and click Next.
Timeshift will now compare the current system state with the state in the snapshot. Depending on the size of your snapshot, this can also take time.
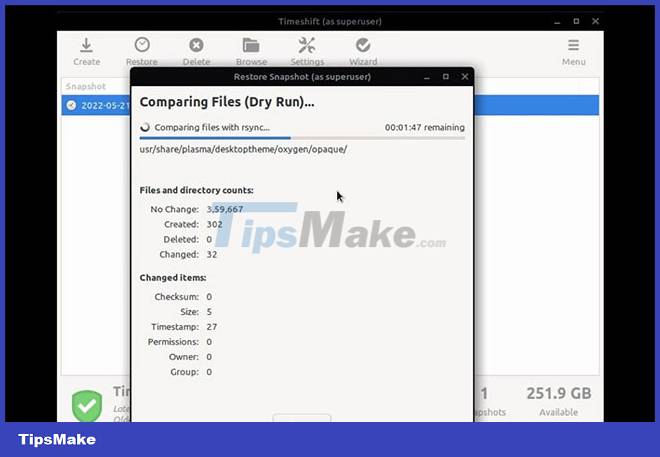
Once done, you will see a list of all the files and folders that need to be restored and deleted. Go through this list to verify the changes, and no important files or settings were modified in the process.
After you are satisfied with the changes, click Next to confirm. Again, click Next in the following warning screen to confirm the snapshot restore.

Wait a moment and Timeshift will restore your snapshot.
In case you are unable to boot into the system, you can try to boot into it using a live USB and then use Timeshift to restore it to its previous working state and fix any system components, settings or files. system is damaged or misconfigured.
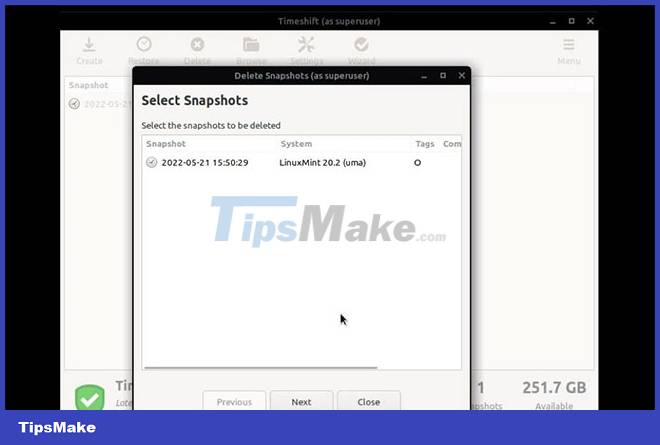
3. Delete snapshot
If you happen to store a lot of media and software on your local machine and for some reason you are also saving the snapshot on the same drive, then you may want to delete the old snapshot at some point to resolve the issue. free up disk space.
To do this, click the Delete tab on the main Timeshift window. Then, select the snapshot you want to delete and press the Delete button.
The system restore utility is a must-have application on Linux computers, especially if you love to customize your system and need to adjust its various configurations and system files quite often.
Therefore, it is also essential to ensure that the tool automatically takes the appropriate snapshots. Hope this guide helps you get started with Timeshift. You can use it to set up automatic snapshots, so that when you need to restore the system, you can do it quite easily.
Similarly, another great Linux system backup and restore utility is dd, which backs up your entire system, including everything from system settings to all documents, files, and even application.
Was this article helpful?
Your feedback helps us improve.
Related Articles
 Complete how to use all backup and restore tools on Windows 1011 minutes read
 Configure the System Restore feature in Windows 108 minutes read
 How to use Backup and Restore on Windows 7?5 minutes read
 Backup and restore Registry on Windows5 minutes read
 How to backup and restore Windows 10 from System Image5 minutes read
 How to back up and restore Linux Terminal history6 minutes read
Reader Comments 0
Sign in with email or Google to join the discussion.