Instructions for setting up Mozilla Thunderbird to set up email scheduling and automatic mail replies
The need to write an email reply with too many content makes you spend a lot of time or you want to send an email in the future but are afraid to forget what to do? Quite simply, the following article will guide readers to set up email delivery schedules and set up automatic mail replies in Mozilla Thunderbird.
Table of Contents
The need to write an email reply with too many content makes you spend a lot of time or you want to send an email in the future but are afraid to forget what to do? Quite simply, you can set an email schedule and set up auto-reply mode. In this article, we will show you how to do it in the Mozilla Thunderbird application - a cross-platform, free and multi-platform email application.
Note: Here, we use Thunderbird for the Windows version. However, the instructions below are applicable for Mac and Linux versions, although the interface is slightly different.
- Instructions for backing up email on Mozilla Thunderbird
- Instructions for composing autoresponder messages on Microsoft Outlook 2016
Automatic answering filter
Auto responder filters allow you to identify incoming emails and pair them with sample messages. When an email activates the filter, the sender will automatically receive a reply. Here is an example of the auto-reply feature:
- Answer common questions.
- Set up email replies "not available at the office" when you are on leave.
- Confirm that you have received the email and will respond as quickly as possible.
Now let's see how you can create automated email replies in Mozilla Thunderbird!
Set up message templates
To create a template, you need to use the Menu bar to File> New> Message or if you are using the Mail Toolbar, click the Write button to create a new email or simply press the CTRL + N shortcut key (which is Command + N key on the Mac).

Next, write a message like when you write a regular email. Remember to add a title!

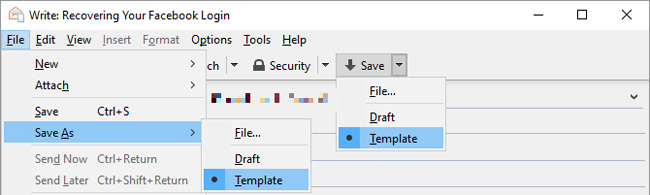
Now save your message as a template. In the Email menu of the email, go to File> Save As> Template , or in Composition Toolbar - expand the Save drop-down menu and click Template .
Prepare the message templates you need, then proceed to create filters.
Tip: If you do not see any menu or toolbar above, right-click on the toolbar's blank to see additional menus. Check next to the tools you lack so they appear on the toolbar.
Set up message filters
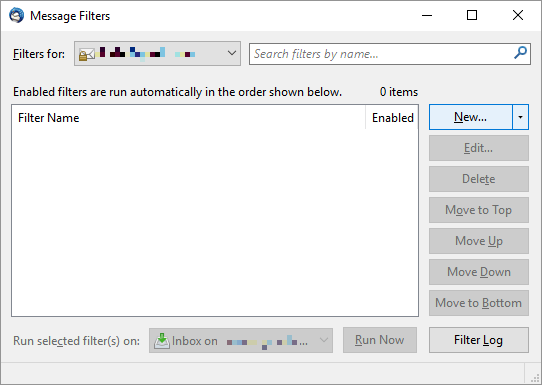
Go back to the Thunderbird Menu bar, go to Tools> Message Filters . to open the corresponding window.

In the Message Filters window, click New (this button starts the new filter setting).
Note: If you use multiple email accounts in Thunderbird, be sure to set the email address that the filter will apply in Filters for.
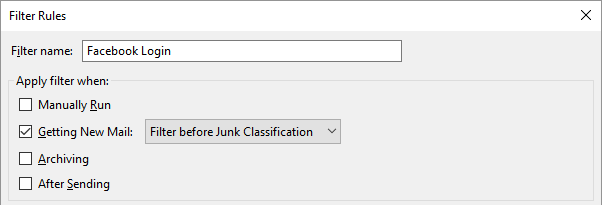
Start setting up Filter name in case you need to edit the filter later.
Under Apply filter when , instruct Thunderbird to run the filter. For example, if you want to see all emails before sending automated feedback, choose Manually Run . The advantage of manual filters is that you can apply them only to the selected folders. To filter all incoming messages, select Getting New Mail . You can select before or after Junk Classification .
Note: You can also set up Archiving filters or After Sending email, which means you can use filters to organize your emails.
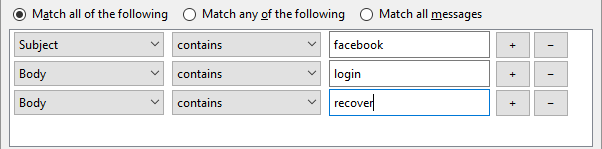
Now is the time to set up your rules. First, decide if the filter should Match all of the following or Match any of the following rules . Then compose your rules. Filter criteria can be applied to all email headers to CC users and you can also create custom criteria. Here, we choose Subject and Body . Click "+" to add more rules and click "-" to delete the corresponding rule.
Note: You can also create Thunderbird Match all messages (you won't be able to set any more rules). This feature is very useful when you need to process a series of emails coming from a specific address (selected in the first step).
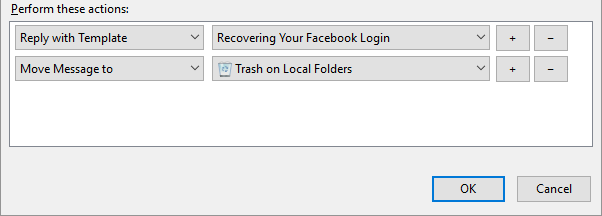
Finally, Thunderbird needs to know what tasks to do with incoming emails to match your rules. in the Perform these actions section , you can select Reply with Template , then select the template. You can also set additional rules, such as moving incoming mail to a specific folder.
When you're happy with the filter, click OK to save it.
Tip: You can set multiple stages of filters to work together. Below is a screenshot of the filter criteria and actions available. For example, you can set up automatic filters to move incoming messages to a directory based on your rules, but not to enable automated replies. You can now re-check the content in the folders and move the mail in or out as needed. Finally, you can run different autoresponder filters on specific folders.
Set email delivery schedule
Another unique feature that you can activate in Thunderbird is to schedule an email. This means that Thunderbird will send those emails at a specific time in the future. This feature is very useful for sending reminders, to yourself, your friends or a group of people.
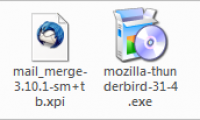
Because this is not the default feature of Thunderbird, we need to register a utility called Send Later . This utility is similar to Boomerang for Gmail, except that it is free and unlimited.
Set up the Send Later utility
The easiest way to install the Thunderbird utility is to install it directly via Add-ons Manager. Click the Thunderbird Menu icon (2 vertical lines) and select Add-ons . In Add-ons Manager , open the Extensions tab. Locate the search box at the top right and find all utilities for Send Later. Click Install next to that gadget.
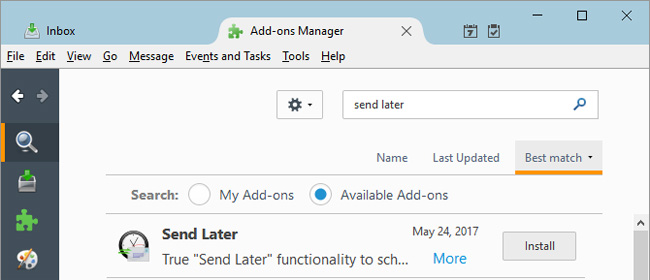
Your utility has been downloaded and installed with a single step. Click Restart now to complete the installation process.

Before starting to use the utility, go back to Add-ons Manager> Extensions and open Send Later Options . Here, you can describe the image above 'Send Later', including General settings, Custom Shortcuts for sending schedules and Advanced options.

Use Send Later
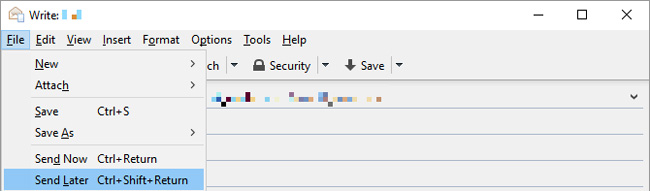
Next time, when you compose an email you want to send later, go to File> Send Later or press CTRL + SHIFT + RETURN.
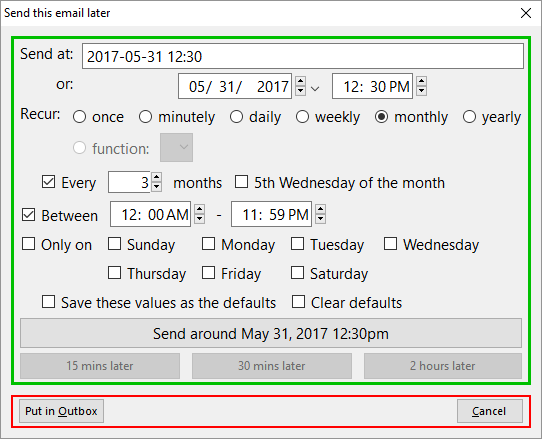
In the Send this email later window that appears, set the date and time in the Send at section, select Recur mode if you want this email to repeat and select one of the options if necessary.
So is the scheduling of email and setting the mail reply mode in Mozilla Thunderbird is complete. It's that simple, isn't it!
How do you use filters and utilities to organize email in Thunderbird? Share your tips and the utilities you like best in the comment section below!
Was this article helpful?
Your feedback helps us improve.
Related Articles
 Mozilla Thunderbird 68.6.04 minutes read
 Instructions for configuring and setting up email with Thunderbird4 minutes read
 Transfer email from Outlook to Thunderbird2 minutes read
 How to set up automatic email replies on Outlook4 minutes read
 Instructions for sending mass emails with Mozilla Thunderbird3 minutes read
 Mozilla will stop developing ThunderBird2 minutes read
Reader Comments 0
Sign in with email or Google to join the discussion.