Table of Contents
This guide explains how to change the Time Automatically Saved (Save) in Word, with clear steps, practical tips, and important checks before you begin.

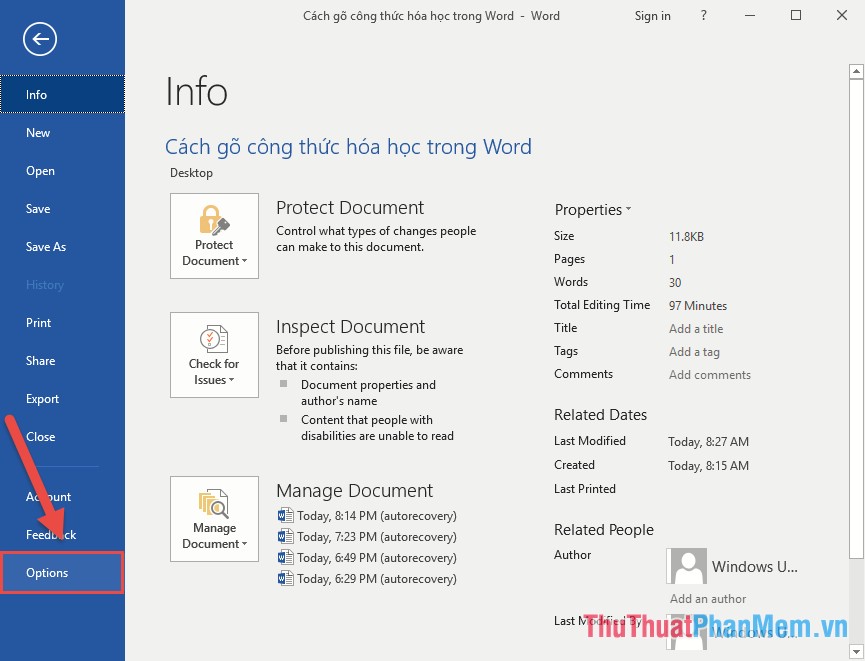
To adjust the time of auto-saving, you do as follows: Open the Word software interface -> on the File tab -> Option:
Step 2: The Word Option window appears, click the Save -> item in the default Auto Auto Save information section after 10 minutes of automatically saving, you need to adjust this parameter to suit your requirements:

For example, here to avoid self-forgetting, set the time after 1 minute Word automatically saves the drafted content without the user having to save the text:
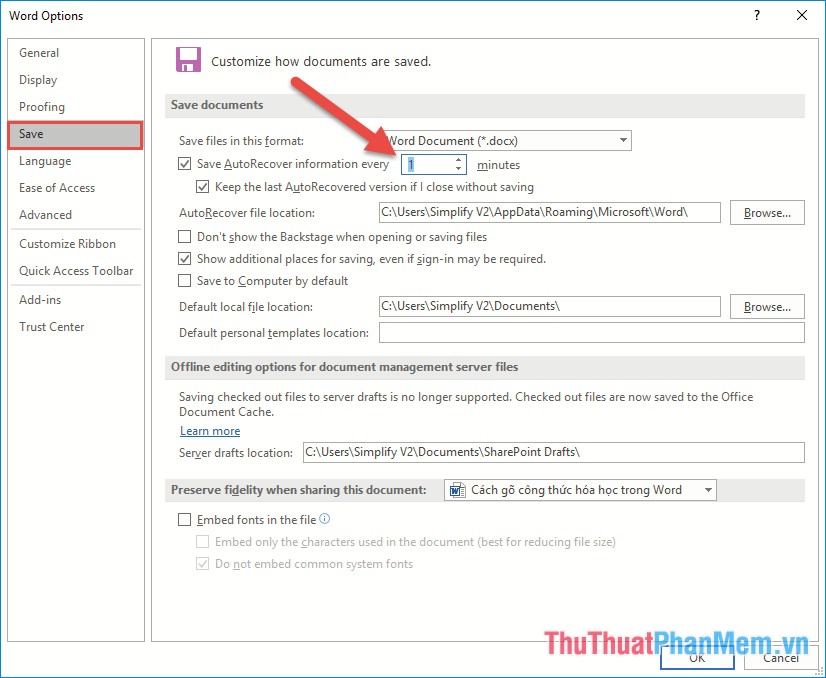
And to avoid the loss of data, put the feature to save files that have not been saved in Word in your easy-to-remember, easy-to-find folder by clicking Browse in the AutoRecover file locations section:

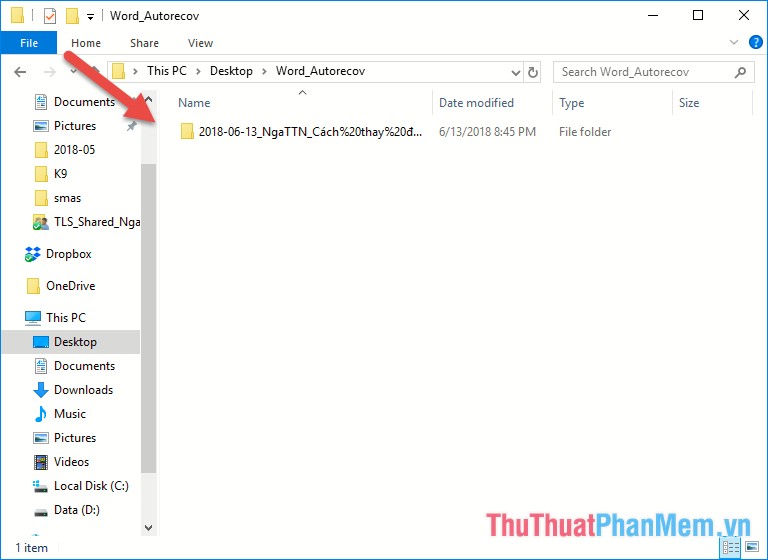
The example here creates the Recover folder on the desktop:

The results of that directory will contain the data file for some reason not yet saved, you can restore it:
Thus, the combination of setting the time of automatic saving (Save) and creating a folder to store data files that have not yet been saved is a great combination that helps you not lose data when editing documents but forget. manipulate save text.
Above are the sharing on how to change the time of automatic saving (Save) in Word. Good luck!
FAQ
What should I know about Change the Time Automatically Saved (Save) in Word?
Focus on the key features, requirements, limitations, and practical use cases explained in this guide.
How do I get the best results with Change the Time Automatically Saved (Save) in Word?
Follow the recommended steps, use current software or information, confirm compatibility, and review settings before major changes.
Are there any risks or limitations?
Potential limitations depend on compatibility, data quality, cost, privacy, support, and how the product or method is used.
Related Articles
 How to Change the Time Automatically Saved in Word 20073 minutes read
 How to Change the Auto-Save Time in Word 20132 minutes read
 Time Settings Are Automatically Saved in Excel2 minutes read
 Delete Wi-Fi Windows 10: How to Delete Wi-Fi Saved on Windows 10?4 minutes read
 How to Change the Wallpaper Automatically over Time on Android Phones3 minutes read
 How to Automatically Open a Website at a Specific Time5 minutes read
Reader Comments 0
Sign in with email or Google to join the discussion.