Table of Contents
This guide explains how to create Beautiful Covers in Word, with clear steps, practical tips, and important checks before you begin.

Article instructions on how to create beautiful covers in Word, please refer.
Method 1: Use the available cover templates of Word
Microsoft Word provides you with many cover templates, you can choose a cover template that matches the content in the Word document. You do the following:
Step 1: Choose a cover template
If you want to insert a cover template on the first page, just select Insert -> Cover Page -> left click on the cover template.
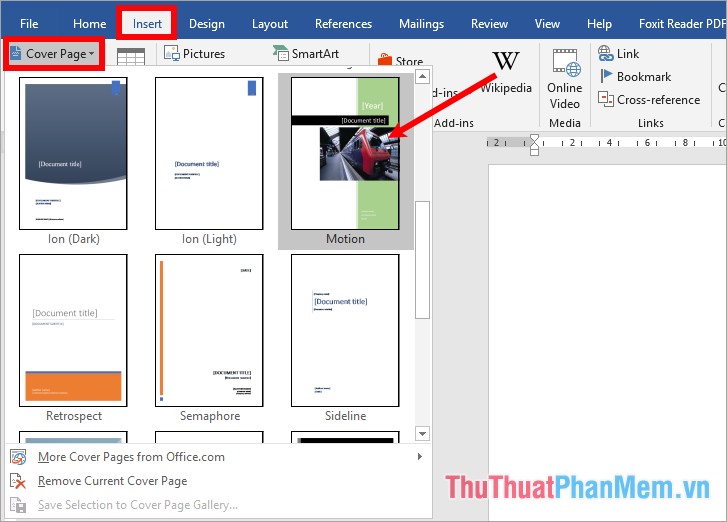
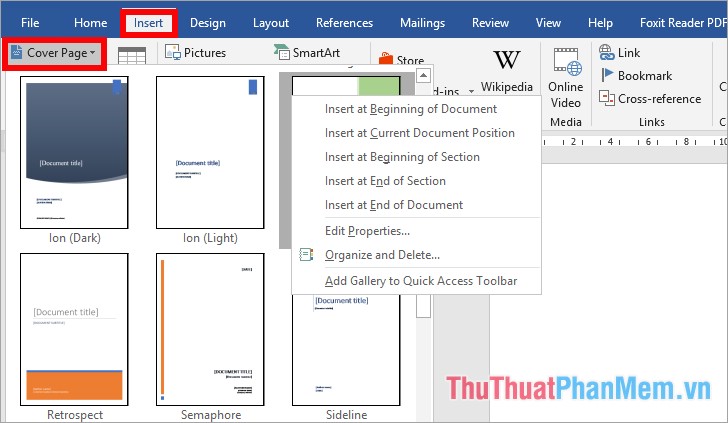
If you want to insert the cover template in a different position, you select Insert -> Cover Page -> right click on the cover template you choose. Here you have the placement options:
- Insert at Beginning of Document: insert at the beginning of the document.
- Insert at Current Document Position: Insert at the current position of document.
- Insert at Beginning of Section: insert at the beginning of the Section.
- Insert at End of Section: insert at the end of Section.
- Insert at End of Document: insert at the end of document.
Step 2: Edit the content of cover template
After you have inserted the cover template into the Word document, you only need to edit the title in the cover template to fit the document content. So you have a nice cover for your Word document.

Method 2: Create beautiful covers with tools in Word
You can also create beautiful covers for essays, thesis reports, internships, essays, etc.
First, you need to align the document, set the standard alignment for A4:
- Align the top margin ( top margin from the top edge): 20mm - 25mm (2cm - 2.5cm).
- Align the bottom (bottom margin from the bottom edge): 20mm - 25mm (2cm - 2.5cm).
- Align the left margin (the left margin is from the left edge): 30mm - 35mm (3cm - 3.5cm).
- Right alignment (right margin away from right edge): 15mm - 20mm (1.5cm - 2cm).
You can refer to the article guide alignment details here http://TipsMake. vn/cach-can-le-chuan-rong-word/
After choosing A4 size and standard alignment for your Word document, you begin to perform steps to create a beautiful cover:
Step 1: Create a border frame for the cover
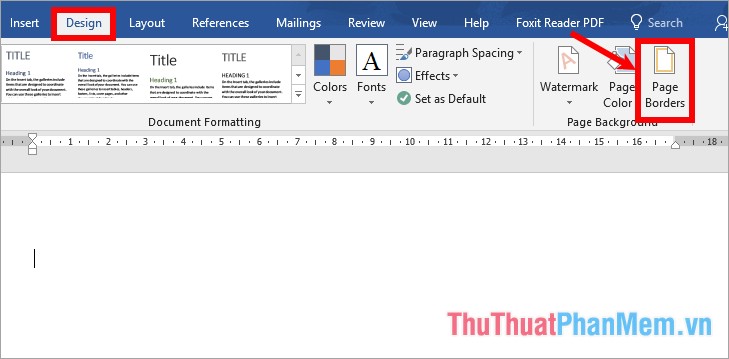
Put the mouse cursor in the first blank page of the document, then select the tab Design -> Page Borders.
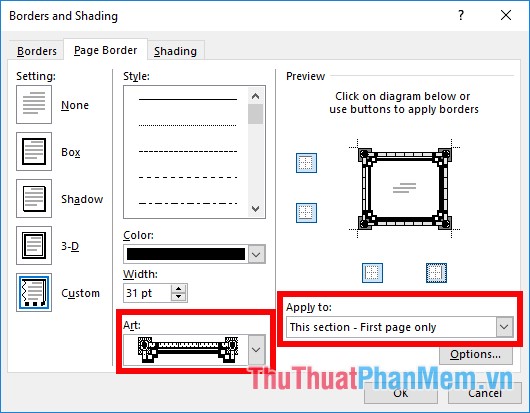
A Borders and Shading dialog box appears , select the art border in the Art section, in the Apply to you select This section - First page only (only add borders for the first page).
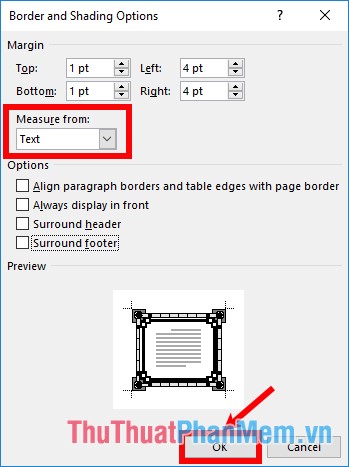
Next you select Options in the dialog box Border and Shading Options you select Measure from the Text , and unmarked in the box under the Options for the cover snap into curbside printed page. Click OK -> OK to close the two dialog boxes.
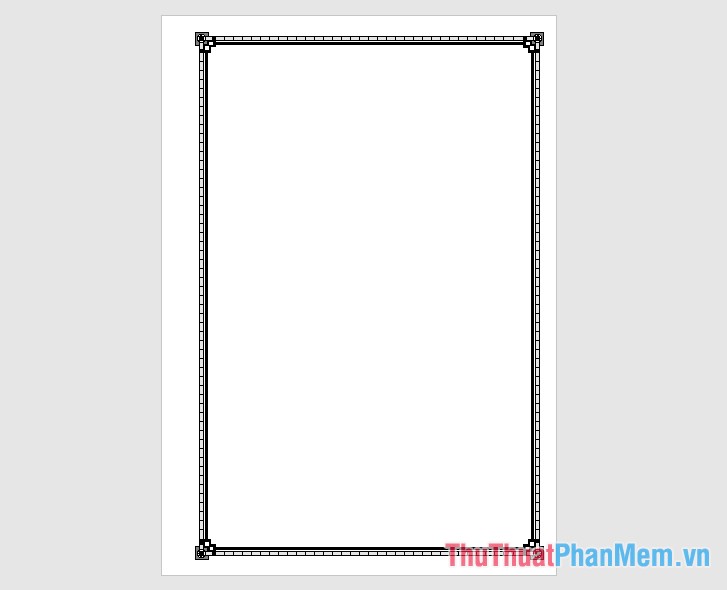
The cover frame after you finish adding:
Step 2: Add information for the cover
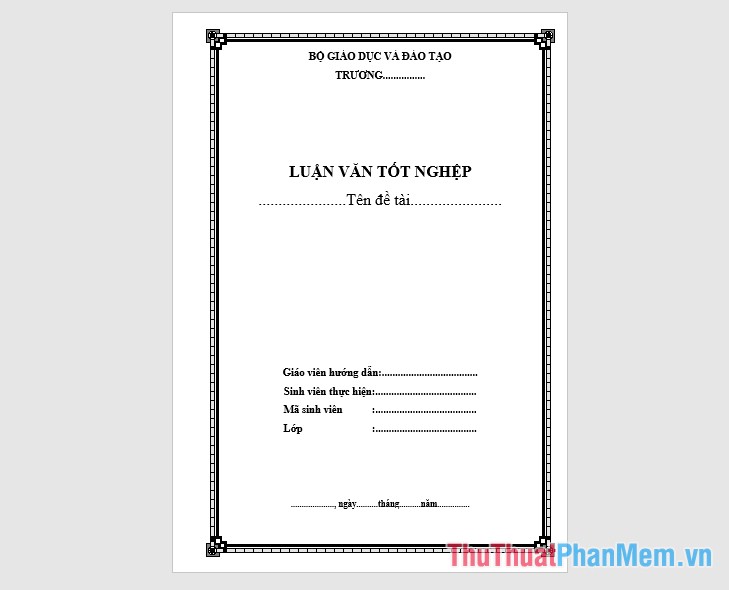
You can add a Text Box or enter the content directly for the cover, then align the position, the bold style, the font size accordingly, you can refer to the form below:
Step 3: Insert the appropriate image
To make your cover more beautiful and impressive, you can choose images, clip art suitable for the content of the essay and report. For example, you can insert images of books and pens, if the content of information technology you can get images on computers.

Step 4: Insert special symbols
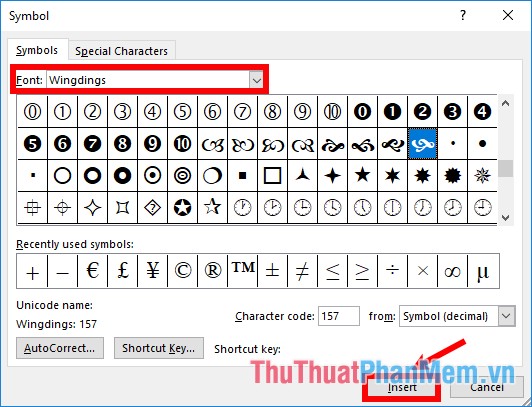
Select Insert -> Symbol -> More Symbols.
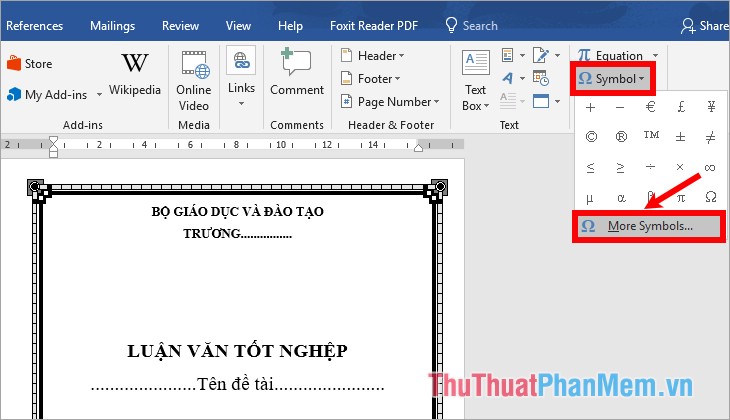
In the Symbol dialog box, select Wingdings (or Wingdings 2, Wingdings 3) in the Font section, you can select many decorative symbols and choose Insert to insert on the cover.
After editing, you have a beautiful cover page:
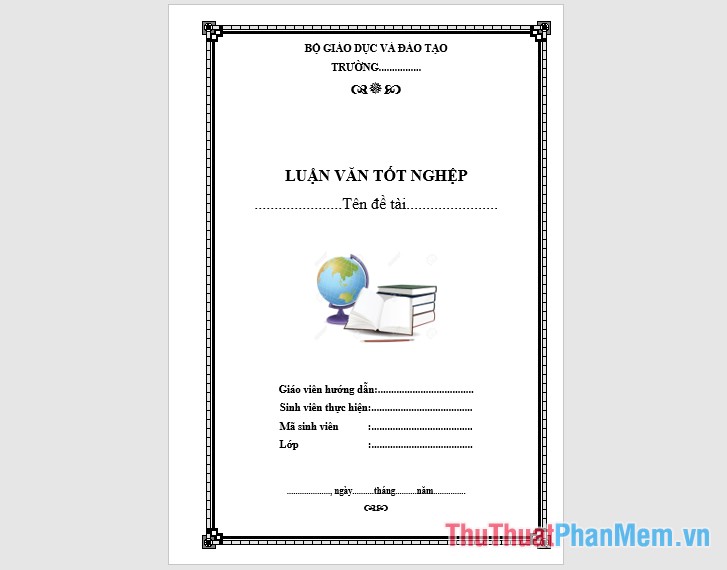
So with simple steps, you can create beautiful covers in Word. Good luck!
FAQ
What should I know about Create Beautiful Covers in Word?
Focus on the key features, requirements, limitations, and practical use cases explained in this guide.
How do I get the best results with Create Beautiful Covers in Word?
Follow the recommended steps, use current software or information, confirm compatibility, and review settings before major changes.
Are there any risks or limitations?
Potential limitations depend on compatibility, data quality, cost, privacy, support, and how the product or method is used.
Related Articles
 Create Beautiful Border Borders in Word3 minutes read
 Top 3 Websites to Create Beautiful Online Art Word4 minutes read
 How to Create Curved Fonts on Word - Artistic Curved Fonts5 minutes read
 How to Create a Cover Page in Word: How to Create Word Covers8 minutes read
 Top Tool to Create Avatar and Cover Photos 'Quality' for Facebook3 minutes read
 Create a Quick Dot (……………) LINE in Microsoft Word4 minutes read
Reader Comments 0
Sign in with email or Google to join the discussion.