How to Add a Header in Powerpoint
If you want to personalize your PowerPoint presentation with a consistent header, you'll need to manually position a text box or image at the top of the master slide design. PowerPoint does have a built-in 'header' tool, but it won't...
Table of Contents
Method 1 of 3:
Using an Image or Text Box as a Slide Header
-
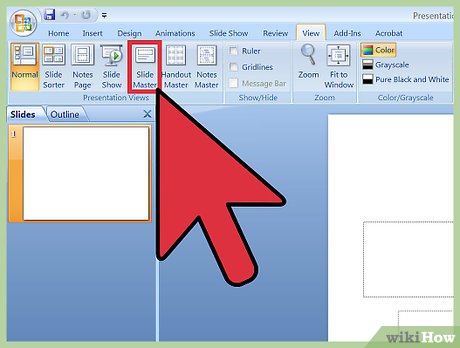
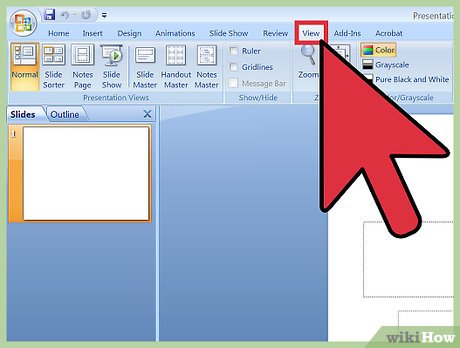 Click 'View,' then 'Slide Master.' You can add an image or string of text to the top of each slide by adding it to the Slide Master. The Slide Master contains all of the information that will repeat throughout the presentation, such as the background and default positioning of objects, and can be edited at any point during the creation of your presentation.
- On a Mac, click 'View,' 'Master,' then 'Slide Master.'
-
 Click the first slide in the Slide Master view. To make sure your text or image heading appears at the top of each slide, you'll need to work with the first slide in the presentation.
- All changes made to this slide will effect all other slides in the presentation.
-
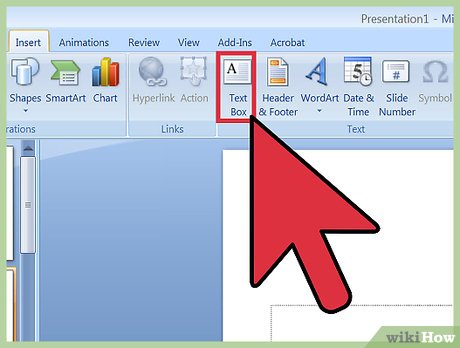 Insert a text box. To include a string of text at the top of every slide, click 'Insert,' then 'Text Box.' The cursor will turn into an arrow. Click and hold the mouse button while dragging the cursor to the left to create a box to type in. When you've reached an optimal size, let go of the mouse button, then type your header text.
- Select one of the alignment options (left, center, or right) from the 'Paragraph' area to align your text.
- To change the color or typeface, highlight what you've typed and choose a different option from the text formatting area in the toolbar above.
-
 Insert an image or logo. If you have an image you'd like to use as a header, click 'Insert,' then 'Picture.' Choose your image from the dialog box, then click 'Open' to insert it.
- To resize the new image without warping it, drag one of its four corners.
- To move the whole image, click inside the image and drag it.
-
 Insert Word Art. If you want to stylize some text with special effects, click 'Insert,' then 'Word Art.' Choose from one of the style options, then begin typing.
- In some versions of PowerPoint for Mac, Word Art is inserted by clicking 'Insert,' 'Text,' then 'Word Art.'
- To fine-tune the text's appearance, highlight what you've typed and use 'Text Fill' to change the color, 'Text Outline' to change the border, and 'Text Effects' to add effects like shadows and beveling.
-
 Click 'Close Master View' to exit Slide Master mode. You'll be brought back to your PowerPoint presentation in normal editing mode.
Method 2 of 3:
Adding Headers to Handouts and Notes For Printing
-
 Click 'View', then either 'Notes Master' or 'Handouts Master.'[1] Headers will only appear on the printed handout or notes version of your presentation, not the slide show you present on a screen. Notes and Handouts headers are limited to text-only.
- Choose 'Notes Master' if you'd like to view and print your presentation as a single slide-per-page situated above a lined area intended for note-taking.
- Choose 'Handout Master' if you intend to print the presentation as a series of slides (with no note-taking area) on a single page.
-
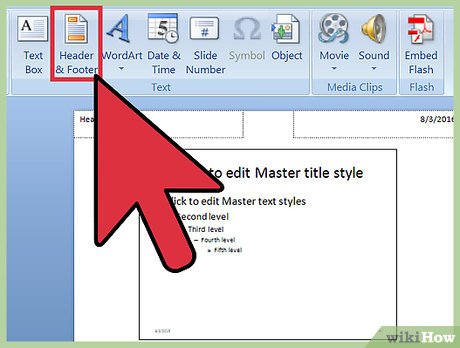
 Click 'Insert,' then 'Header & Footer.' You'll automatically be brought to the Notes and Handouts tab of the 'Header & Footer' screen.
 -
 Check 'Date and Time' and choose a time setting. Choose between 'Update automatically' and 'Fixed' as a display type. If you choose 'Fixed,' type the date in the blank.
 -
 Check 'Header,' then type your desired header text into the field. You can also choose to add a footer here (which will appear at the bottom of the notes page or handout) by checking 'Footer' and entering your desired information.
 -
 Click 'Apply to All' to save your changes. This will add your header (and footer, if you added one) to every printed page. You can return at any time to modify your header settings.
 -
 Adjust the Header location. If you want to move the header to another place on the page, hold your mouse cursor over one of the lines surrounding it until a 4-way arrow cursor appears. Hold the mouse button down and drag the header to another location.
- Moving the header to another location on the Notes Master will not move it on the Handout Page—you'll have to switch to the Handout Master on the Views tab if you want to reposition the header that style of printout.
- Footers can also be moved this way.
-
 Click 'Close Master View.' This action will return you to the PowerPoint slides.
 -
 Print a handout or notes page. After pressing print on your PowerPoint presentation, find the 'Print What' area on the print dialog box. It's set to 'Slides' by default, but you can change this to either 'Handouts' or 'Notes Page.'
- If you select 'Handouts,' you'll see options to change the amount of slides per page. The default is 6, but if you want people to be able to read the content on the page, you might want to go with 2 or 3.
- For the 'Notes Page,' each slide will print on its own page with a series of lines below for note-taking.
Method 3 of 3:
Using a Footer
-
 Click 'Insert,' then 'Header & Footer.'[2] If you don't mind where the recurring text appears, one way to include a string of text on each slide is by using a footer. The text will appear at the bottom of each slide rather than the top.
- In PowerPoint 2003 and earlier, click 'View,' then 'Header & Footer.'
- If you really needed a uniformly-centered header on the top of the page, try using an image or text box instead.
-
 Place a check in the box next to 'Date and Time.' If you want the date and time on each slide in your presentation to display as the current date and time, select this option.
 -
 Create a single date to be displayed on every slide. If you'd prefer the date on the slide remain the same no matter when you show the presentation, type the date into the box that says 'Fixed.'
 -
 Check 'Footer' and add your own text. If you want to standardize a bit of text other than the date, type your desired text into the box. The text you type here will appear on every slide.
 -
 Click "Apply to all" to propagate your changes. This will add a recurring footer at the bottom of every slide.
 -
 Drag the footer to the top of the slide. If you want the footer to appear at the top of a slide (like a header), click the footer text until it is surrounded by a dotted box, then drag it to the top of the slide.
- This action will not propagate to the other slides in your presentation. You'll have to move the footer on each individual slide.
Was this article helpful?
Your feedback helps us improve.
Related Articles
 How to insert Header and Footer on PowerPoint when printing3 minutes read
 How to create Header in Microsoft Excel4 minutes read
 Create headers and footers (Header and Footer) when printing in PowerPoint2 minutes read
 Header fields in HTTP29 minutes read
 How to create bullets in PowerPoint4 minutes read
 Header File in C4 minutes read
Reader Comments 0
Sign in with email or Google to join the discussion.