How to check and access UEFI settings on Windows 10
If you want to access UEFI firmware settings to change the default boot order or set password UIFI, you do not know how to do it. You can refer to the steps taken to access UEFI settings in the following article of Network Administration..
If you want to access UEFI firmware settings to change the default boot order or set password UIFI, you do not know how to do it. You can refer to the steps taken to access UEFI settings in the following article of Network Administration.
1. Check if your computer supports UEFI?
To check if your computer is using BIOS or UEFI (EFI), follow the steps below:
Step 1:
Open your computer and proceed to log in to your account.
Step 2:
Open the Windows installation drive (usually C drive).
Step 3:
On the Windows 10/8 installation drive, open the Windows folder, then find and open the folder named Panther , then open the text file named Setupact on Notepad.


Step 4:
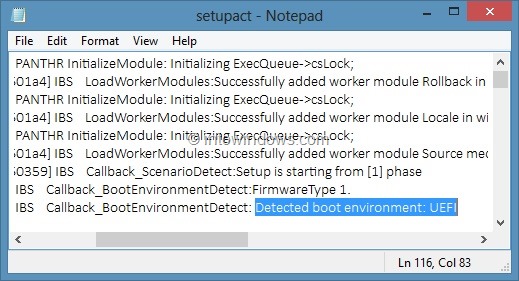
On the Notepad file, you search for the item named Detected Boot Environment. You can use the Windows + F key combination to search the Detected Boot Environment section quickly.
At the end of the Detected Boot Environment section will display the BIOS or UEFI. If your computer supports UEFI, you will see Detected Boot Environment: UEFI .
2. Access UEFI settings on Windows 10
2.1. Way 1
Step 1:
Save all operations and close all running programs on your Windows 10 computer.
Step 2:
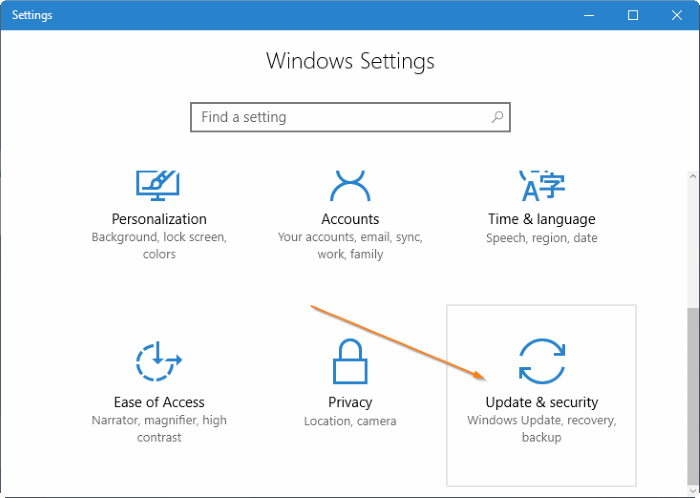
Open the Settings application on your Windows 10 computer by clicking the Settings icon on the Start Menu or pressing the Windows + I key combination.

Step 3:
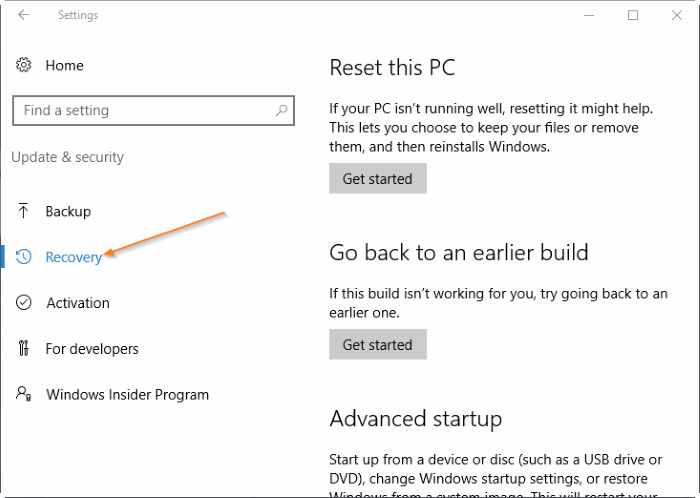
On the Settings window, click the Update & security icon, then click Recovery.
Step 4:
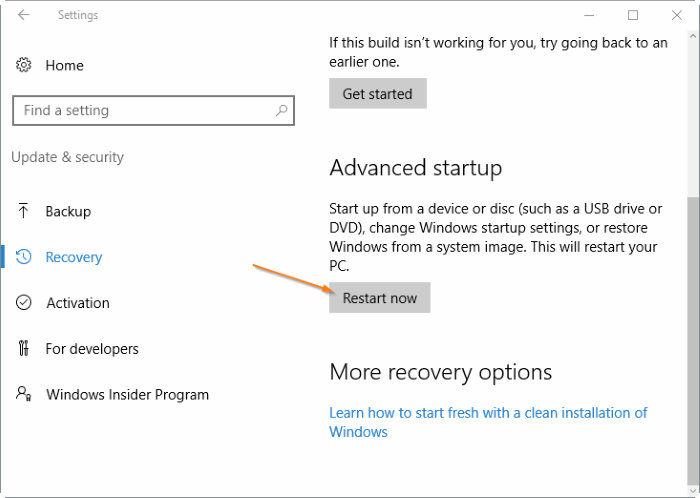
Under Advanced startup , click Restart to restart your computer.
Step 5:
When the Choose an option screen appears, click Troubleshoot to access the Troubleshoot screen.

Step 6:
On the Troubleshoot screen, click Advanced options .

Step 7:
When the Advanced options screen appears, click UEFI Firmware Settings .

Note: If UEFI Firmware Settings option does not appear, your computer does not support UEFI.
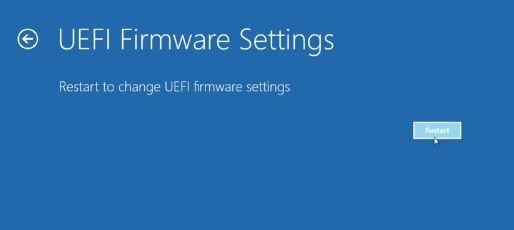
Step 8:
Finally, when the UEFI Firmware Settings screen appears, attach the message 'Restart to change UEFI firmware settings' , click Restart to restart your computer and access UEFI firmware settings.
2.2. Use Command Prompt to access UEFI settings
Step 1:
Right-click the Start button on the Taskbar to open the Power User Menu, then click Command Prompt (Admin) to open the Command Prompt under Admin.
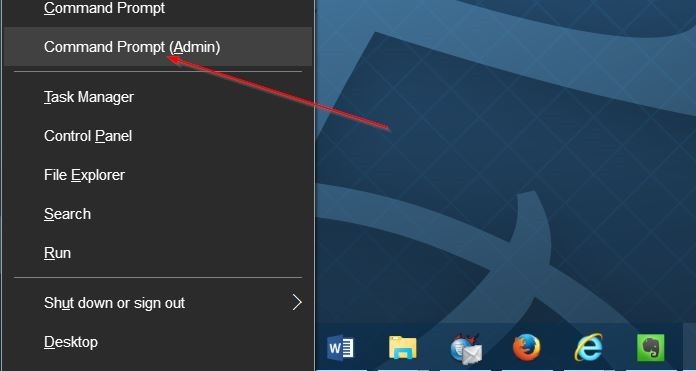
When the User Account Control message window appears, click Yes .
Step 2:
On the Command Prompt window, enter the following command line and press Enter:
shutdown.exe / r / o
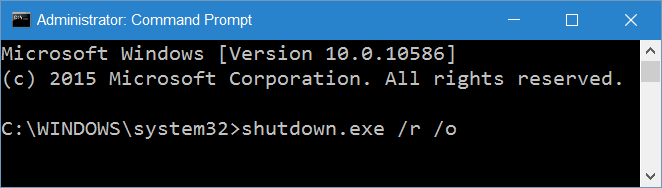
You should now see the message 'You are about to be signed off', your computer will reboot in a few minutes.
Step 3:
After your computer has finished booting, do the same steps 5,6,7 and step 8 as in way 1 to access the UEFI installation.

2.3. Different ways
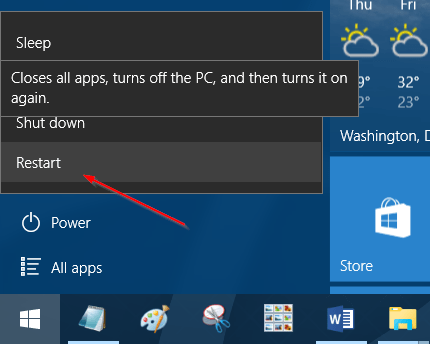
Step 1:
Open Start Menu, then click on Power button , press and hold Shift key then click Restart button .
Step 2:
After your computer has finished booting, now you are in the Choose an option screen, perform steps 5,6,7 and step 8 similar to above 1 to access UEFI settings.
Refer to some of the following articles:
- How to re-activate Windows 10 after changing the hardware?
- Activate "God Mode" on Windows 10, 8 and 7
- Instructions for fixing errors do not turn off Windows 10 computers and laptops
Good luck!