Guide to filming screen with CamStudio
CamStudio is a program with powerful features to record the activities taking place on your computer screen. The movie will be recorded as Flash (SWF) or AVI format.
CamStudio is a program with powerful features to record the activities taking place on your computer screen. The movie will be recorded as Flash (SWF) or AVI format. CamStudio is completely free, simple to install, easy to use. You can record the entire computer screen, or an area of the screen of your choice. Here I will introduce you how to use CamStudio to be able to record a good quality computer screen.
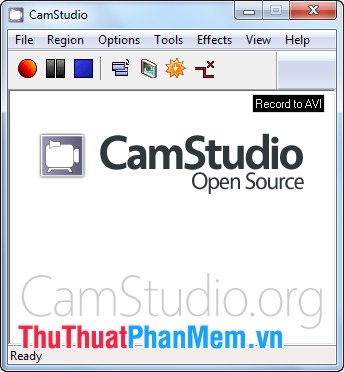
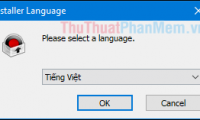
First of all, download the CamStudio program here. You unzip and run the file CamStudioSetup.exe to install, when opening the program will have the following interface:
The main option buttons of the program:
- Record (
 ): Click this button the program will start recording the screen.
- Pause (
 ): During screen recording, you can press this button to pause recording.
- Stop (
 ): Finish recording the screen.
- Toggle view (
 ): Used to collapse the interface of the program.
- Screen Annotainons (
 ): Click this button, you can adjust and add content to captions in the video.
- Record to Flash AVI MP4 (
 ): By default when saving the movie, the program will save it as AVI, this button will help you convert Flash (SWF) or MP4.
Step 1: Set other options before starting screen recording.
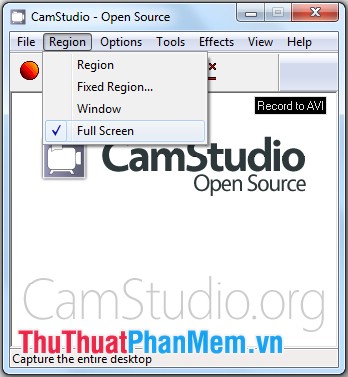
- Choose the video size: Go to Region option in the program interface, there are some options for you.
+ Full Screen: Record all computer screens.
+ Region: You can choose the size of the screen you want to record by setting the screen frame to suit your requirements.
+ Fixed Region .: Choose an arbitrary width, customize the screen size to be rotated.
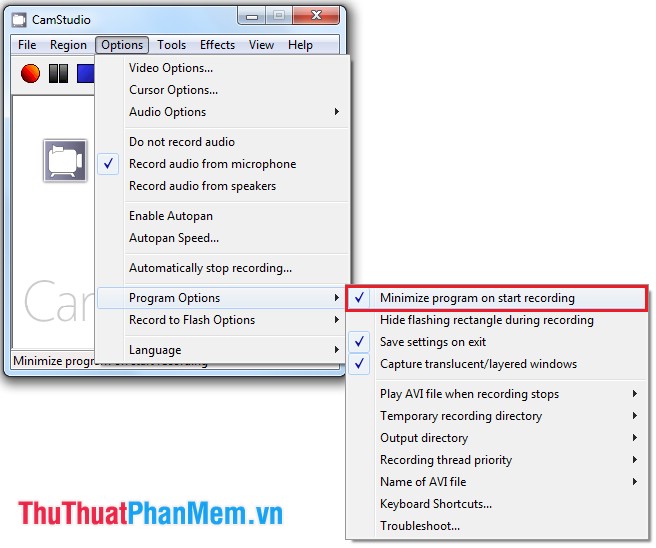
- To minimize the screen of CamStudio before starting to record the screen, and the CamStudio program does not appear in the movie, select Options -> Program Options -> Minimize program on start recording.
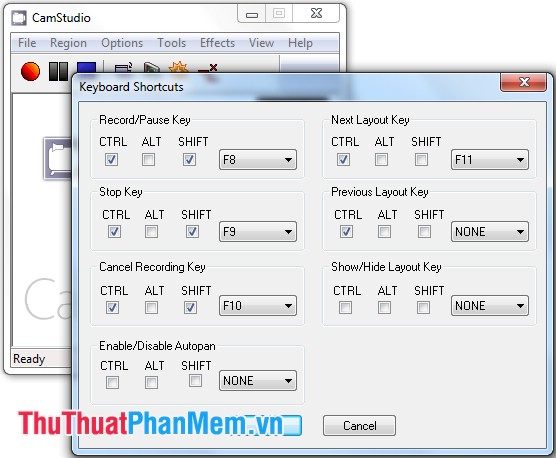
- To not have to open CamStudio to stop recording or finish recording you can use the shortcut key combination. Define the shortcut for the Stop and Pause you choose: Options -> Program Options -> Keyboard Shortcuts .
- Record sound as well as actions on the screen, select Options -> Record audio from speakers.

If you want to add sound through your microphone, select Options -> Record audio from microphone .
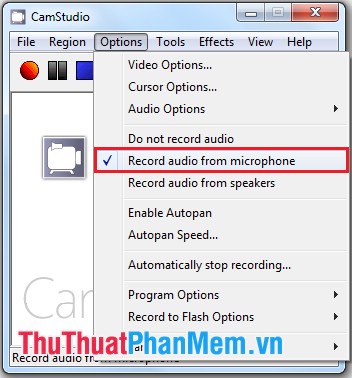
(If it does not, select Options -> Audio Options -> Audio Options for Microphone ).
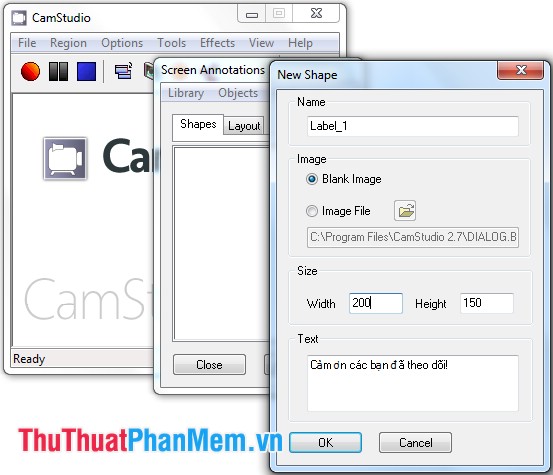
- Add captions on the screen, select the icon
 or select Tools -> Screen Annotations .
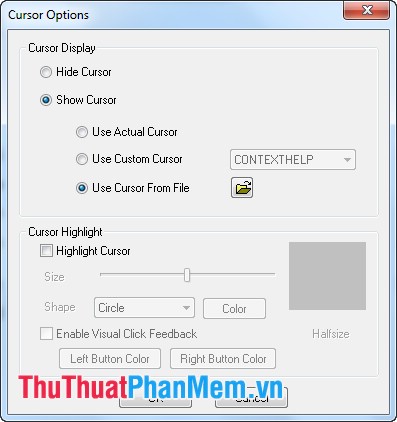
- Display or hide the mouse cursor during the screen recording, you select Options -> Cursor Options .
+ If you want to remove the cursor, select Hide Cursor .
+ If you want to show mouse pointer during recording, select Show Cursor . Select the icon
 to select your favorite mouse.
There are also a number of other custom features, you can learn more while using the program CamStudio .
Step 2: After setting up some necessary settings, you can start recording the screen.
Select the icon
 (or choose File -> Record ) to start recording.
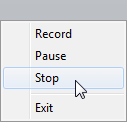
During the recording you can use the shortcut combination set above to pause or end recording. Alternatively, right-click the CamStudio icon in the taskbar and choose Pause or Stop .
Step 3: When you press Stop to finish the screen recording process, the program will ask you to save the recorded file. You choose where to save the file and the file name and choose Save to save.

The simple steps above can help you use the screen recorder with CamStudio program , to have better quality video, you can learn more about the features of CamStudio during the process of learning and using the program. . Good luck!
Was this article helpful?
Your feedback helps us improve.
Related Articles
 Filming, video screen with Bandicam software3 minutes read
 How to record a screen with VLC Media Player?2 minutes read
 Why is the screen often black and flashing when filming?5 minutes read
 Instructions for filming the screen with CyberLink Youcam3 minutes read
 Record simple screen videos with Screencastify on Chrome5 minutes read
 5 Top Points to Consider For High-Quality Video Editing6 minutes read
Reader Comments 0
Sign in with email or Google to join the discussion.