Instructions for upgrading from Windows 10 32-bit to 64-bit
If your hardware supports 64-bit versions of Windows 10, the crime does not "upgrade" from the 32-bit version to 64-bit and try the new version.
1. Is Windows 10 64-bit compatible with your computer?
Only 64-bit versions of Windows can be installed on computers with compatible hard drives. So if you want to switch from 32-bit Windows 10 to 64-bit, the first thing you need to do is check if the 64-bit version is compatible with your computer?
1. Press the Windows + I key combination to open the Settings menu .
2. On the Settings interface click on System.
3. Click About.

4. At System Type, if you see information: 3 2-bit operating system, x64-based processor means that your Windows 10 computer is running 32-bit version that supports 64-bit version .
If the information is 32-bit operating system, x86-based processor means that your Windows 10 computer does not support the 64-bit version.
In addition, you can open the System Information to view the information above:
1. Open Start Menu, enter System Information in the Search box and press Enter.
2. At the System Summary section in the right pane, look at the list of left pane to find System Type. If you see information that is x64-based PC , your computer can run 64-bit versions of Windows 10.
In contrast, if you see the x86-based PC information , you can not install the 64-bit version of Windows operating system.

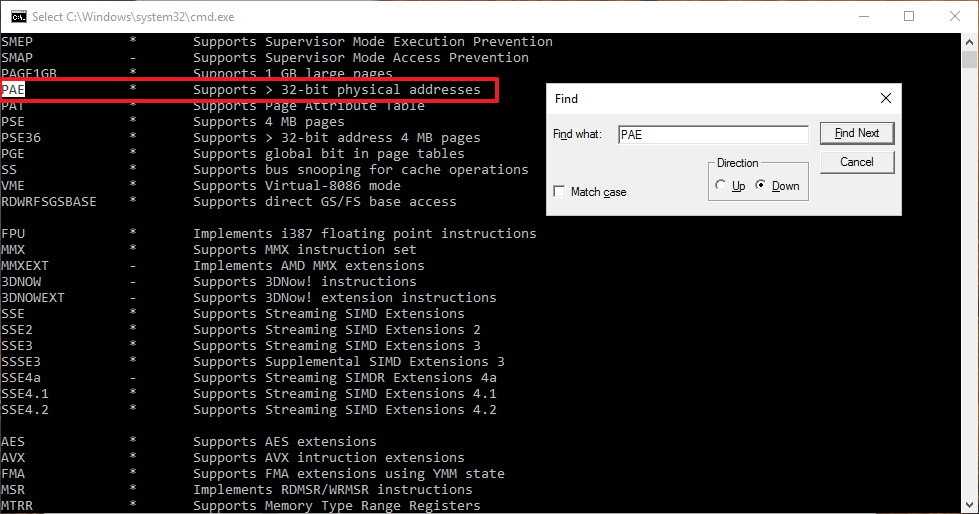
Also some computers running Windows 10 require processors to ensure some features. According to Microsoft support page, on Windows 8.x operating system and later versions, the operating system requires 3 features: Physical Address Extension (PAE), No-eXecute (NX), and Streaming SIMD Extensions 2 ( SSE2). In addition Windows 10 (64-bit) also requires the CMPXCHG16b (CX16) feature to be present in the processor.
The Windows Setup wizard always checks for hardware compatibility before starting the installation. If this feature is not supported, you cannot install Windows 10.
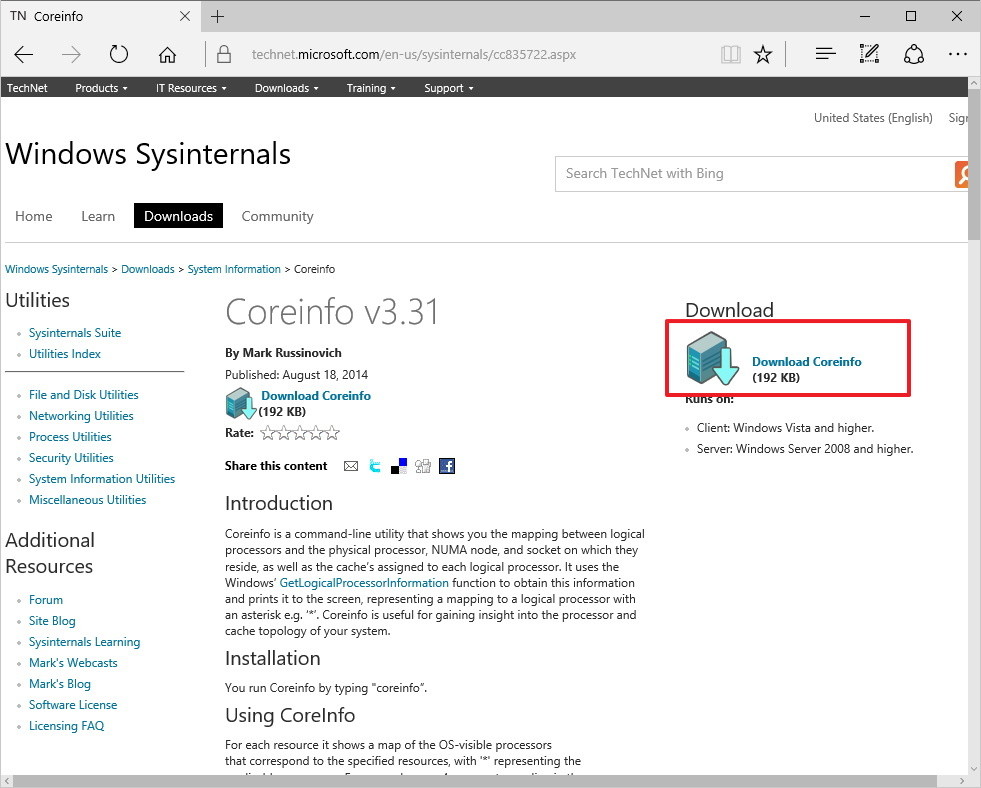
If you want to check if your computer supports this feature, you can use the Coreinfo tool from Windows Sysinternals.
1. Access Windows Sysinternals and download Coreinfo to your device and install.
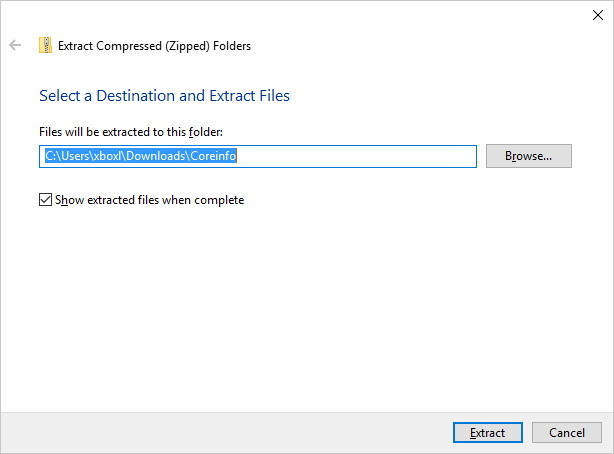
2. Open the Coreinfo folder you just downloaded, right-click the ZIP folder and select Extract all.
3. After the Coreinfo folder opens, click File and select Open command prompt .

4. Enter the Coreinfo command into the Command Prompt window and press Enter.
5. Coreinfo will list processor information.
If four features PAE, NX, SSE2 and CX16 appear, you can upgrade to Windows 10 64-bit.
2. Ensure the device drivers are 64-bit versions
In addition to the above factors, you must ensure that some other factors on the system such as video card and sound card are compatible with the 64-bit version, the reason is that 32-bit drivers will not work.
3. Proceed to back up the system
To avoid some bad cases during the upgrade process, it is recommended that you back up your system before upgrading.
Note : You should back up individual files to a USB drive or OneDrive because these files will be deleted during the installation process.
4. Wipe the Windows 10 installation
There is no direct link from 32-bit version of Windows 10 to 64-bit version. Therefore the only solution is to clean up the operating system installation.
Note:
Before proceeding to delete the installation, you should make sure that the copy of Windows 10 is activated.Go to Settings => Update & security => Activation to see the information.
4.1. Create Windows 10 installation media
1. Connect your USB drive, require a USB drive with a minimum capacity of 4 GB
2. Access to Microsoft's Windows 10 download page.
3. Click the Download tool now button to download and save the Media Creation Tool on your Desktop.

4. Double-click the file MediaCrationTool.exe .
5. Click Accept to accept the terms.
6. Select Create installation media for another PC.
7. Click Next.
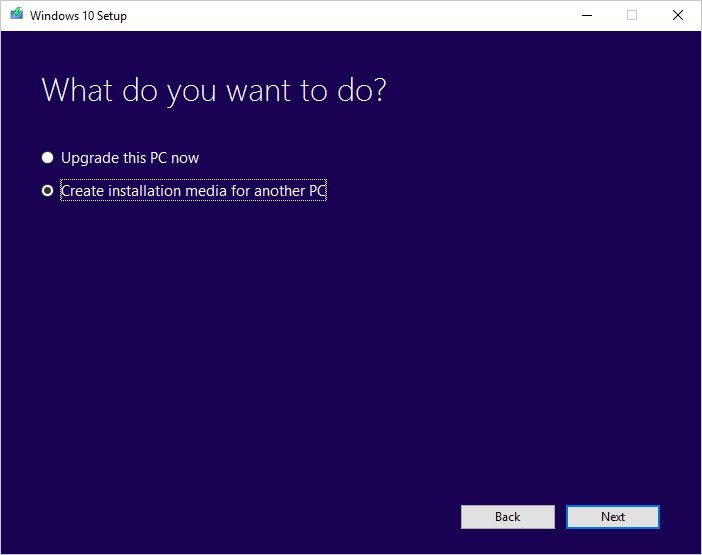
8. Remove the option Use the recommended options for this PC .
9. Select the language, edition and choose Architecture as 64-bit (x64).
10. Click Next.

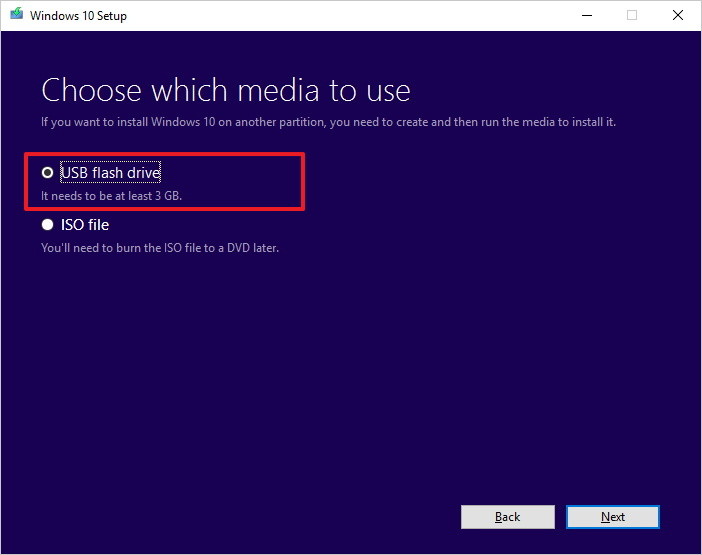
11. Select the USB Flash drive option .
12. Click Next.
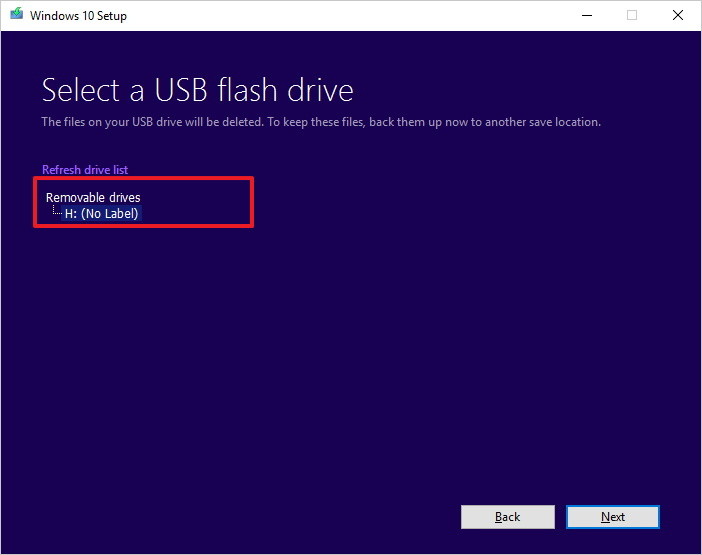
13. Select your USB drive.
14. Click Next.
15. After Installation Media is installed, close the Media Creation Tool.
4.2. Install Windows 10 64-bit
1. Restart your computer connected to Installation media and start installing Windows 10.
2. On the Windows Setup window, click Next.
3. Click Install now.
4. On previous versions you have enabled Windows 10, so you can skip the Product key step.
5. Accept the terms and click Next.
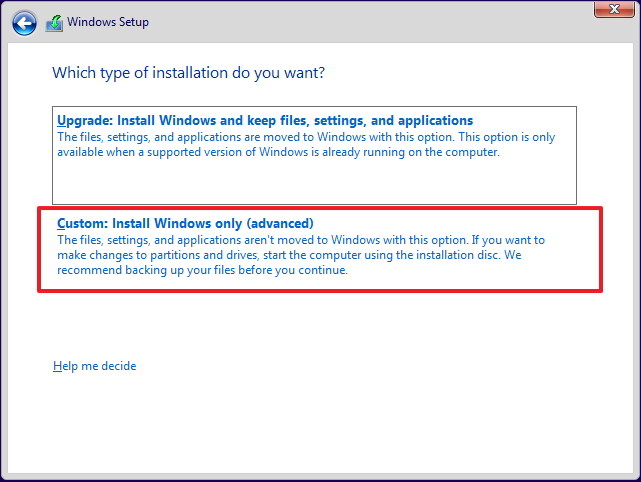
6. Custom: Install Windows only (advanced) .
7. Select and delete the system partition, usually Drive 0 Partition 1 and Drive 0 Partition 2 .

8. Click on Next and follow the on-screen instructions to complete the installation process.
After installation is complete, go to Settings => Windows update to download the latest update and driver version.
If some drivers are not available on Windows Update, you can check the manufacturer's website to download and install the necessary 64-bit driver version.
Refer to some of the following articles:
- When and how to defragment hard drives on Windows 10?
- Instructions for activating and using Remote Desktop on Windows 10 computers
- Fix Windows 10 error with just one click with FixWin
Good luck!
You should read it
- Instructions for upgrading Windows XP to Windows 7 or Windows 10
- DVD upgrade to Windows 8 costs 70 USD
- Microsoft details the upgrade process from Windows 7/8/10 to Windows 11
- How does Windows 7, 8 not automatically upgrade to Windows 10?
- This is why you should say goodbye to Windows 7 and upgrade your device to Windows 10
- How to Upgrade Windows 7 to Windows 8
 How to create a new User on Windows 10 using Computer Management and Control Panel
 Steps to restore Windows Store on Windows 10 after removal
 Instructions 2 simple ways Reset Windows 10 (The last part)
 Error missing Disk Cleanup on Windows 10/8/7, this is a fix
 Fix Accessories missing on Windows 10 Start Menu
 Create a tone when pressing Caps Lock, Num Lock, or Scroll Lock Windows 10