Flash - Water drop effect
Tutorial to make water droplets effect fall in Flash ...
1. Create a file with the parameters shown in Figure 1

Figure 1
2. Using the Oval Tool, remove the border color, select the gray fill color, draw an oval near the top edge of the canvas, then use the Selection Tool to adjust it to look like a drop:
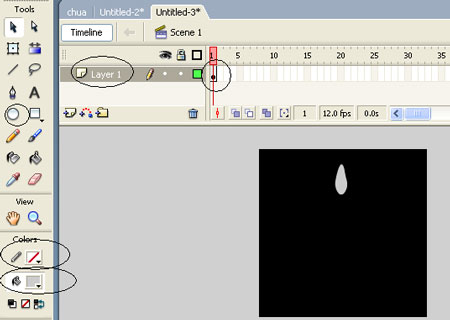
Figure 2
3. Right-click Frame 15 and select Insert KeyFrame

Figure 3
4. Use the down arrow on the keyboard to drop the water:
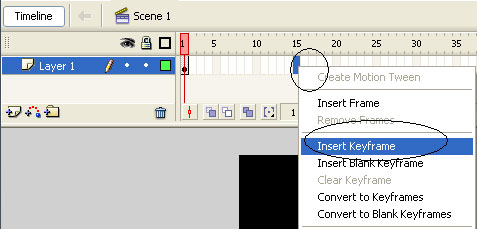
Figure 4
5. At the new location of the water drop, right-click it and select Free Transform

Figure 5
6. Use the mouse to adjust the drop of water:
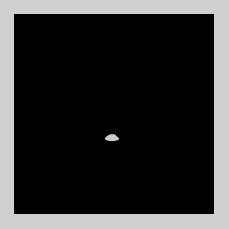
Figure 6
7. Lock the existing layer and create a new layer:
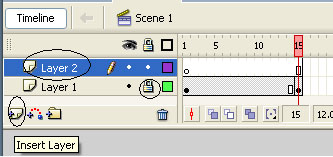
Figure 7
8. Right-click Frame 15 of the new layer and select Insert KeyFrame:
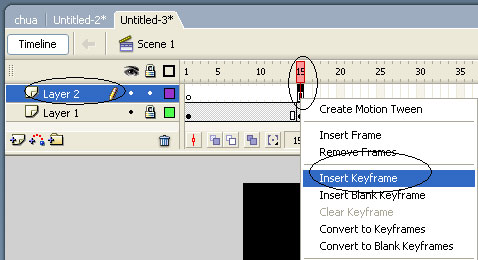
Figure 8
9. Also at Frame 15, select the Oval Tool, remove the fill color, set the fill color to gray and draw an oval:
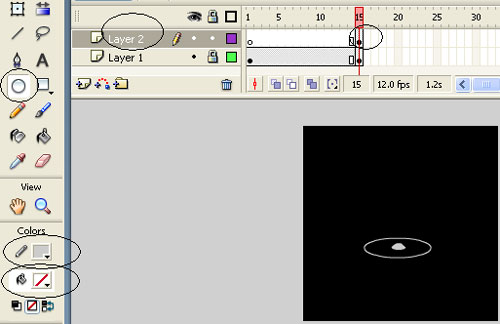
Figure 9
10. Right-click Frame 25 and select Insert KeyFrame:
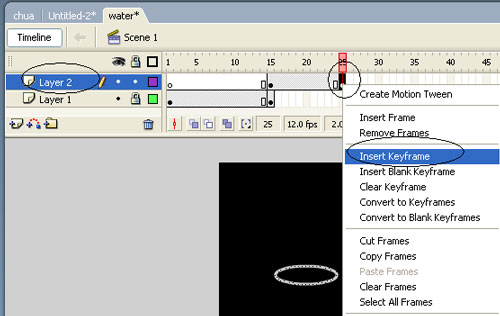
Figure 10
11. Select Edit> Copy, then Edit> Paste in Place to create a new oval right at the old oval position:
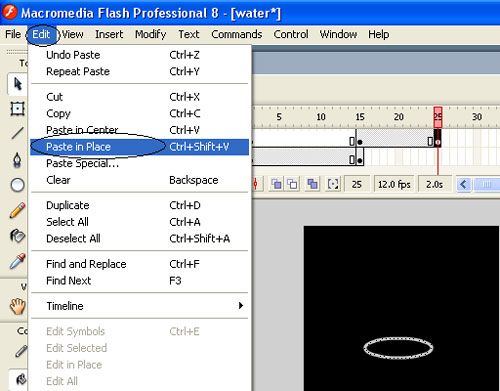
Figure 11
12. Right-click on the new oval and select Free Transform:
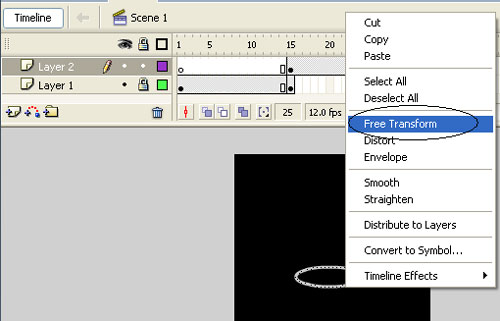
Figure 12
13. Press the Alt, Shift keys and use the mouse to adjust the big old oval a little bit:
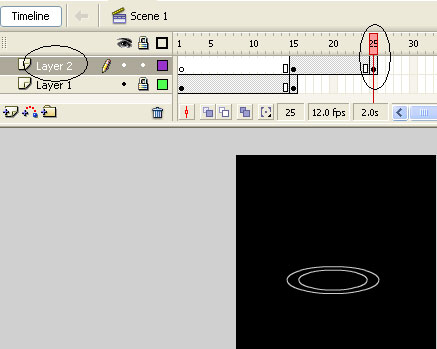
Figure 13
14. Do the same Step 10 13 to get new ovals at Frame 35, 45:
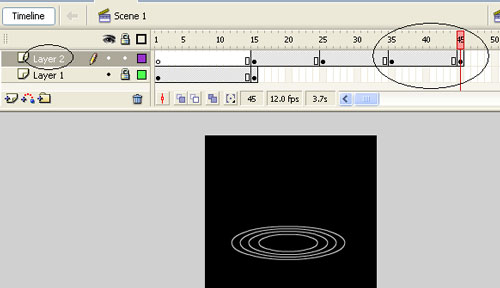
Figure 14
15. Lock this layer, unlock the layer below, left-click and any place between Frame 1 and Frame 15, in the Tween section of the Properties panel, select Shape:
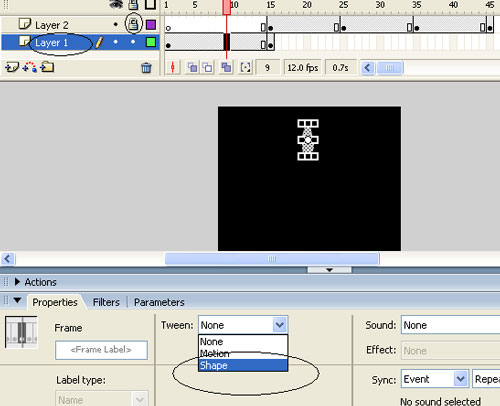
Figure 15
16. Do the same Step 15 for the upper layer:
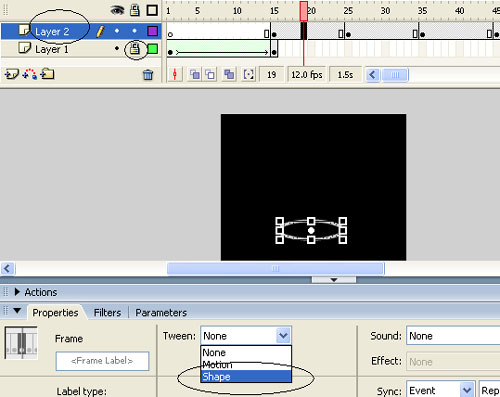
Figure 16
17. Press Ctrl + Enter to check the results, download the original file here.
Was this article helpful?
Your feedback helps us improve.
Related Articles
 Macromedia Flash - Water bubble effect4 minutes read
 What is hydrogen water? What does hydrogen water do for health?6 minutes read
 Macromedia Flash - The spotlight2 minutes read
 Macromedia Flash - Product image advertising effects5 minutes read
 Macromedia Flash - Running text effect2 minutes read
 Design a drop of water that will replace rabbit ears on smartphones in 2019?2 minutes read
Reader Comments 0
Sign in with email or Google to join the discussion.