Flash - Strange menu
Tutorials make strange menus in Flash.
Strange Menu
1. Create a file with the parameters shown in Figure 1:

Figure 1
2 Select the Oval Tool, remove the border color, click the small triangle in the fill color to bring up the color palette, and select the color as shown in Figure 2.
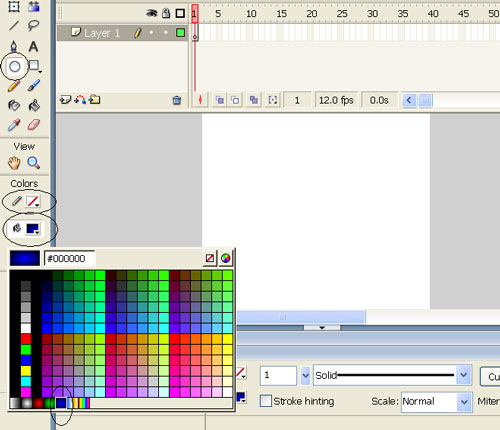
Figure 2
3. Draw a circle (press add Shift key when drawing) on the canvas and right-click it and select Convert to Symbol .
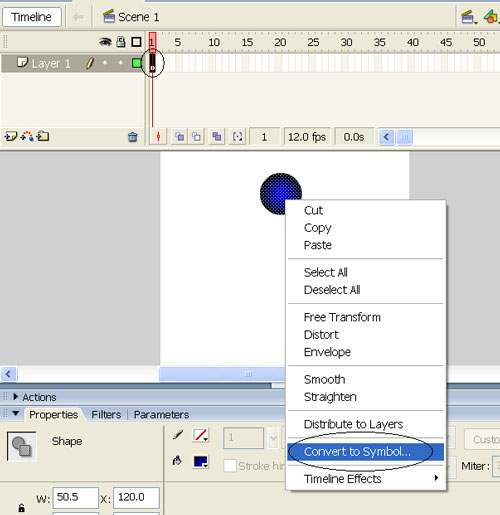
Figure 3
4. In the dialog box that appears, select Movie Clip. Double click on the newly created Movie Clip to enter it. Right-click Frame 20 and select Insert KeyFrame

Figure 4
5. At Frame 20, adjust the circle's color to red as shown in Figure 5

Figure 5
6. Click on the text Scene 1 to return to the main frame
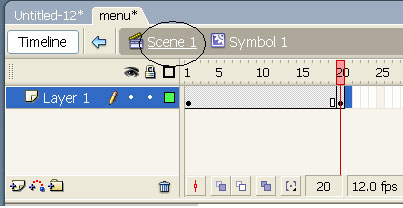
Figure 6
7. Click on the circle on the canvas and press Ctrl-C to Copy it to the clipboard, for later steps.
8. Right-click Frame 5 and select Insert KeyFrame
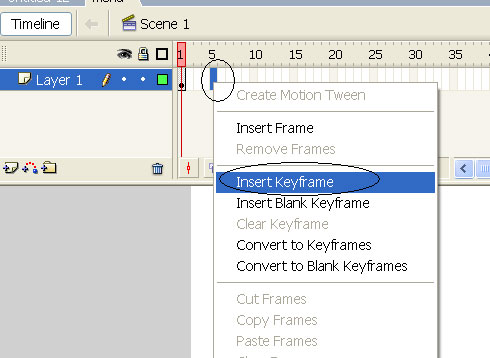
Figure 7
9. Right-click Frame 20 and select Insert KeyFrame

Figure 8
10. Click on the circle on the canvas to select it. Select Modify> Transform> Flip Vertical
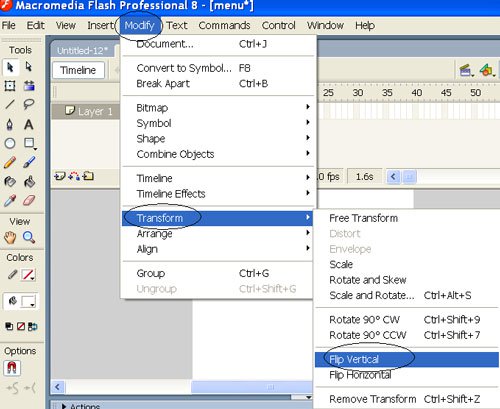
Figure 9
11. Right-click between Frame 5 and Frame 20 and select Create Motion Tween
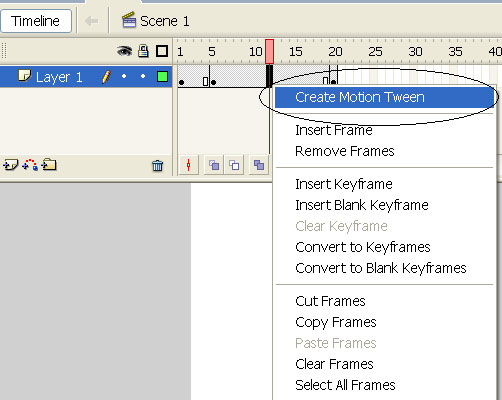
Figure 10
12. Right-click Frame 21 and select Insert KeyFrame, then press Ctrl-V to paste the circle we have saved on the clipboard in Step 7
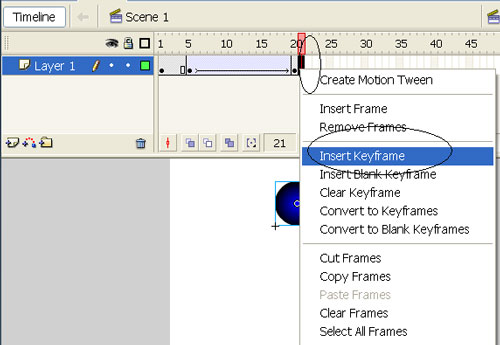
Figure 11
13. Do the same for Frame 22, 23. Select Window> Align and select 2 items as shown in Figure 12 to get 4 equally spaced circles.
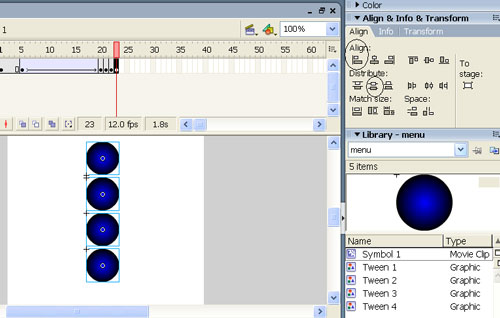
Figure 12
14. Lock the existing layer, create a new layer, select the Oval Tool, remove the border, select the red fill color and draw a circle that covers the blue circle in the layer below.
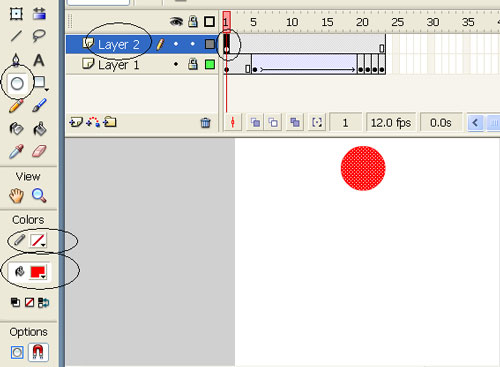
Figure 13
15. Right click on it and choose Convert to Symbol .
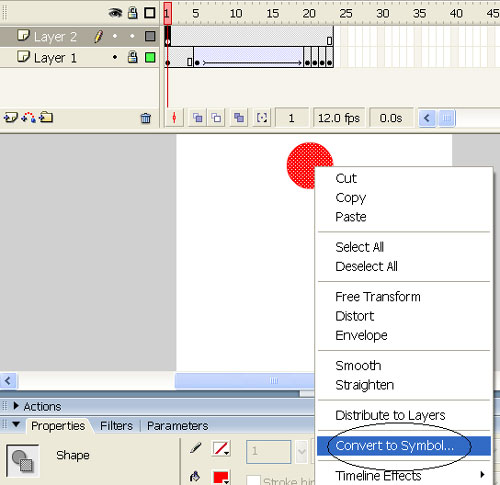
Figure 14
16. In the dialog that appears, select Button. Double click on the red circle to enter it. Use the mouse to drag the dot at the Up position through the Hit position
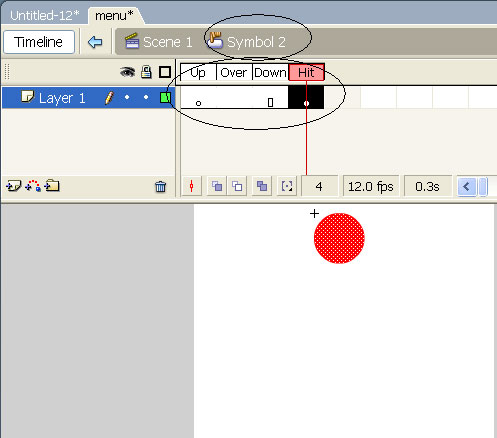
Figure 15
17. Click on Scene 1 to return to the main frame, if done correctly, you will get the result as shown in Figure 16
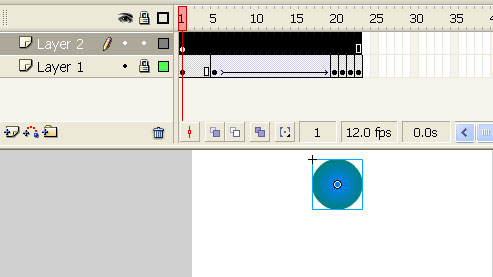
Figure 16
18. Click on the newly created Button, select Window> Actions to open the Actions-Button panel (note that you have to do Actions - Button!) And then enter the following commands:
  on (rollOver)
  {
  gotoAndPlay (5);
  }
  on (release)
  {
  getURL ("https://quantrimang.com");
  }
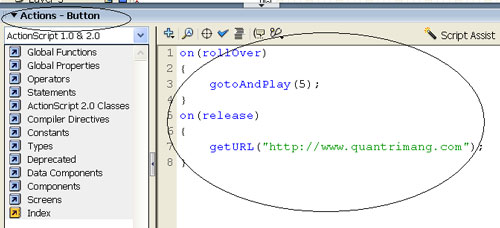
Figure 17
19. Lock the existing layer, add a new layer, select Window> Actions to open the Actions-Frame panel and then enter the following command:
stop ();
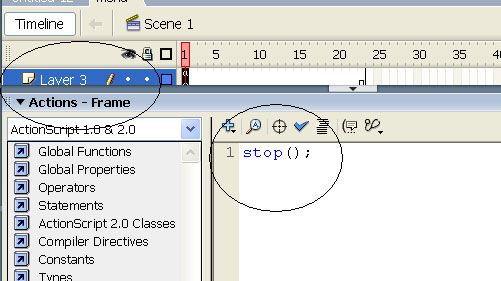
Figure 18
20. Right-click Frame 23 of this layer and select Insert KeyFrame and open the Actions-Frame panel, enter the stop () command line;
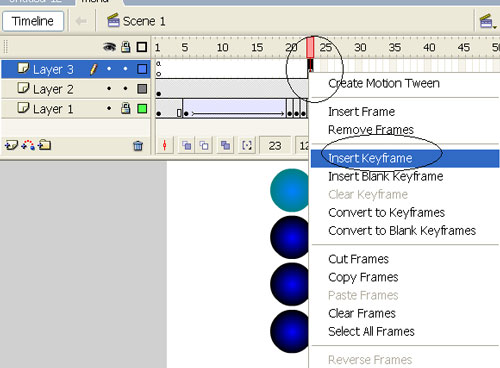
Figure 19
21. Lock this layer, unlock the first layer, click on Frame 23, select the Text Tool and enter the words home, news, relax, help for each circle.
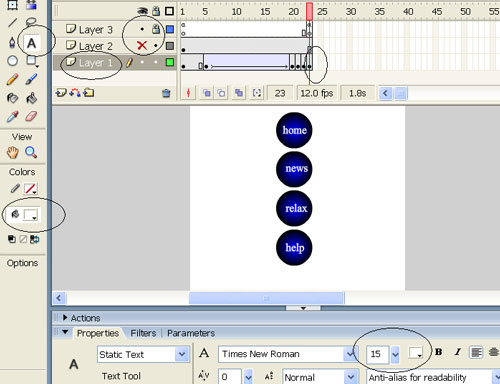
Figure 20
22. Do the same steps Step 14 to Step 18 to get the buttons for news items, relax, help (in the code entered you just need to use on (release) with the links you choose)
23. Press Enter + Ctrl to check the result.


 Overview of the Forefront TMG 2010 management interface
  Microsoft System Center Service Manager - Part 4: Use
  Install and configure email handling solutions on TMG 2010 Firewall - Part 2: E-Mail Policy
  Check the TMG 2010 virtual private network server - Part 2: Configure TMG Firewall as the PPTP Remote Access VPN Server
  Troubleshoot problems with Kerberos in SharePoint - Part 2
  Configure Web Services URL of Exchange Server 2007