Adjust the captured image in Photoshop
The editing after shooting is also a very important step to have a beautiful photo tinted ...
Editing after shooting is also a very important step to have a beautiful photo tinged with autumn.
The golden light of the sun often increases the warmth of the image. Even when it is not up, its light helps to create interesting shadows from the shape and arrangement of the terrain and trees. However, one of the downsides is that when the sun is not high, low light can cause exposure problems. The picture is usually slightly dark, pale in color and does not clearly show the intention of the operator. To fix this, you can use Photoshop.
In the tutorial below, you can adjust colors using layers, as well as restore details to highlight them using the " Clone Stamp " tool.
Here is an example with a specific photo.
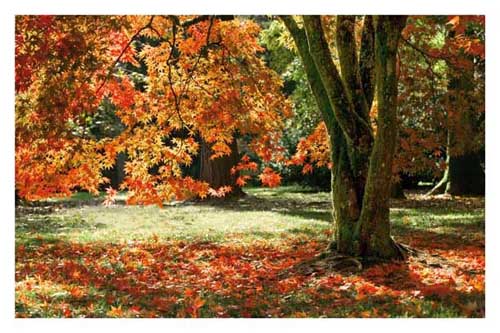
The photo was taken with a 1Ds machine after it was processed. Photo: Photoradar .
Step 1: Prepare the Raw file for the photo.
Open the RAW file of the captured image (in the example, open the Color_Before.dng file to download the link at the end of the article) with the Adobe Camera Raw editor. Push the Fill Light indicator to 40, this is just enough to recover some of the details that were shot back in the light but without losing other details in the bright area. Then continue to open the photo to edit normally with the Photoshop program.
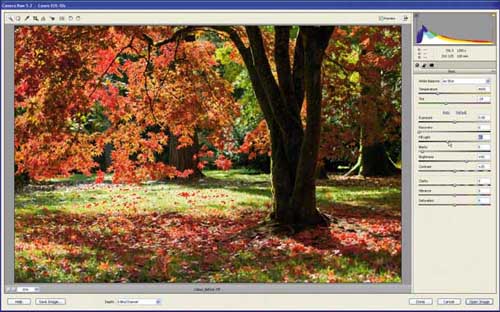
Using RAW files has many benefits in later editing. Photo: Photoradar .
Step 2: Lighten the dark areas.
In the Layer menu click Create Adjustment Layer , select Levels . Adjust the parameters as shown below. Click OK to apply the changes.
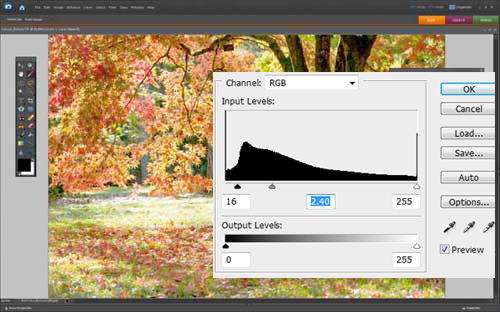
Brighten dark areas. Photo: Photoradar .
Step 3: Darken the background.
With the implementation in step 2, you can clarify the details of the backlight shooting. But it can make the rest of the image too bright. This can be overcome by using the Brush tool [B], set the Foreground to black, and adjust the size of the Brush to 900 pixels. Click on the newly created layer above and start using the Brush tool to darken (darken) the too bright background areas.
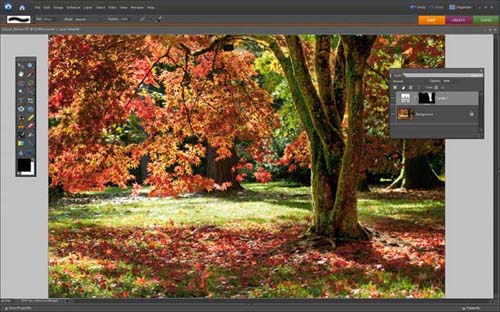
Darken the background. Photo: Photoradar .
Step 4: Add details.
Because the photo is improved a lot, there are some areas that seem to lose the details. In this case we can use the Clone Stamp tool (S). Click on the background layer. For example, in the picture, press Alt and left mouse simultaneously on the grass area, then spray over other bright areas around to add details and seamlessly blend the grass.

More details. Photo: Photoradar .
Step 5: Increase the color of the photo.
In the layer menu, click Create Adjustment Layer and select Hue / Saturation . In the new table that appears, the menu Edit select Master and adjust Hue to +9, and Saturation to +25. However, the color of the image seems too saturated, so continue to select the Edit menu as Yellows, and adjust the Saturation to -50. In the Edit menu, select Reds to adjust Saturation to +21. Click OK to finish this process.
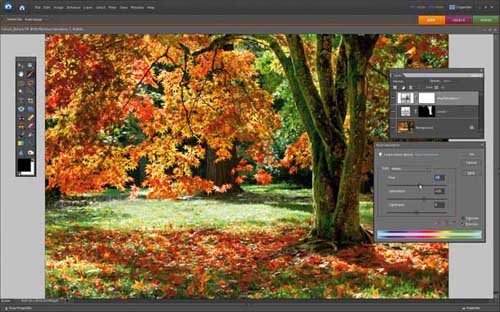
Increase color for photos. Photo: Photoradar .
Step 6: Add borders to the photo
Double click on the background layer and click OK on the next panel to unlock it. In the Select menu above select All, continue to Edit, in the menu that appears select Stroke. Set the Width indicator to 120 pixels (px), Color choose white (White) and in Location choose Inside . Click OK to finish. This way will create a white border for the image.
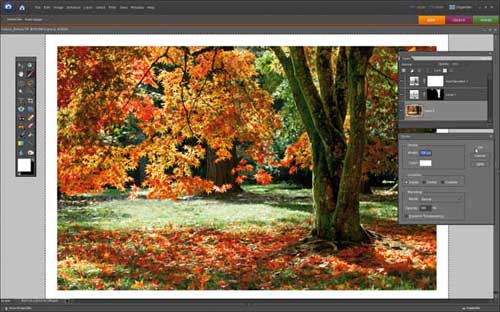
Add borders to photos. Photo: Photoradar .
You can download the original photo taken with Canon 1Ds here to experiment with the steps in the article.
Was this article helpful?
Your feedback helps us improve.
Related Articles
 How to rotate a photo in Photoshop2 minutes read
 How to scale layer, scale image in Photoshop3 minutes read
 How to Insert Text in Photoshop7 minutes read
 Instructions for using the gradient tool in Photoshop4 minutes read
 Automatic color adjustment feature in Photoshop2 minutes read
 Use Photoshop Mix to delete details in the image5 minutes read
Reader Comments 0
Sign in with email or Google to join the discussion.