Fixing the error 'WiFi doesn't have a Windows 10 configuration IP validation'
All computers and routers are provided with IP addresses to help users access the Internet. Similar to the Wifi Router, the Internet service provider (ISP) provides the IP address for all Wifi Routers to support users to connect to the Internet on their services.
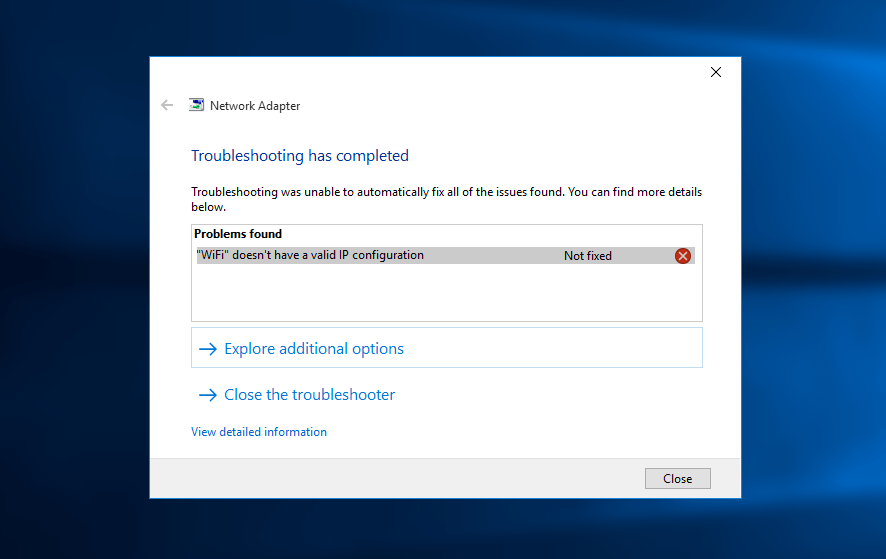
However, in some cases if the IP address of the system (Internet Protocol) is misconfigured, it will cause a 'WiFi doesn't have a IP configuration validate' or 'Ethernet doesn't have a configuration IP validation' or 'Wireless network không có một cấu hình IP hợp lệ'.
Usually, there are three main causes of "WiFi doesn't have a valid IP configuration" error on your Windows 10 computer: router error, wrong IP address error, and finally a NIC error.
To fix WiFi error do n't have a IP configuration valid on Windows 10 computer, please refer to the following article of Network Administrator.
1. Check the network card settings (Network Adapter)
Step 1:
Press the Windows + R key combination to open the Run command window.
Step 2:
Enter the following statement in the Run command window then click OK or press Enter to open the Network connections window:
ncpa.cpl
Step 3:
On the Network connections window, right-click the network connection you are using, select Properties .
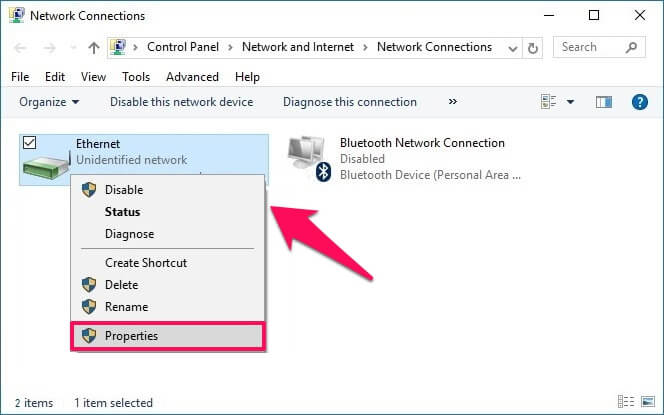
Step 4:
On the Properties dialog window, find and select Internet Protocol Version 4 (TCP / IPv4) option and click Properties .
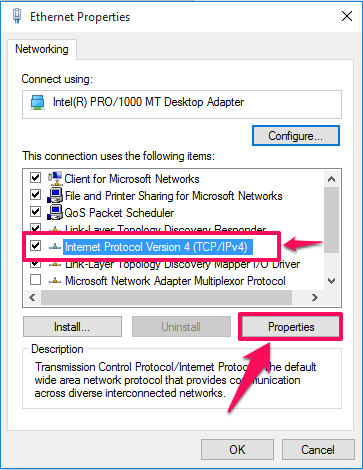
Step 5:
Next check the box to select 'Obtain an IP address automatically' and 'Obtain DNS server address automatically' .

Step 6:
Click OK to finish.
2. Restart the Router or Modem
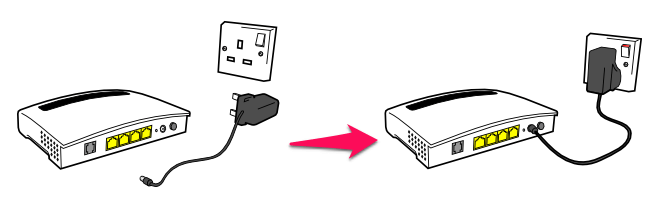
If you apply the above method and still cannot fix the error, you can try to restart the Router or Modem to fix the WiFi error.
Simply turn off your router and wait about 5 minutes. Then re-enable the Router and check whether WiFi doesn't have a longer IP configuration valid.
3. Reinstall the Network Adapter
Step 1:
Press the Windows + R key combination to open the Run command window. Then enter the command below and then click OK or press Enter to open the Device Manager window:
hdwwiz.cpl
Step 2:
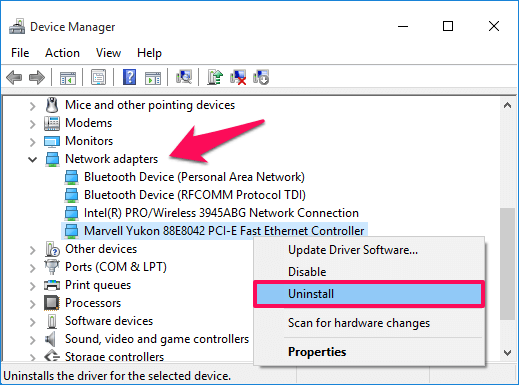
Add Device Manager window, expand Network adapters option and note the name of the network card you are using.
Step 3:
Right-click the Ethernet card you are using, select Uninstall.
Step 4:
Next, click Action and select the option called 'Scan for hardware changes'.
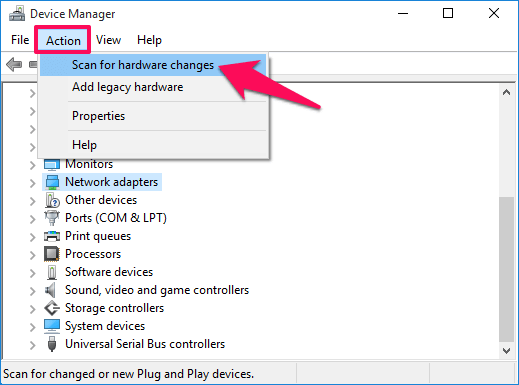
Searches will be performed and your network card interface will be added. You can now run the Windows Network Diagnostics tool or the Network Adapter troubleshooting tool to see if the problem has been fixed.
Refer to some of the following articles:
- Wifi on Windows 10 does not connect after starting from Sleep mode
- This is how to reset network settings on Windows 10 with just one click
- Conflict of IP address error when connecting to Wifi on iPhone, iPad, this is a fix
Good luck!
You should read it
- ★ Fix Wifi error disconnected on Windows 10, 8, 7 and Vista
- ★ How to fix WiFi errors on Windows 10, simple and effective
- ★ How to fix the problem of not connecting to WiFi in Windows 10
- ★ 6 ways to fix Wifi connection errors on iPhone 6
- ★ How to fix the error of not finding Wifi after updating Windows 10