How to disable Lock Screen lock screen on Windows 10 Anniversary Update
Windows 10 Anniversary Update updates include a Group Policy update available on Enterprise and Education versions. Therefore users can use Group Policy to disable Lock Screen lock screen on Windows 10 Anniversary Update.
Table of Contents
Windows 10 Anniversary Update updates include a Group Policy update available on Enterprise and Education versions. Therefore users can use Group Policy to disable Lock Screen lock screen on Windows 10 Anniversary Update.
1. Disable Lock Screen lock screen on Windows 10 Anniversary Update
1. First open Control Panel.
2. Next on the Control Panel window, select System and Security => Administrative Tools.
3. On the next window, double-click the Task Scheduler shortcut .

4. In the left pane, click to select Task Scheduler Library .
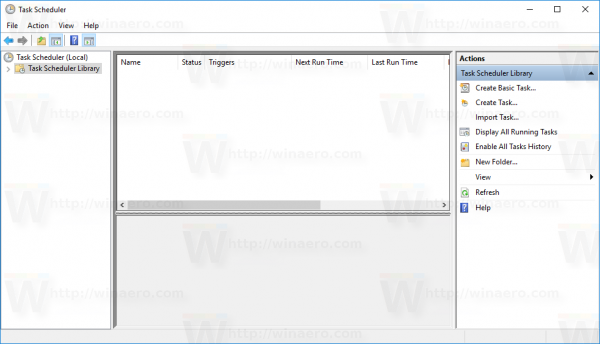
5. In the right pane, click Create task .

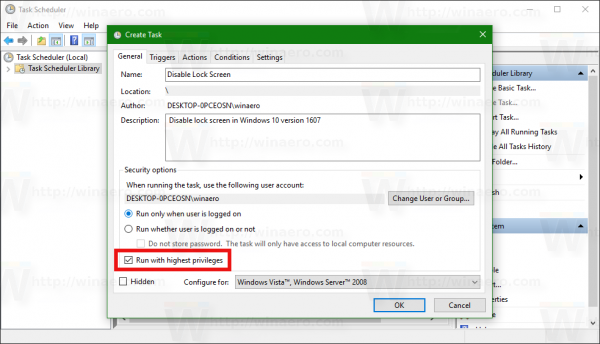
6. The Create Task window appears on the screen. Here you click on the General tab and give a name to the Task in the Name box, such as Disable Lock Screen and add a description to the Description frame.

7. Select Run with highest rights option.
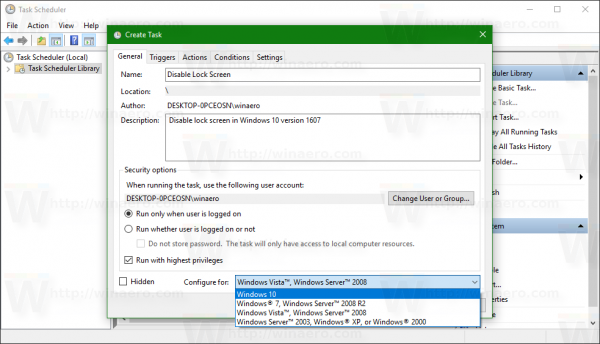
8. At the Configure for section, select Windows 10 .
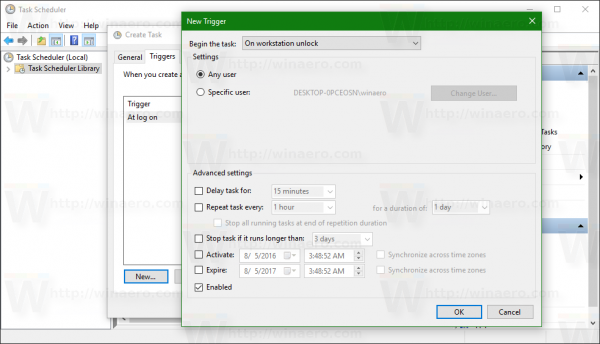
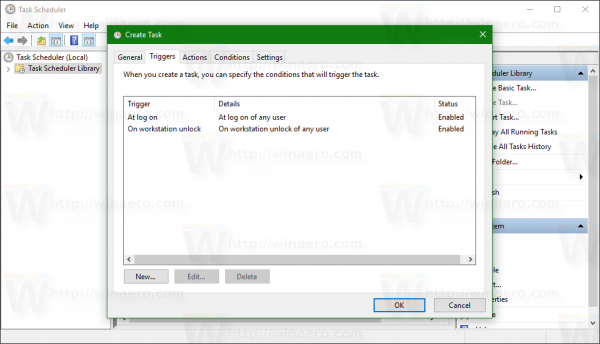
9. Next, switch to the Triggers tab , where you click the New . button .
On the New Trigger window, adding the first trigger is At log on.
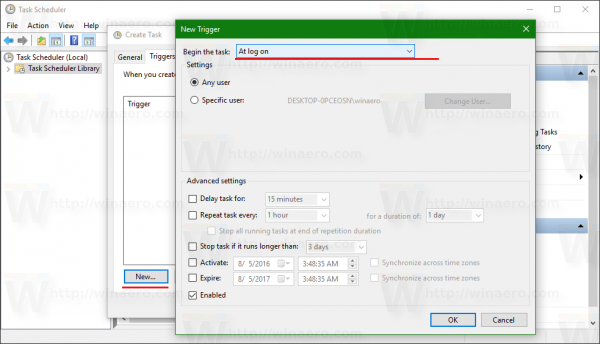
Add the second trigger, On workstation unlocked of any user as shown below:
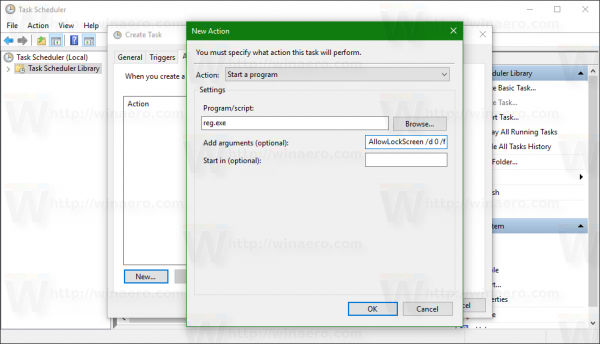
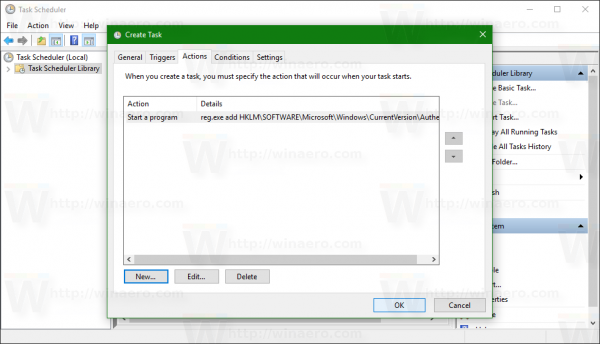
10. Next transfer to Actions tab . Add the first action by clicking the New . button.
At the Program / script section , enter reg.exe .
At the Add arguments (optional) section , enter the text below:
add HKLMSOFTWAREMicrosoftWindowsCurrentVersionAuthenticationLogonUISessionData / t REG_DWORD / v AllowLockScreen / d 0 / f
The next step is to open the Registry Editor and navigate to the key:
HKEY_LOCAL_MACHINESOFTWAREMicrosoftWindowsCurrentVersionAuthenticationLogonUISessionData
Here you find and double-click AllowLockScreen DWORD and set the value in the Value Data box to 0 to disable the Lock Screen lock screen.
If you want to re-activate the Lock Screen lock screen, follow the same steps and set the value in the Value Data frame to 1.
The final step is to check to see if the Lock Screen lock screen has been disabled. To do this, first run Task on Task manager.
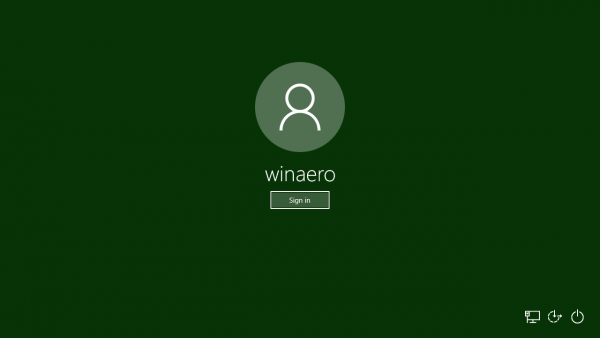
Press the Windows + L key combination, you'll see the Lock Screen lock screen no longer appear.

Or alternatively log out and then log in to your Windows 10 computer once. Lock Screen lock screen no longer appears.
Also you can refer to the detailed steps to disable the Lock Screen lock screen on Windows 10 Anniversary Update in the video below:
2. Use LockScreenGone
LockScreenGone is a small utility designed to assist Windows users to disable the Lock Screen lock screen on Windows 10 Anniversary Update and later versions with just one click.
Follow the steps below to disable Lock Screen Windows 10 lock screen with LockScreenGone utility:
Step 1:
Download the zip file LockScreenGone utility to your computer and unzip.
Download the zip file LockScreenGone utility to your computer and extract it here.
Step 2:
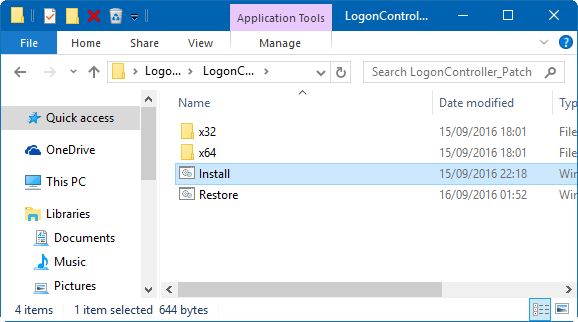
The next step is to extract the zip file into the LogonController_Patch folder.
Step 3:
Open the LogonController_Patch folder that you unzipped, find the file Install.cmd . Run the file Install.cmd under Admin by right-clicking on the file and then clicking Run as administrator .
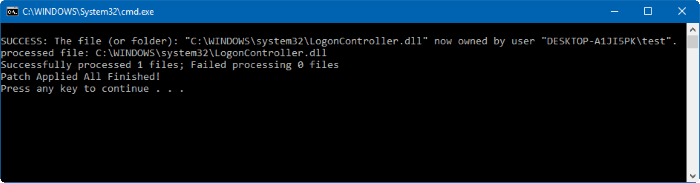
Step 4:
At this time, the Command Prompt window appears, waiting for a few seconds and you will see a success message. The tool creates a backup file from the original LogonControll.dll file before patching the file.
So you're done, now press the Windows + L key combination on the screen and you'll see the login screen, not the Lock Screen lock screen anymore.
If you want to restore the Lock Screen lock screen, simply run the Restore.cmd file in the LogonController_Patch folder.
Turn off the Lock Screen lock screen again after updating
Windows 10 can reactivate the Lock Screen lock screen after updating the new version. So if you don't want to have Lock Screen lock screen appear after updating the new version, follow the steps below:
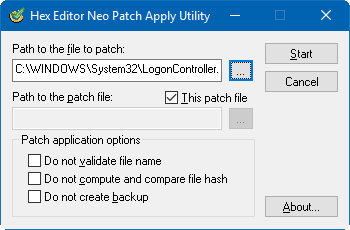
Step 1 :
Open the LogonController_Patch folder, then open the x64 or x32 folder, depending on the version of Windows 10 you are running.
Step 2:
Run the LogonController_Patch file. In the Path to the file to patch section, click the Browse button, then navigate to C: WindowsSystem32, select LogonController.dll file and click OK .
Step 3:
Finally click on the Start button to path the file again.
Refer to some of the following articles:
- How to download Windows 10 Anniversary Update update?
- Free memory space after updating Windows 10 Anniversary
- What is Developer Mode on Windows 10? How to activate this mode?
Good luck!
Was this article helpful?
Your feedback helps us improve.
Related Articles
 Instructions to disable Cortana on Windows 10 Anniversary Update5 minutes read
 How to enable the Login Login hidden on Windows 103 minutes read
 Fix the Webcam Error on Windows 10 Anniversary Update is suspended4 minutes read
 How to disable Lock Screen lock screen on Windows 8, 104 minutes read
 How to download Windows 10 Anniversary Update update?4 minutes read
Reader Comments 0
Sign in with email or Google to join the discussion.