Table of Contents
Canva's Magic Expand adds AI-generated content beyond the original edges of a photo. It is useful when a subject is cropped too tightly, a portrait needs to fit a landscape design, or a background needs more room for text. It does not simply stretch the existing pixels.
Magic Expand is different from an image upscaler. Expansion creates new scenery around the photo; upscaling increases resolution and attempts to improve sharpness. Use the tool that matches the problem you are trying to solve.
Before you expand the image
- Use the highest-quality original available. Expansion cannot restore detail that is already missing from the subject.
- Choose a photo with a clear background, consistent lighting, and enough visual context for Canva to continue.
- Keep a copy of the original design so you can compare or undo changes later.
- Check whether Magic Expand is available on your Canva plan and whether the generation will count against an AI usage allowance. Availability and limits can change.
For a broader look at Canva's editing features, see this comparison of five useful AI tools in Canva.
How to extend an image with Magic Expand
1. Place the photo in a Canva design
Open an existing design or create one at the final size you need. Upload the photo, add it to the page, and select it. Starting with the target page size makes it easier to judge how much new background the layout requires.
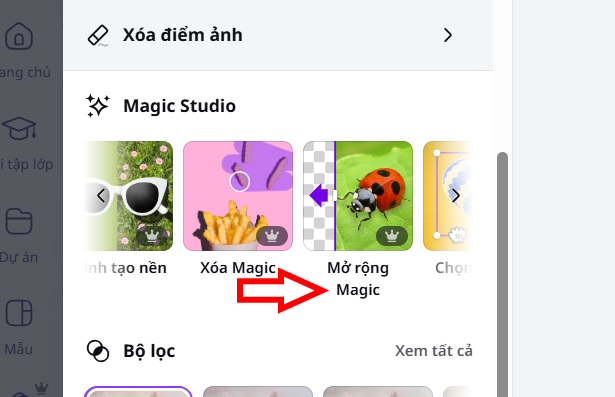
If you begin from an uploaded image rather than a design, Canva may offer to use it in an existing design or create a new one.

2. Open Magic Expand
With the photo selected, open the image-editing tools and choose Magic Expand. The exact toolbar labels can vary between desktop, mobile, and editor updates. Canva's official Magic Expand help page lists the current route for each platform.
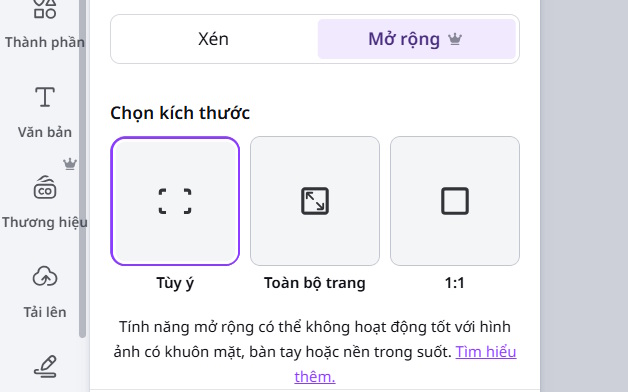
3. Choose how far and in which direction to expand
Select an option that matches the intended layout:
- Whole page or Entire page: fills the page around the selected image. This is useful when converting a photo to the current design's dimensions.
- Aspect ratio: creates a standard shape such as square, portrait, or landscape.
- Custom or Freeform: lets you position or resize the crop boundary so only selected sides need new content.
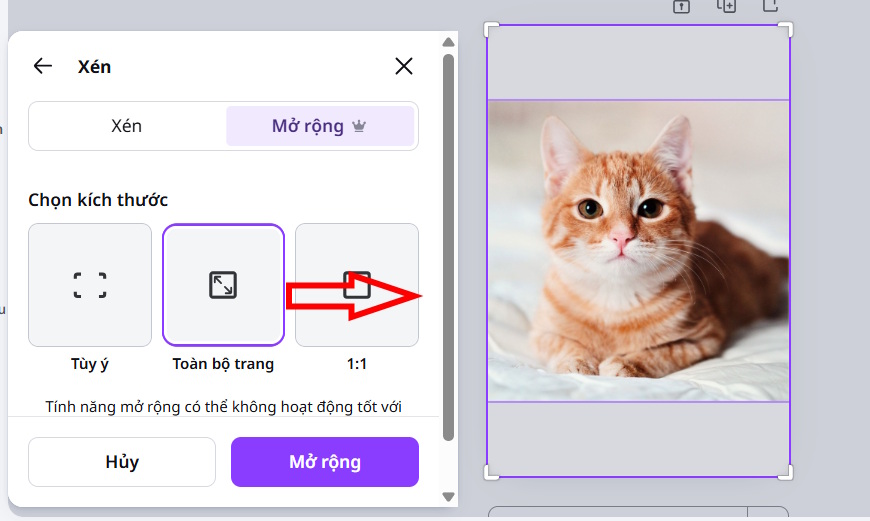
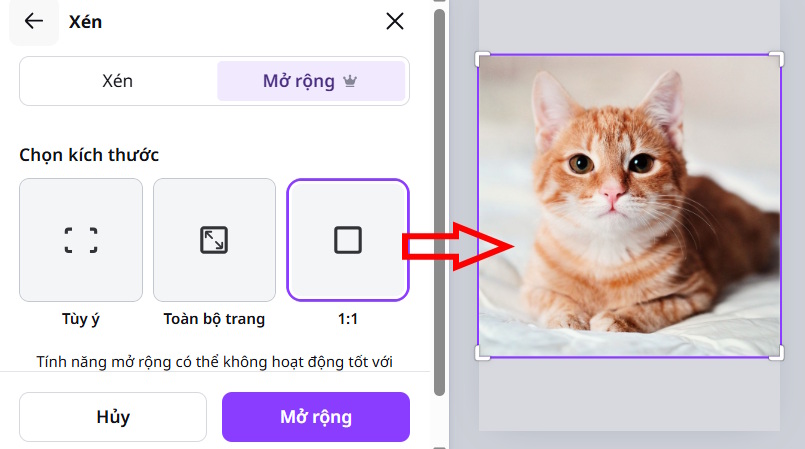
A 1:1 choice makes a square result; it does not guarantee that the image remains unchanged. The result depends on the original proportions and how the photo sits inside the new boundary.
For a custom expansion, place the original subject where it should remain and extend the boundary into the empty area. Leave important faces, products, logos, and text inside the original image whenever possible; generated reconstruction of those details may be inaccurate.
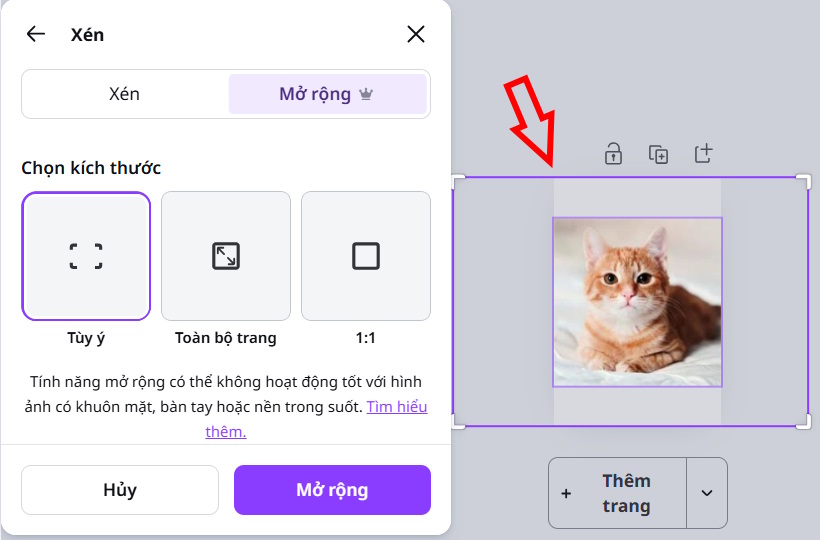
4. Generate the expanded versions
Select Expand and wait for Canva to generate alternatives. The number of suggestions and button wording may change with the editor. Compare the full image rather than judging only the newly filled border.
5. Choose a result or generate again
Select the version with the most consistent perspective, lighting, texture, and edges. If none is usable, generate another set or reduce the amount of expansion. A smaller extension often gives the tool more reliable context.
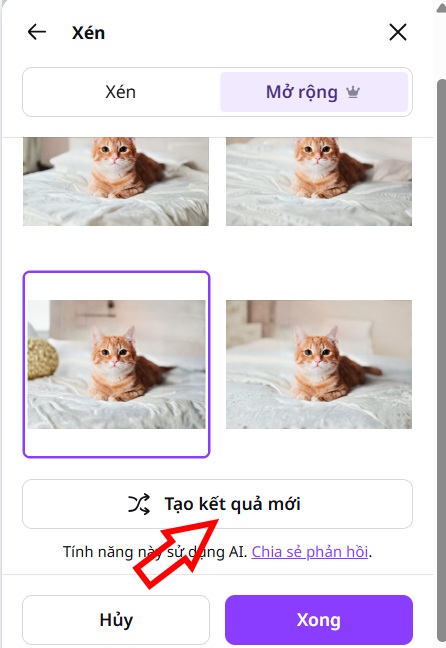
After applying a result, crop and position it within the final layout. Zoom in before exporting so you can inspect seams and small artifacts that are easy to miss at page scale.
Examples: vertical and horizontal expansion
Vertical expansion can add sky, ceiling, floor, or foreground when a landscape photo must fit a portrait page. Check that vertical lines, horizons, and shadows continue naturally.

Horizontal expansion can create space beside a subject for a headline or convert a portrait crop into a banner. Place the subject away from the side where the text will appear before generating.

How to get cleaner results
- Expand in stages. Two modest expansions can be easier to control than one very large jump.
- Give the background enough context. Repeating walls, skies, water, and soft scenery are usually easier to continue than a crowded scene.
- Protect the focal point. Do not ask the tool to invent half of a face, hand, product label, or recognizable logo when accuracy matters.
- Check repeated objects. AI expansion can duplicate windows, leaves, patterns, people, or furniture.
- Inspect geometry. Look for bent horizons, mismatched perspective, disconnected lines, and shadows from no visible object.
- Leave room for a safe crop. Generate slightly more background than required, then crop away weak outer areas.
Common problems and fixes
The expanded area looks blurry or smeared
Try a smaller expansion, use a higher-resolution source, or choose a result with simpler background detail. If the original image itself is too small, use a dedicated upscaling tool instead. This overview of AI photo editors for different workflows can help you choose an alternative.
Faces, hands, or text change
Reposition the crop so those elements remain entirely inside the source photo. Magic Expand generates missing content; it should not be trusted to preserve identity, readable wording, or product details outside the original frame.
A transparent area produces strange results
Place the subject over a temporary solid or photographic background, or use a background-generation tool designed for cutouts. Transparency gives the expansion model less scene information to continue.
The image fits but the layout still feels awkward
Expansion solves framing, not every composition problem. Move the subject, adjust the crop, and reserve deliberate negative space for text. You can also use a different layout treatment, such as the technique in this guide to creating a 3D tilted image in Canva.
Review before downloading
- Compare the result with the original at 100% zoom.
- Check faces, fingers, lettering, logos, straight lines, reflections, and shadows.
- Confirm that generated details do not misrepresent a real product, place, or event.
- Test legibility after adding any text or graphic overlay.
- Export at the dimensions and file format required by the destination.
Magic Expand works best as a composition tool: it creates believable space around an image so the photo fits a new format. For actual sharpness or print resolution, use upscaling and verify the exported pixel dimensions separately.
Related Articles
 How to Use Magic Morph in Canva AI: Step-by-Step Guide4 minutes read
 What Is Magic Write in Canva? Basic Usage of Magic Write: Clear Explanation6 minutes read
 How Do I Convert Between Different Design Formats in Canva: Explained4 minutes read
 4 New Canva Features You'll Love11 minutes read
 Guide to Extracting Text from Images Using Canva AI4 minutes read
 Instructions on Creating Worksheets in Canva4 minutes read
Reader Comments 0
Sign in with email or Google to join the discussion.