Table of Contents
Most printers connect to a Windows laptop or Mac through USB or the local network. Start with automatic detection; use manual driver or IP setup only when the printer does not appear. Bluetooth is mainly relevant to a small number of portable printers and should be used only when the manufacturer explicitly supports desktop printing over Bluetooth.
This guide covers Windows 11 and current macOS versions, with fallbacks for older or less discoverable printers.
Choose the right connection
| Connection | Best for | Main limitation |
|---|---|---|
| USB | One computer, simple and stable setup | Requires a cable and may need a USB-C adapter |
| Wi-Fi or Ethernet | Several computers and phones sharing one printer | Printer must be configured on the same reachable network |
| Bluetooth | Supported portable or specialist printers | Uncommon for ordinary desktop printers and may require a vendor app |
| Shared Windows printer | A USB printer shared by another Windows PC | The host PC must be on and sharing must be configured securely |
Before you begin
- Turn on the printer and clear paper, ink, toner, cover, or jam errors.
- Confirm the exact model number and the connection types it supports.
- For USB, use a known-good data cable and a reliable USB-C adapter or powered hub if required.
- For network printing, connect the printer and laptop to the same home or office network. Guest Wi-Fi can block device discovery.
- Let Windows or macOS try its built-in driver first. Download additional software only from the printer manufacturer or an approved app store.
- On a managed work or school computer, ask IT before installing drivers or adding a network printer.
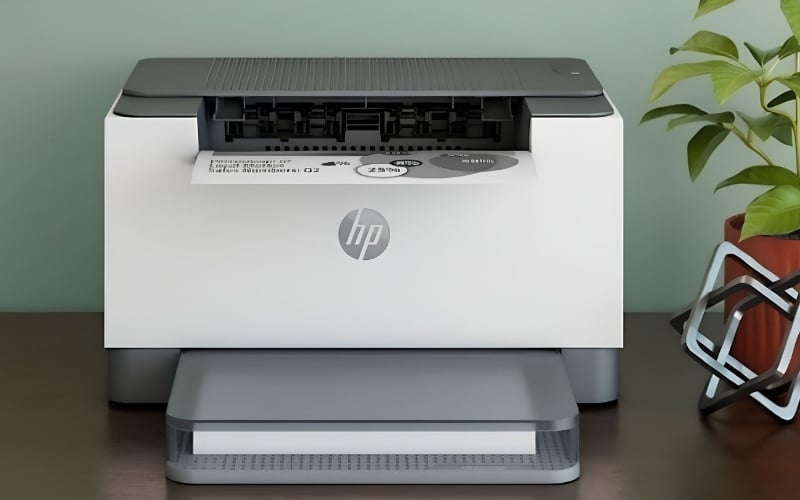
Connect a printer to Windows 11
USB: try automatic setup first
- Turn on the printer.
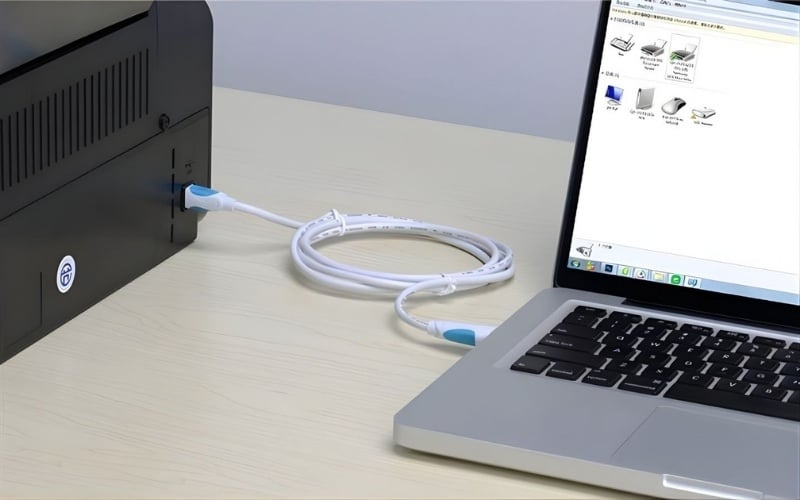
- Connect it directly to the laptop with the appropriate USB cable.
- Wait while Windows detects the device and installs a compatible driver.
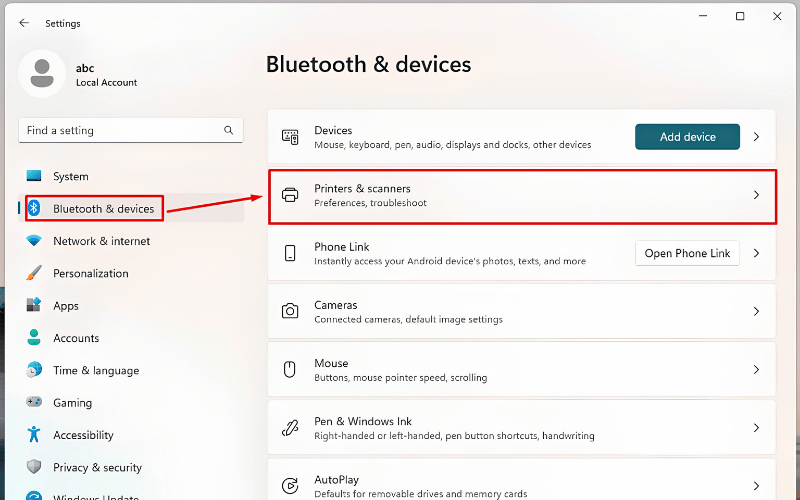
- Open Settings > Bluetooth & devices > Printers & scanners and confirm that the printer appears.
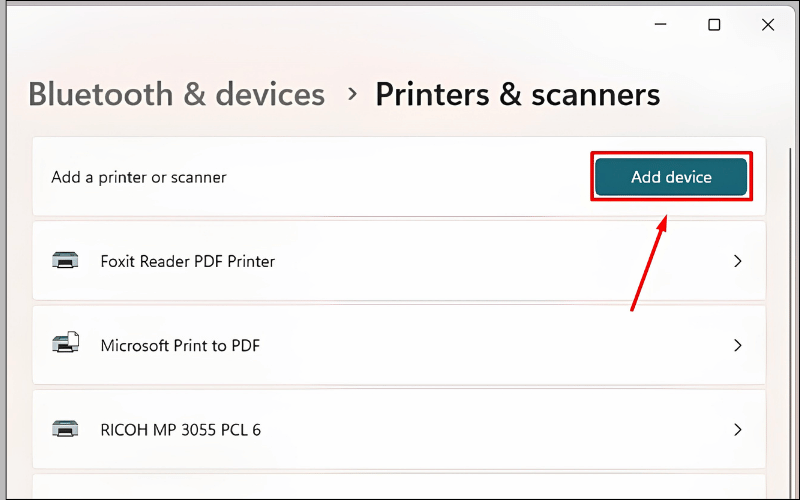
If the printer is absent, select Add device beside Add a printer or scanner. Windows will search for connected and network printers.
Use the manual wizard only if detection fails
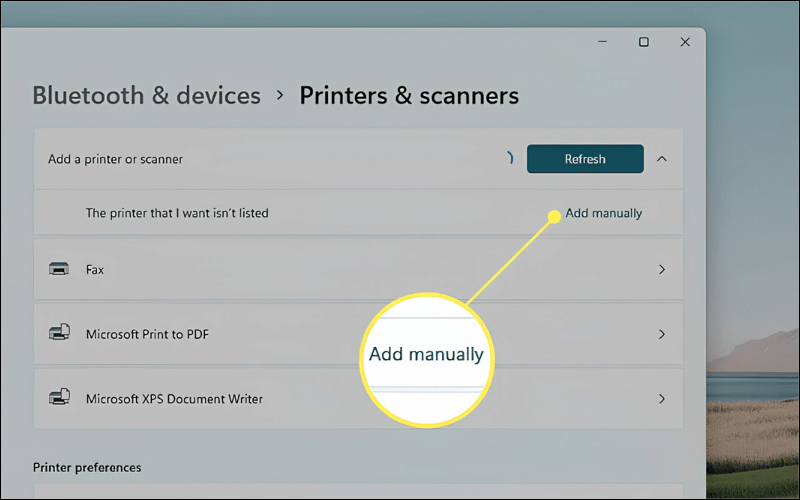
Select Add manually after Windows finishes searching. The wording may appear as “The printer that I want isn’t listed” in some versions.
For a direct USB printer, choose the local-printer option and keep the automatically created USB port when one is available. Do not invent a port if Windows has not detected the USB connection; first try a different cable and port.
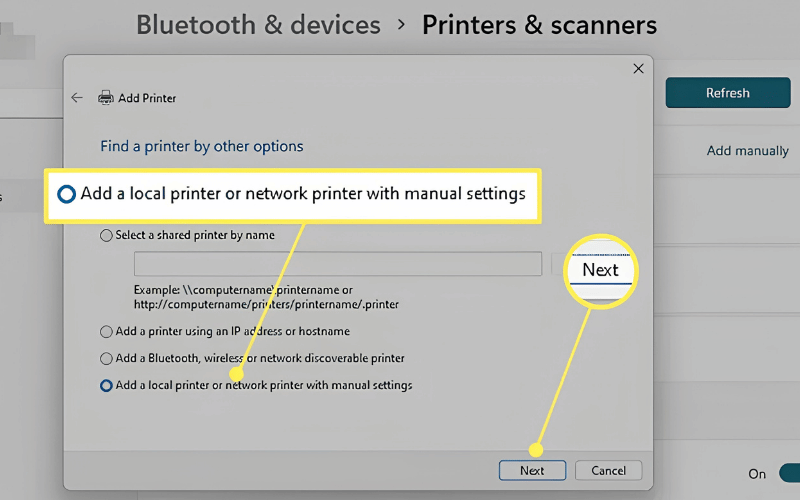
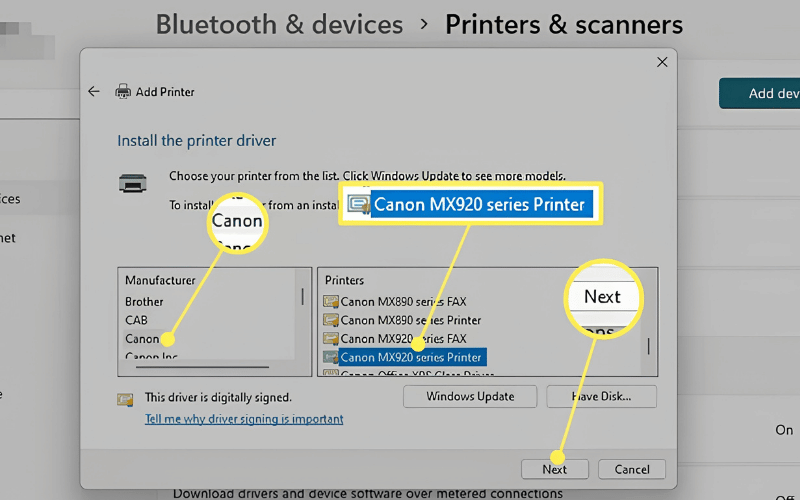
Select the manufacturer and exact model from the driver list. If the model is missing, use Windows Update in the wizard when offered, or install the current package from the manufacturer’s support site.
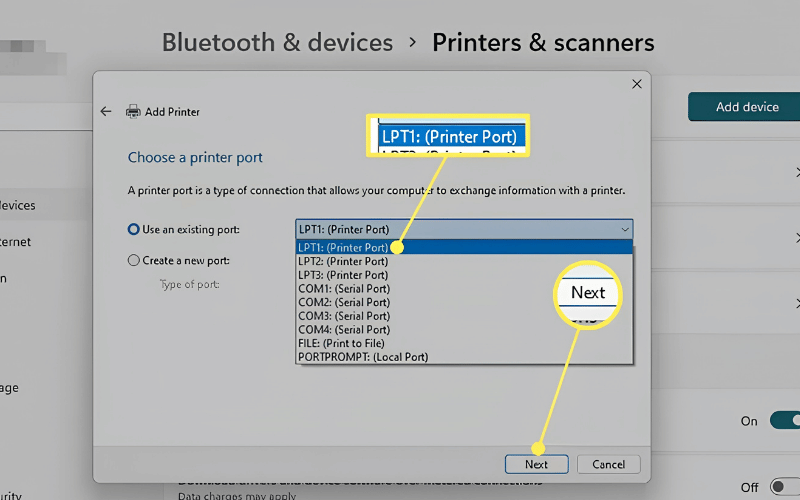
Select the port created for the printer. A USB connection commonly uses a USB virtual printer port; a network printer added by address uses a TCP/IP port.
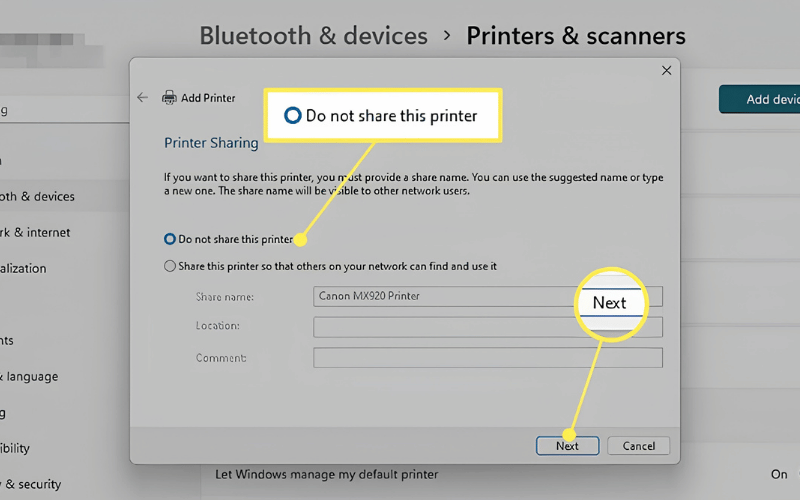
Give the queue a recognizable name. Share it only if this PC is intended to act as a printer host and the network is trusted.
Microsoft’s current Windows printer installation guide covers the automatic and manual paths.
Wi-Fi or Ethernet printer
- Use the printer’s control panel or manufacturer setup app to join the network. An Ethernet-connected printer can be plugged into the router or network switch.
- Confirm that the Windows laptop is on the same reachable network.
- Open Settings > Bluetooth & devices > Printers & scanners.
- Select Add device, then choose the correct printer.
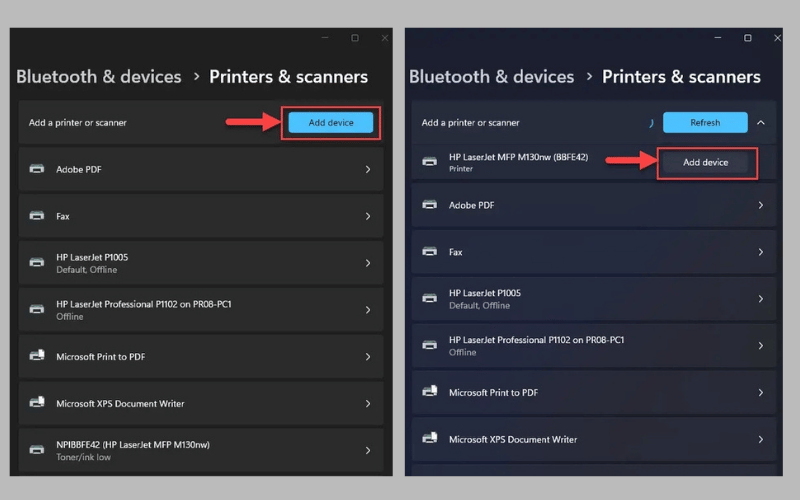
If discovery fails but you know the printer’s IP address or hostname, select Add manually and choose the TCP/IP address or hostname option. Avoid selecting a similarly named neighbor or old queue; compare the model and IP address with the printer’s network report.
Bluetooth printer
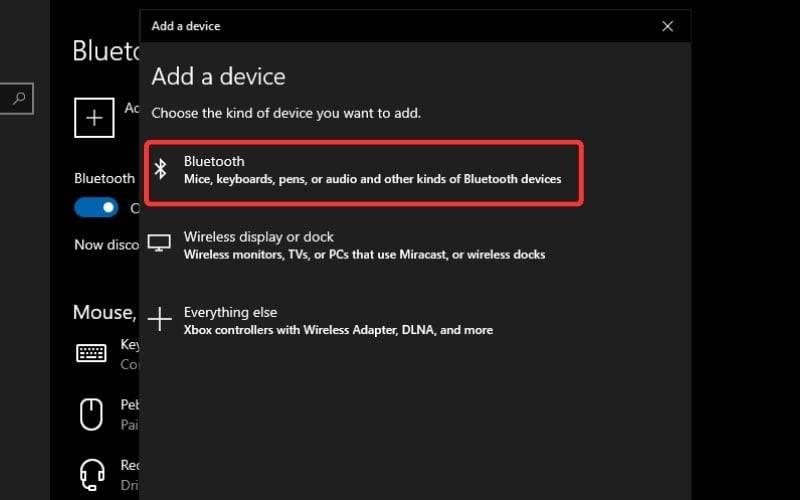
First confirm that the model supports Windows printing over Bluetooth. Put the printer in pairing mode, then open Settings > Bluetooth & devices > Devices > Add device and select Bluetooth.
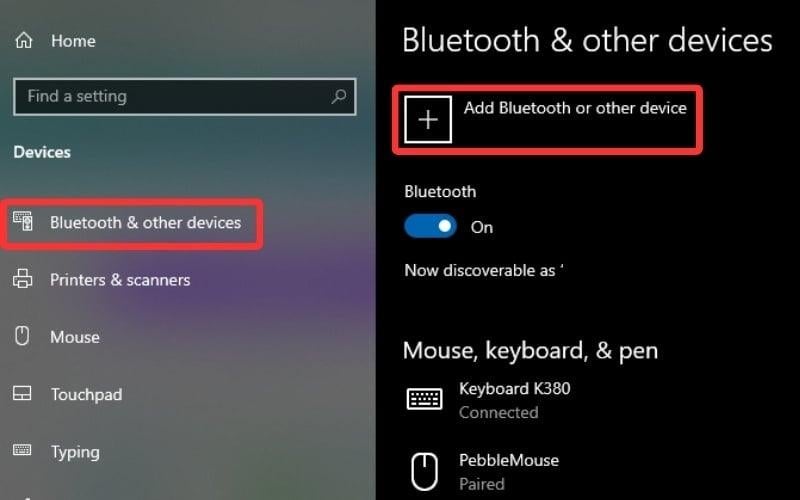
Select the printer and complete any displayed code or confirmation step. After pairing, check Printers & scanners. If the device appears only as a Bluetooth accessory, install the manufacturer’s supported printing software.
Connect a printer to a Mac
USB printer
- Turn on the printer and connect it to the Mac using the correct cable or a compatible USB-C adapter.
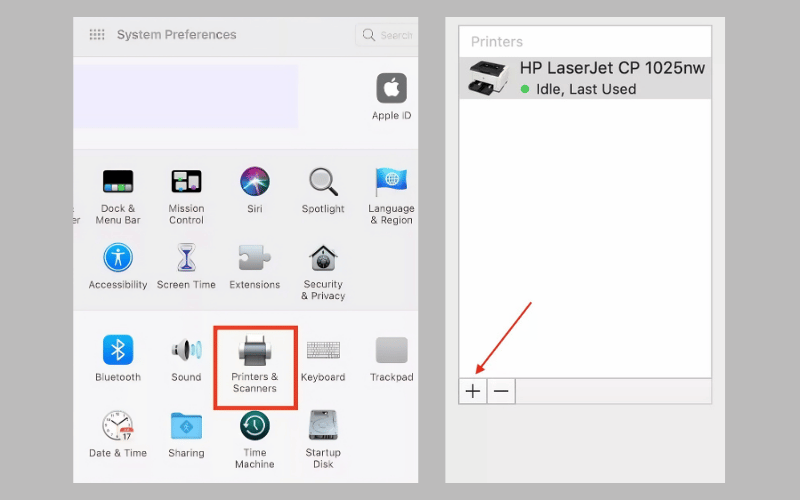
- Open Apple menu > System Settings > Printers & Scanners.
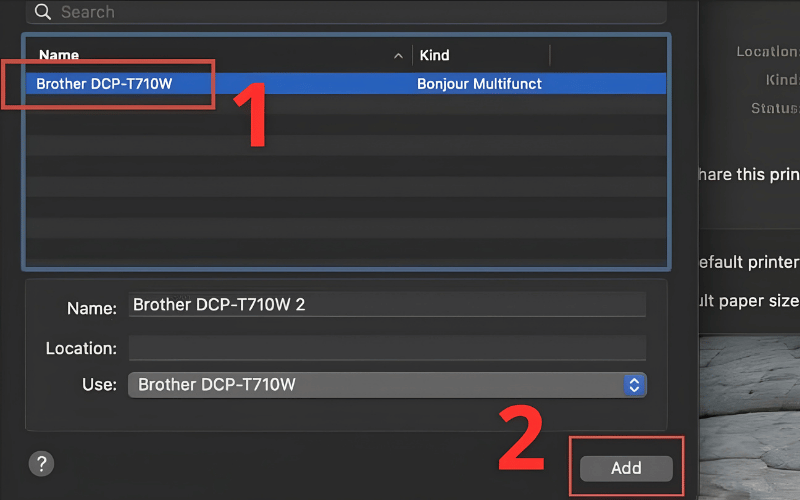
- If the printer does not appear automatically, click Add Printer, Scanner, or Fax.
- Select the printer, check the Use menu, and click Add.
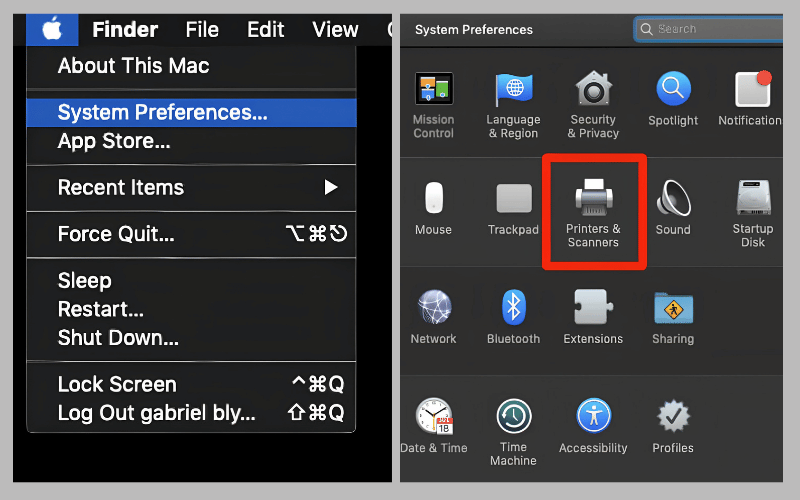
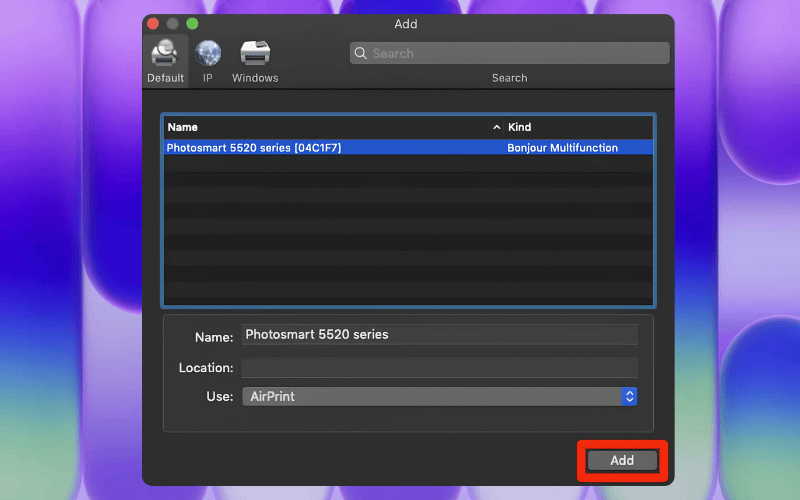
When an AirPrint-capable model offers AirPrint in the Use menu, it is usually the simplest driverless choice. Install the manufacturer’s current Mac software when you need scanning, maintenance, finishing, accounting, or other features AirPrint does not expose.
Wi-Fi, Ethernet, or AirPrint printer
Connect the printer to the same network as the Mac. Then open System Settings > Printers & Scanners and click Add Printer, Scanner, or Fax. Wait for the device to appear in the Default list, select it, choose AirPrint or the appropriate driver, and click Add.
If automatic discovery fails, open the IP tab and enter the printer’s IP address or hostname. Select the protocol specified by the printer administrator or manufacturer—commonly AirPrint, IPP, LPD, or HP Jetdirect—then choose the correct driver in the Use menu.
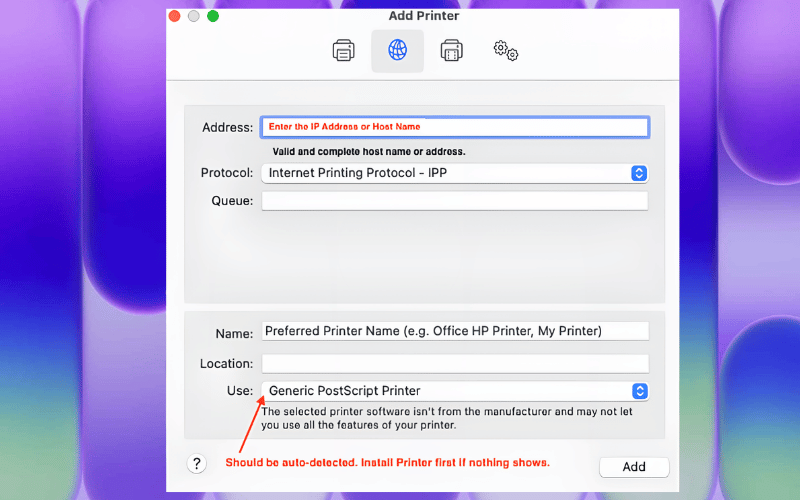
Do not choose a generic PostScript or PCL driver merely because it completes setup. A generic driver can omit duplexing, color, tray, finishing, or status features and may not work with printers that do not understand that language. Use it only when the device documentation or network administrator recommends it.
Apple’s Mac printer setup guide explains USB, network, IP, Windows-shared, and Bluetooth options. Apple also maintains current AirPrint printer information.
Bluetooth printer on a Mac
Put a supported printer in pairing mode and pair it in System Settings > Bluetooth if the manufacturer requires that step. Then open Printers & Scanners, click Add Printer, Scanner, or Fax, select the device, and click Add.
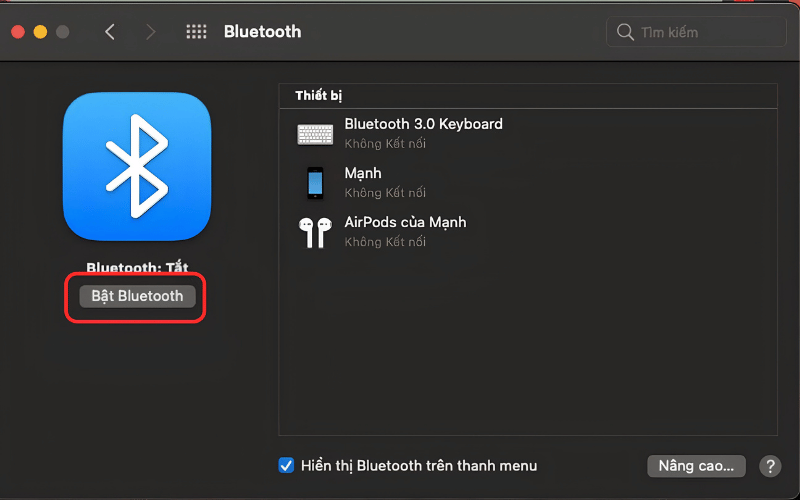
Many compact photo and label printers print only through the manufacturer’s application rather than the normal macOS print dialog. Follow the model-specific instructions if it does not create a standard printer queue.
Print a test page
Windows
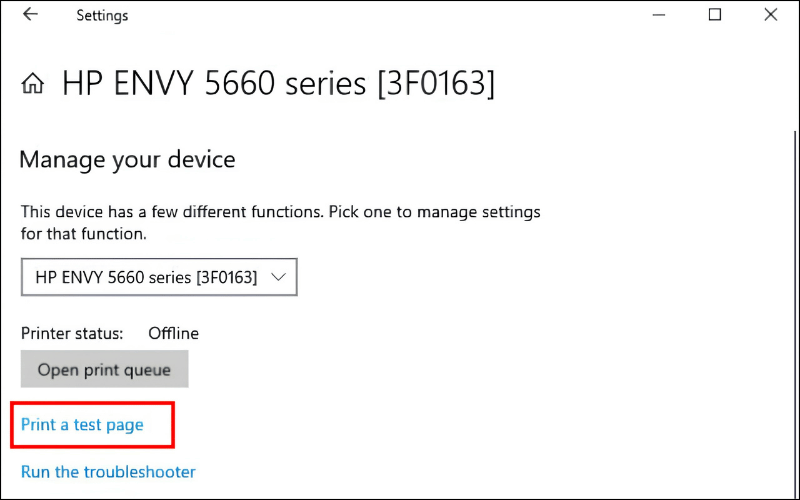
Open Settings > Bluetooth & devices > Printers & scanners, select the printer, open Printer properties, and choose Print Test Page when available. Verify the paper size, orientation, color, duplex setting, and selected printer before sending important jobs.
Mac
Open a small document in Preview or TextEdit, choose File > Print or press Command-P, select the new printer, and print one page. The printer’s utility may also offer a nozzle check, alignment page, or hardware test.
If the laptop cannot find or print to the printer
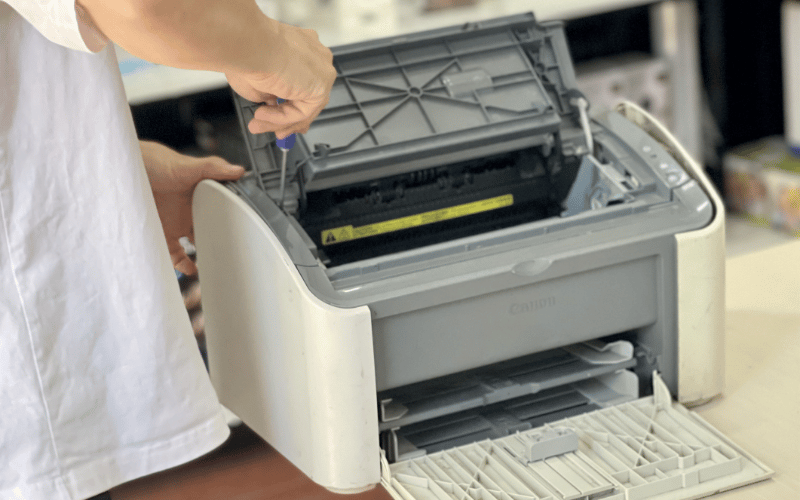
- Read the printer display: clear paper, cover, supply, or jam errors first.
- Check the physical path: reconnect the USB cable, remove an unreliable hub, try another port, or test a known-good cable.
- Check the network: confirm the printer and laptop are on the same LAN and not isolated by guest Wi-Fi, VPN, client isolation, or a firewall rule.
- Restart the queue: cancel stuck jobs, turn the printer off and on, and restart the laptop.
- Remove duplicate queues: keep the queue that points to the current USB port, hostname, or IP address.
- Update safely: install operating-system updates and the exact manufacturer package for the printer model and OS version.
- Re-add the printer: remove the nonworking queue and add it again. On a Mac, resetting the entire printing system is a last resort because it removes all printers, scanners, presets, and completed-job information.
For a specific Windows connection failure, see TipsMake’s guide to fixing “Windows cannot connect to the printer”. If other network devices are also failing, troubleshoot the Windows 11 Wi-Fi connection before reinstalling printer software.
Keep the connection reliable
- For a network printer, reserve its IP address in the router or DHCP server so the queue does not point to an old address.
- Keep printer firmware and approved drivers updated, especially on shared or business networks.
- Use a guest or segmented network only if it permits authorized devices to reach the printer.
- Do not disconnect power or data cables during a print, firmware update, or maintenance cycle.
- Remove abandoned duplicate queues so jobs are not sent to an offline destination.
- For important work, keep a USB cable or PDF workflow available as a fallback.
Related Articles
 How to Connect Printer to Computer, Macbook Extremely Easy at Home6 minutes read
 How to Rename the Printer on Windows 104 minutes read
 Connect Printer via Wi-Fi: How to Connect the Printer via Wi-Fi6 minutes read
 Steps to Connect the Printer to the Computer5 minutes read
 How to Fix Windows Errors Not Connected to the Printer9 minutes read
 Instructions on How to Connect the Printer to a Laptop6 minutes read
Reader Comments 0
Sign in with email or Google to join the discussion.