Table of Contents
This guide provides a clear, practical overview of create your own Office installer as you like with the, with useful context, important details, and straightforward takeaways for everyday readers.
Overall fine for most people, but basically it's hard to accept if you can't set the settings on your own. With this in mind, Microsoft has released the Office Deployment Tool, allowing users to set up a custom Office 365 installer themselves. Specific usage is as follows.
How to use the Office Deployment Tool to fully control the installation of Microsoft Office 365 on your computer

Step 1: Go to this site to download the latest version of the Office Deployment Tool.

Step 2: Continue to access this path and click "Create" under "Create a new configuration".

Configuration setup interface appears. The first will be the Products and releases section, including the structure and apps options you want to install.

Overall, this is the most important customization for creating an Office 365 installation. Applications will show and allow you to choose which settings to install.

Next is to choose the Language to install.
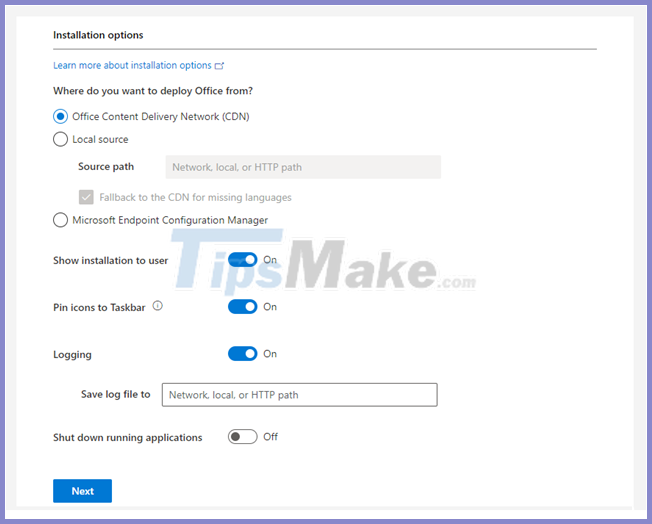
The "Installation options" section allows you to set up where to install Office 365. There are two options for you, including the Office Content Delivery Network (CDN) that allows the server to always download the Office installation files. from cloud (recommended, no source path required).
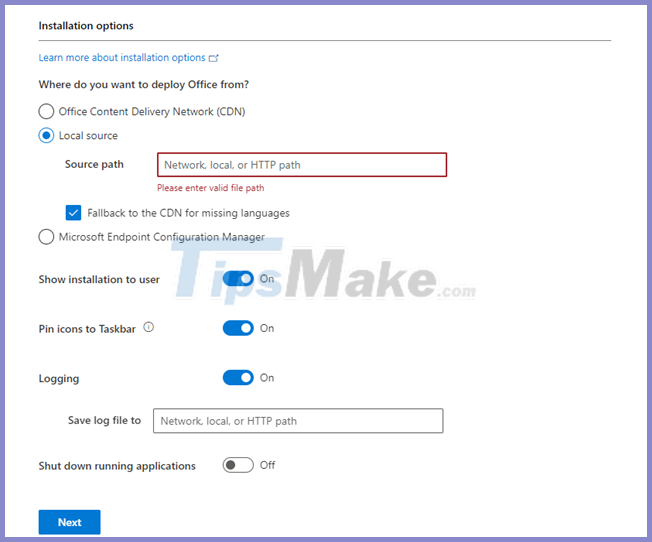
Local Source allows you to download Office setup files to a local folder or share them over the network, and the installation will be run from this folder. Shared or folder capabilities must exist when setup is run. In case you choose Local Source, setup will check what content is already available for sharing or on certain folders and download only what's missing.
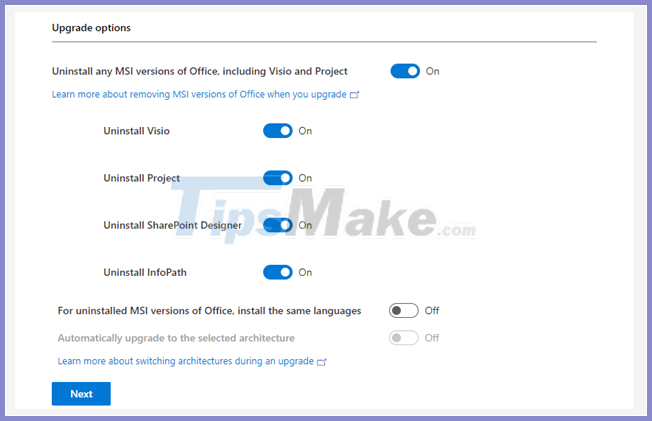
The Update and upgrade section allows you to choose whether you want future updates and upgrades to be installed from a CDN or a local source. Turn automatic updates on or off, choose whether you want to remove everything left over from a previous MSI installation, before installing the Click-to-Run version of Office .
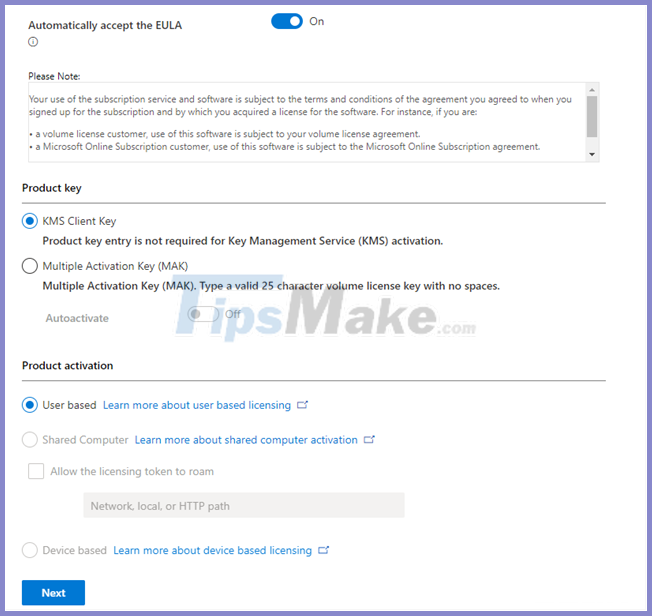
The Licensing and activation section will be copyright and activation options after installation. Here you should enable the option "Automatically accept the EULA" and deactivate the option "Autoactivate".
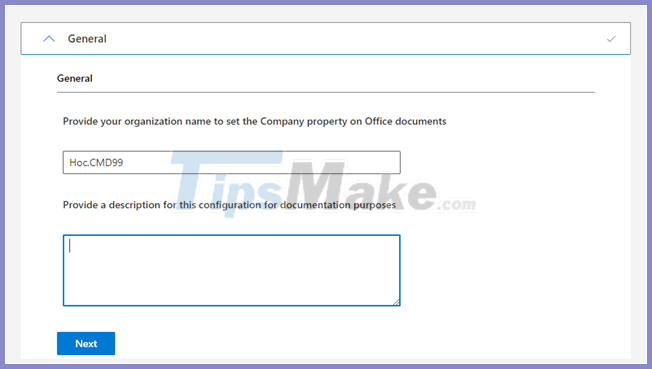
The General section allows you to add your name or the name of an organization and the information will be saved in the configuration file.
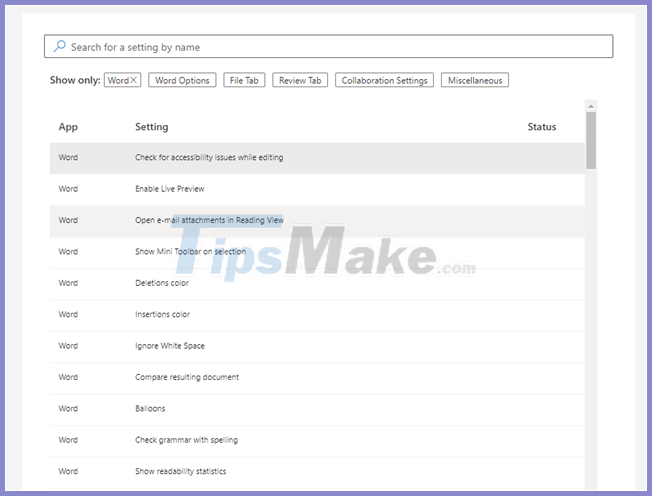
And finally the Application preferences section, which allows you to customize many of the settings for the extensions included in the installation package.
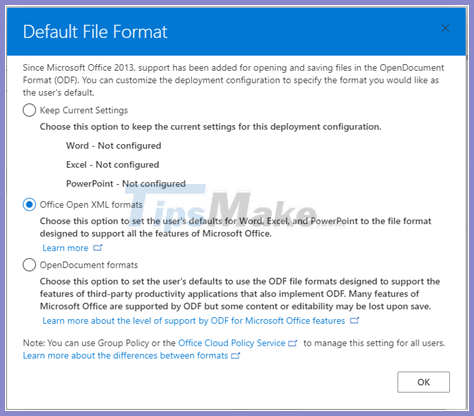
Step 3: After customization is complete, click Export, and check the option "Office Open XML formats", then click OK.
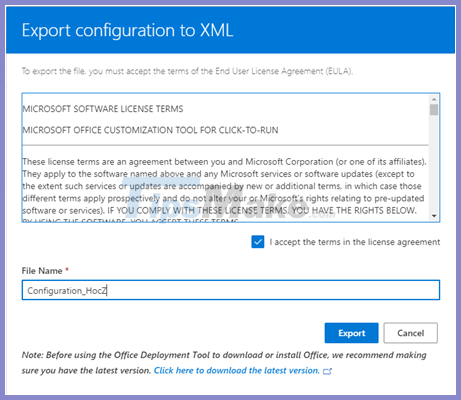
Confirmation window appears, please check the box to accept the terms, name the file and click Export to download the configuration package to your computer.
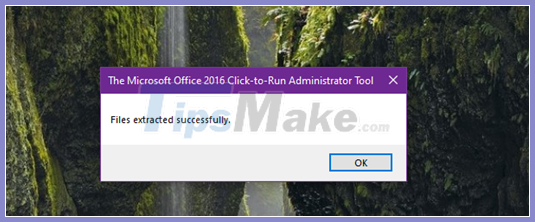
Step 4: Go back to the installation file of Office Deployment Tool downloaded above, launch it to install the Office Deployment Tool on your computer.
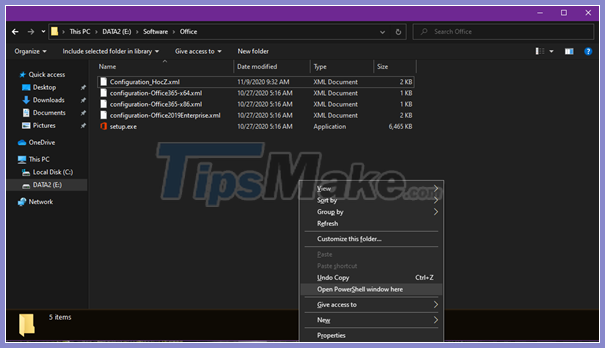
Step 5: After installing the Office Deployment Tool, copy the XML file configured and load above into the installation directory of the Office Deployment Tool. Then press Shift key on the keyboard and right click, select Open PowerShell windows here.
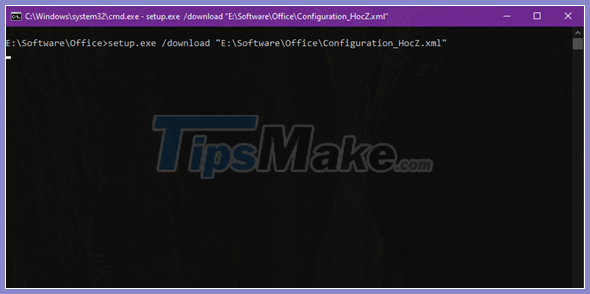
Run the command "setup.exe / download filename_XML".
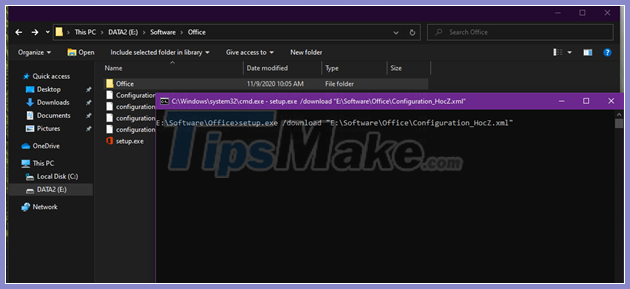
After running the command, you should not see anything happen, but in fact the Office Deployment Tool is downloading the Office 365 installation data according to your setup, and this process will take place in the background. At the same time, in the Office Deployment Tool folder, a "Office" folder will appear, which is where the downloaded installation data is located.
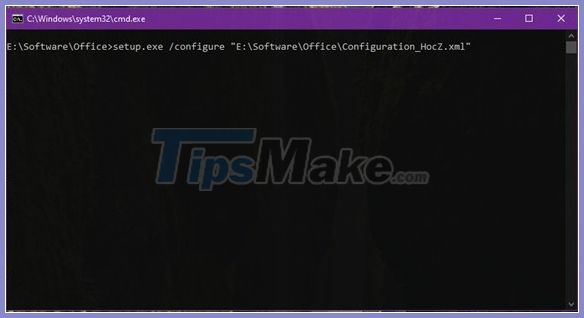
Once the download is complete, continue running the command "setup.exe / configure filename_XML" to begin the custom installation of Office 365 from you.
straightforward, right?
Key Takeaways
Use the information above as a practical reference for create your own Office installer as you like with the. Review each step carefully, confirm any requirements, and choose the option that best fits your situation.
FAQ
What does this guide explain about Create Your Own Office Installer as You Like with the?
It explains the main concepts, practical considerations, and useful steps related to create your own Office installer as you like with the without requiring advanced knowledge.
Who can benefit from learning about Create Your Own Office Installer as You Like with the?
This information is useful for readers who want a clear overview, practical guidance, and reliable steps related to create your own Office installer as you like with the.
What should I check before applying this information?
Review the requirements, confirm that your device, software, or situation matches the instructions, and back up important data before making major changes.
Related Articles
 How to Download a Windows Installer, Office Directly from8 minutes read
 Please Download and Install the Leaked Office 2016 Technical Preview2 minutes read
 Microsoft Allows Users to Reactivate Windows App Installer4 minutes read
 Customize Settings or Change Microsoft Office with Office14 minutes read
 Click: How to Install Powerpoint4 minutes read
 There Is an Official Version of Microsoft Office 2019 Available, Please Download7 minutes read
Reader Comments 0
Sign in with email or Google to join the discussion.