Create a Windows XP installation disc for laptops using SATA hard drives
Today's standard SATA hard drives are widely used and popular, but the installation of Windows XP from normal disks will result in CDs not recognizing the hard drive.The core issue is that the disks have not been integrated with the new ICH9 driver to identify the hard drive during the installation process. The following tutorial will show you how to integrate ICH9 standard into a normal Windows XP installation disc. .
The blue screen phenomenon also occurs when you transfer the ATA standard hard drive to SATA in the BIOS when the Windows operating system does not have a driver supported.
First, you need to prepare:
- Free nLite software, the latest version download here.
- Driver ICH 7 8 9 10 for SATA
- 1 hard drive partition to proceed (moderate capacity
Use nLite:
The main interface of nLite after booting:
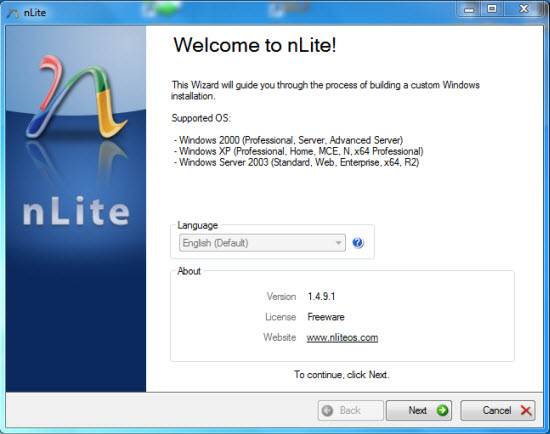
The next step, pointing the path to the directory, the drive containing the Windows installer (copied from the Windows installation disk without the driver included), in this example is the O drive.

After selecting the correct storage location, nLite will display specific information about this Windows version. Click Next to move to the next step:

The next window will appear, select Drivers and Bootable ISO to start the driver integration, and create the boot file iso:
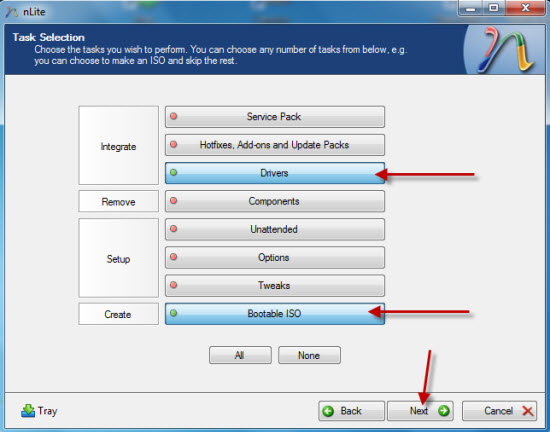
At the next step, press Insert to add the driver, there will be 2 choices: Single driver and Multiple driver folder:
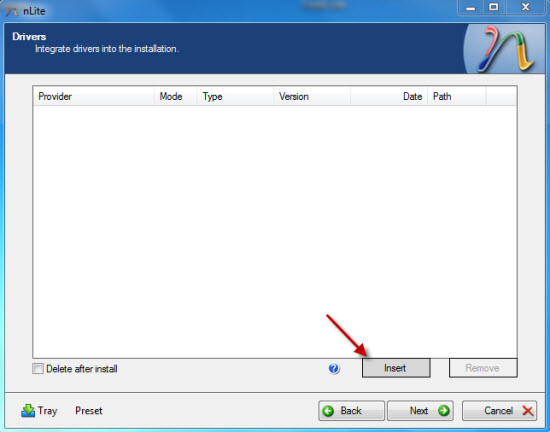
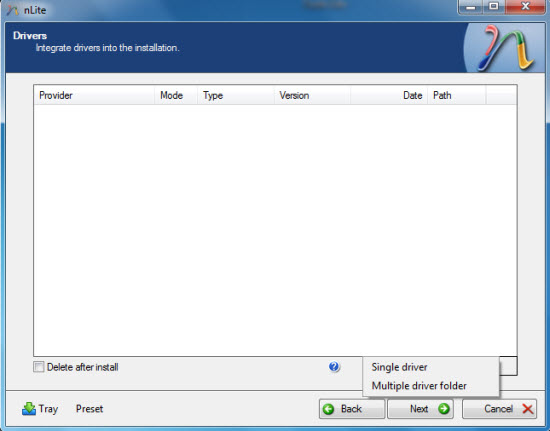
You can use any option, then point the path to the folder containing the ICH driver (download and extract):
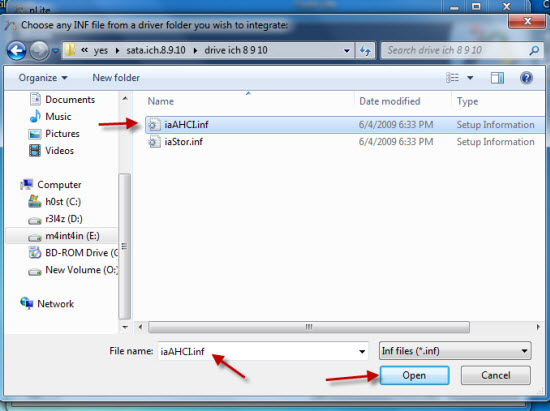
In this example, select Single driver and point to the directory where the driver is saved, select the file iaAHCI.inf and Open :
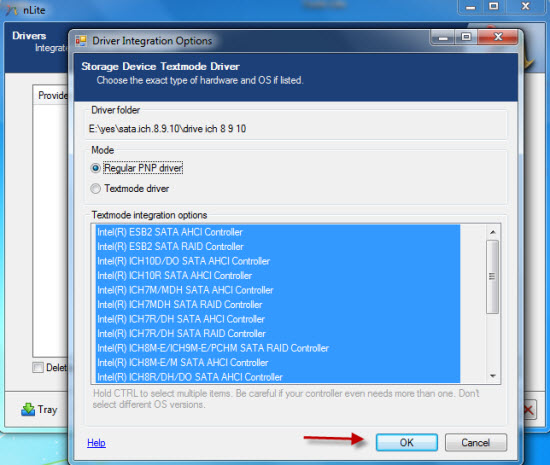
Next, select the Regular PNP driver to select all the drivers that the iaAHCI.inf file contains, or you can select the Textmode driver to add each driver separately. Click OK to move on to the next step:
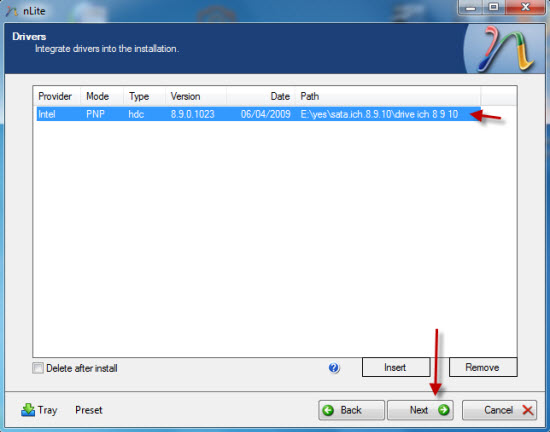
Check again 1 driver information, when you are sure you click Next to forward:
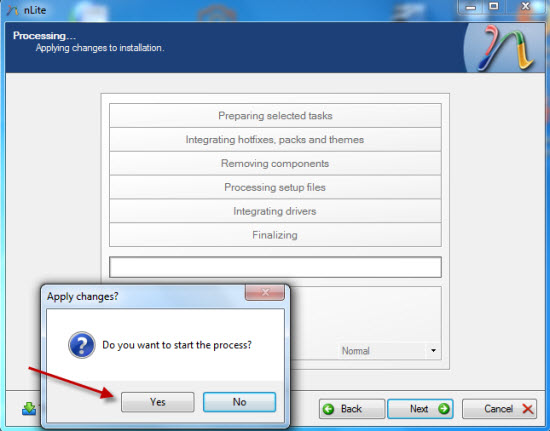
The dialog box showing Apply changes appears, click Yes to start the driver integration:
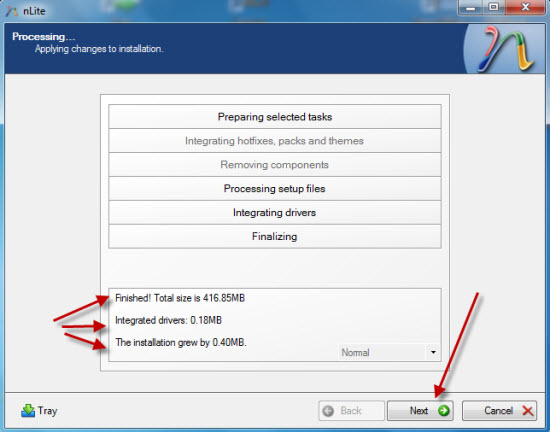
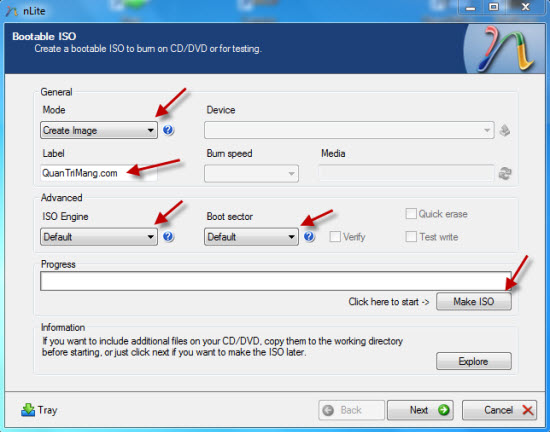
After finishing the process, nLite will display the full information about the disk driver, the driver has been added. Next step, there will be options if you want to burn directly to disk, create ISO file. To be sure, we should create an ISO file and then write to the disk to make sure there is no error:
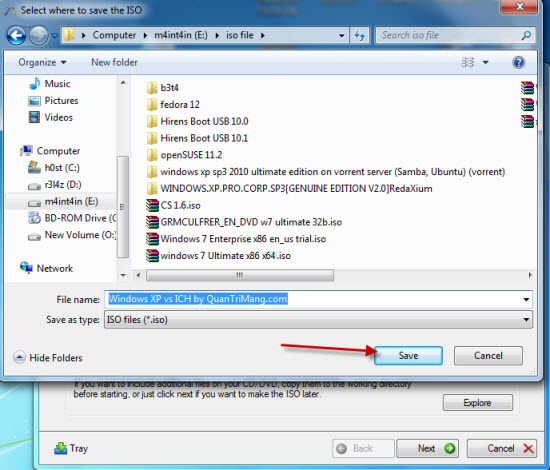
Then select the path to save the ISO file:
So you've completed the basic steps to integrate more drivers into the Windows installation disc. Above is the basic tutorial for adding SATA standard driver, depending on the requirements, you can integrate more types of drivers such as VGA, sound, NIC .
The rest is to burn the ISO file to a CD, and proceed with the installation as usual.
Good luck!