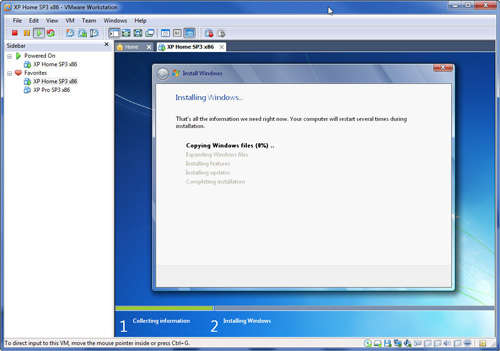
Fix errors when installing Windows 7 on a virtual XP machine
TipsMake.com - We have received a few questions from users experiencing Windows 7 in virtual machines. The problem I want to talk about today is when we try to install Windows 7 on a virtual computer running Windows XP, but when it comes time to select the hard drive / partition where Windows 7 will be installed. , a message will display that the device driver needs access to the drive is not available. This tutorial will explain how to fix this problem and allow the Windows 7 installation process to continue processing.
Note that we will skip some steps and do not waste time on too many screens you will have to navigate through, only display screens that are appropriate for this method.
In this tutorial, we will use the Windows XP Pro w / SP3 installer on the virtual computer. Not nice, no tricks, just a basic Windows installer is not edited in any way. Windows 7 is about to be installed from within Windows XP just like you see on the screenshot. The only change we made was that instead of using the standard Win 7 Home Premium Upgrade DVD, I copied, edited, and edited its images so that all versions of Win 7 can be used for Install this process instead of Windows 7 Home Premium only. If you want to modify Win 7 similar DVD, the instructions are here.

Since you can't upgrade XP to Windows 7, we will choose the [Custom (advanced)] installation option.

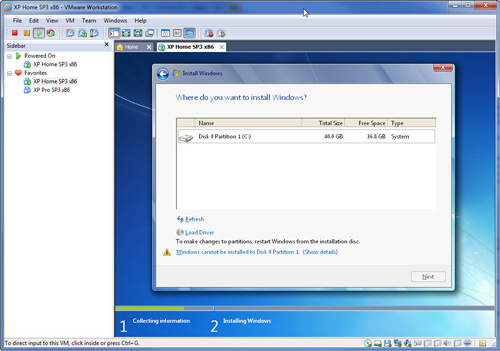
This is the problem. Even if there is a drive with sufficient capacity for Windows 7 installation, there is still the last message: "Windows cannot be installed to Disk 0 Partition 1" with the option to display details. Click on this message to see details.

The crux of the problem is that Windows 7 cannot be installed because it needs drivers for VMware SCSI Controller. All that's needed here is that you will have to provide the correct driver. The problem is that many users will quickly ignore how to provide the necessary drivers.

Obviously, the first step is to get the necessary driver and then how to get the installer to access it and how to get it to access the installer.
It will be much easier if the next step is done in the order we display it. If you make a mistake out of this order, it's not a disaster, but you'll have to come back if you've skipped a step.
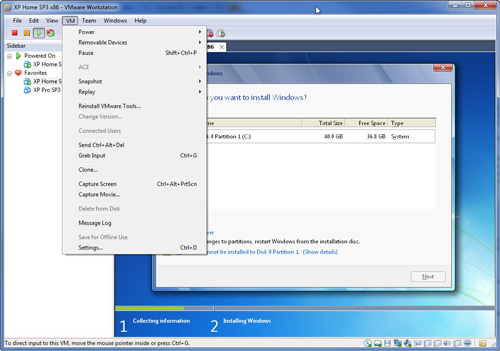
Go to [VM] on the menu bar and select the [Settings] option .
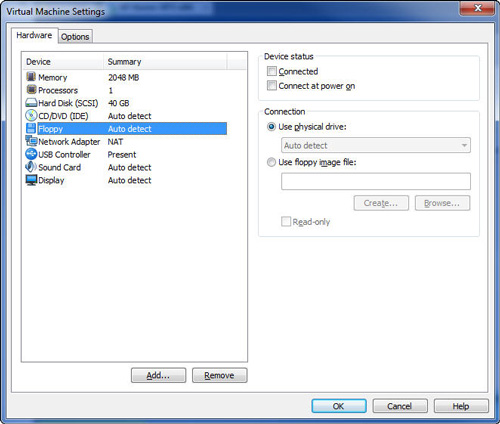
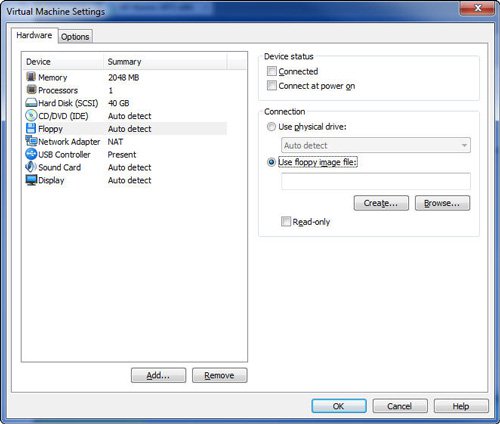
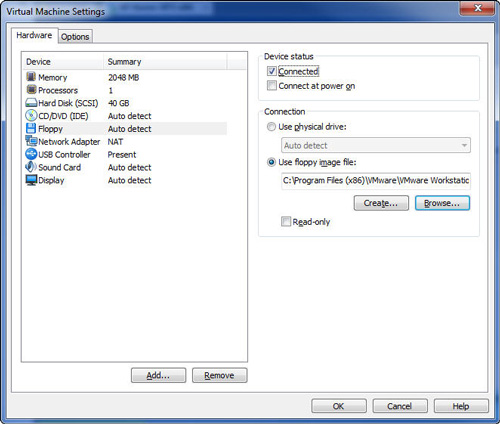
With the [Hardware] tab selected, on the left panel, click [Floppy] will display the customized hard drive in the right panel. Under [Connection] , select [Use Floppy Image File] and then click the [Browse] button.
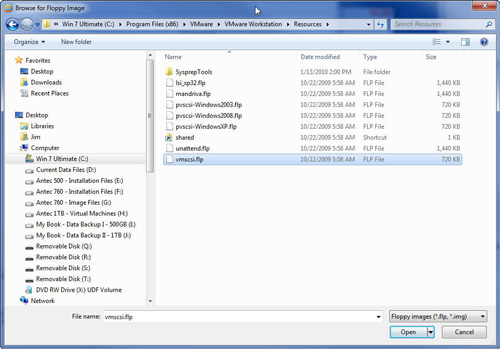
In this step, Windows Explorer will open and you need to find the browse to where the driver file is stored. In our test case, the file (vmscsi.flp) is located in C: Program Files (x86) VMwareVMware WorkstationResources.
You can easily perform a search right on your system to find this file if it is not in our same area and point to the area where this driver is located.
The file you need can be named vmscsi-1.2.0.4.flp , or if you don't have this file, you can donwload it on the VM home page.
Where the .flp file is stored on your host system, there is no difference. It can even be on an external hard drive, CD or DVD. The important thing is that you have to point (find browsing) on it in this step.
Once you've selected the file, click on [Open] and move on to the next step.
As you can see, the previously selected .flp file is now displayed as a disk image file to use.
In the [Device Status] section , make sure [Connected] has an item next to it and then click [OK ] to process.
Go back to the ' Where do you want to install Windows ' screen, click on ' Load Driver ' and handle the next step.
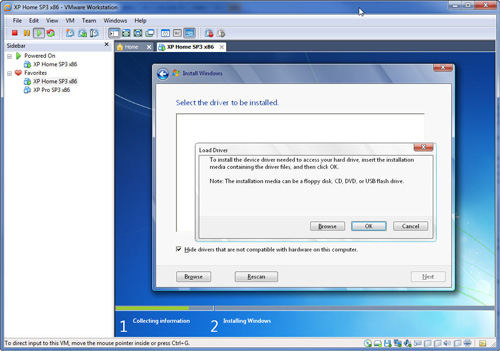
The 'Load Driver' screen will display. Click on [Browse] to process.
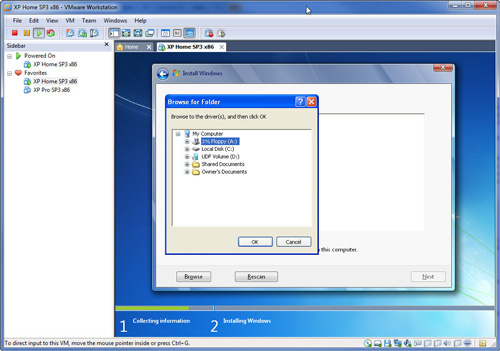
Screen 'Browse for Folder' will display. Click '3 1/2 Floppy (A :) and then click the [OK] button.
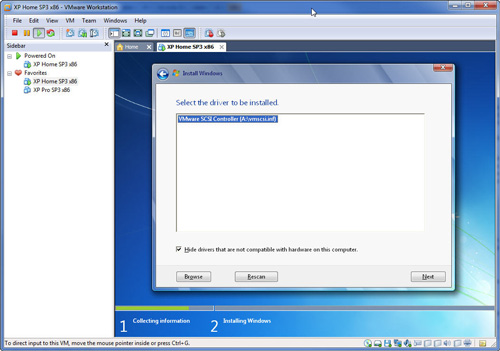
The next step will take a few seconds to execute after some internal drive fails and decodes, the name and location will appear in this window.
If you do not have the dialog box checked for incompatible drivver, you will see some drivers listed. If so, just check the box and click [Rescan] to restrict the list of required compatible drivers.
Click [Next] to continue processing.
Done. Message "Windows cannot be installed to Disk 0" has disappeared and the installation process may continue.
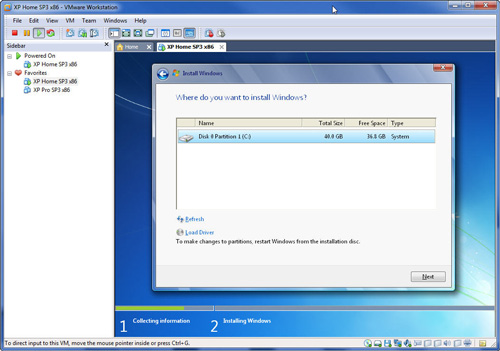
Click the [Next] button .
You will get Windows.old folder message if you install it via an old version of Windows XP installation.
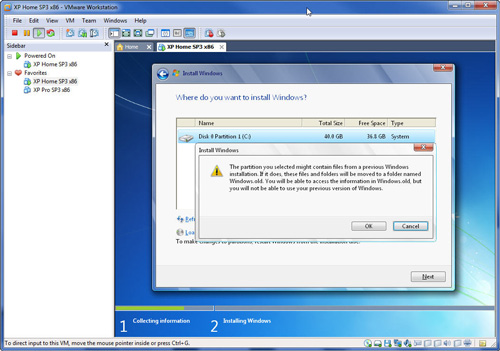
Click [OK] to continue processing.
Your remaining job is to wait for the successful Windows 7 installation process!
