10 things to do when using SSD hard drives on Windows
Many people use SSD (Solid State Drive) but do not know how to increase the performance of this type of drive. Upgrading your computer by adding an SSD is the best thing you can do. An SSD is a device that helps speed up everything you're using on your PC, but if not properly maintained, you might not get the best performance from it.
Here are some things you need to do when running an SSD on a Windows 11/10 computer.
1. Turn on defragmentation

Initially, defragmenting SSDs is not only unnecessary but also harmful to SSDs. But now, Windows will defragment your SSD automatically and periodically. Windows is smart enough to recognize the SSD, then performs this task appropriately and intelligently.
Defragmentation is today the best option in Windows and serves as a comprehensive drive health tool. Windows defragmentation adapts to SSD drives, so enable it.
Do you need to defragment your SSD?
The answer is yes. Windows defragments your SSD automatically and periodically. Windows is smart enough and performs this task appropriately and intelligently. Mr. Scott Hanselman, senior manager at Microsoft said:
"Storage Optimizer will defragment SSDs once a month if the Volume snapshot feature is enabled. This is by design and necessary because volsnap copy speeds are slow for write performance on fragmented SSDs.
There is also a misconception that fragmentation is not an issue on SSDs. If the SSD is too fragmented, you may reach maximum file fragmentation (when the metadata cannot represent any more file segments), which will lead to errors when you try to write /extend file. Furthermore, more file segments means more metadata has to be processed while reading/writing files, which can lead to slower performance.
For Retrim, this command will run according to the schedule specified in the dfrgui user interface. Retrim is necessary because of the way TRIM is handled in the file system. Due to varying hardware performance in response to TRIM, TRIM is processed asynchronously by the file system. When a file is deleted or space is freed, the file system queues a TRIM request for processing.
To limit snapshot resource usage, this queue can only reach a maximum number of requests. If the queue has a maximum size, incoming TRIM requests may be dropped. This is okay because Windows will periodically come in and perform a Retrim using Storage Optimizer. Retrim is performed at a granular level to avoid reaching the maximum TRIM request queue size when TRIMs are dropped."
2. Disable Fast Startup
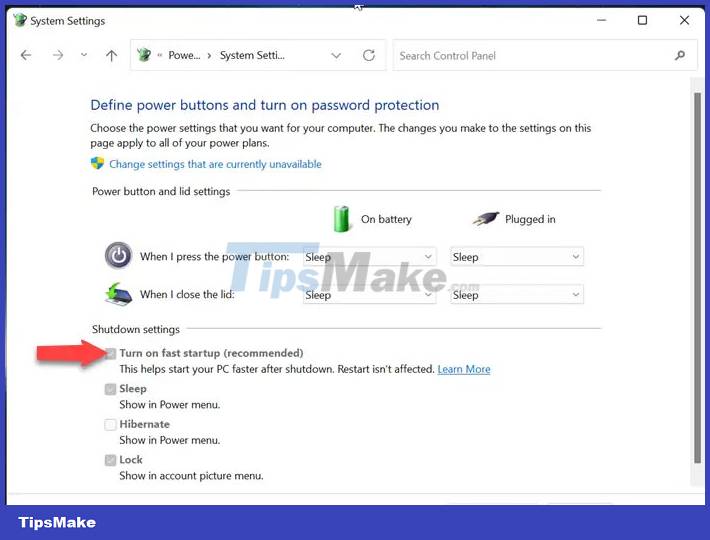
Fast Startup helps increase performance by reducing boot time, but is also known to cause problems for some users. If you have an SSD and are turning off Fast Startup, it means your PC will reboot cleanly every time you shut it down. Disabling Fast Startup is not necessary but it can be helpful.
3. Check if System Restore is enabled
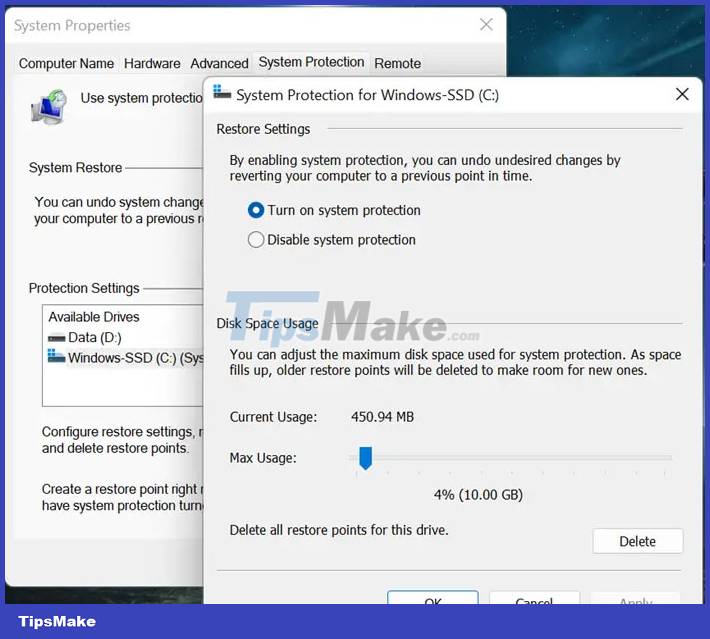
In the early days of SSDs, they were not very durable, so people often suggested turning off the System Restore feature to improve performance.
But today, that advice is redundant. Now, System Restore is an extremely necessary feature that the article recommends that you enable on Windows systems.
Below are the steps to enable this feature.
- Click Start.
- Open Create a restore point .
- The System properties tab will open.
- Now, right click on your SSD in the list.
- Configuration in new window.
- Then, click Turn on system protection .
After that, System Protection will be enabled.
4. Arrange data in the right drive
We all know that SSD (Solid State Drive) is a fast but smaller drive, while HDD (Hard Disk Drive) is a large but slower drive. Therefore, you should plan to store your data and files accordingly. You should put operating system files and other data that you use frequently and want to run faster on the SSD. If you own large files like movies and songs, you should keep these files on the HDD, because they don't need to run fast.
5. Enable TRIM
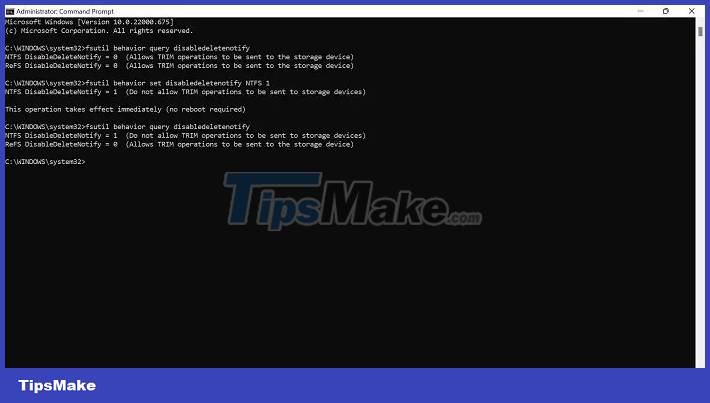
The TRIM command allows the Windows operating system to communicate with the SSD. No need to delete and restore the entire blog to the SSD in case any data pages are dropped. TRIM can easily delete only the necessary pages. This helps improve SSD performance and it must be enabled on your PC.
When TRIM is enabled, the SSD does not erase all data, but instead only erases necessary data.
6. Enable AHCI
Advanced Host Controller Interface (AHCI) is a crucial feature to ensure that Windows supports all the features that come with running an SSD on your computer, especially the TRIM feature, which allows Windows to help the SSD Carry out regular garbage collection.
The term 'garbage collection' is used to describe the phenomenon that occurs when a drive discards information that is considered no longer in use.
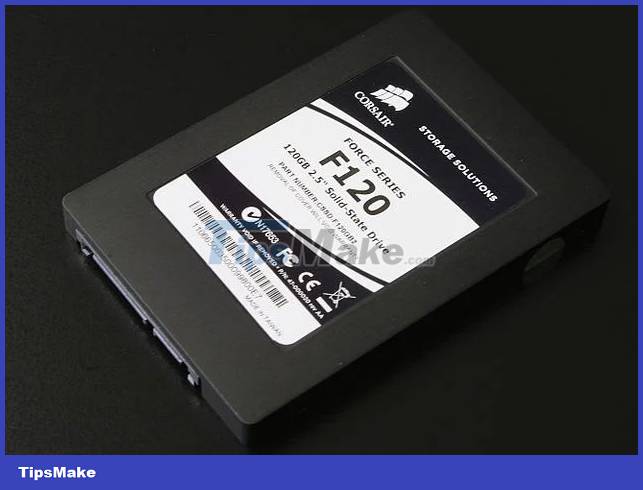
To enable AHCI, go into your computer's BIOS and find the appropriate setting. Each BIOS works differently, so you'll have to learn a bit. Most likely new computers will have this feature enabled by default. You should enable this feature before installing the operating system, although you can also enable it later.
7. Configure Write Caching
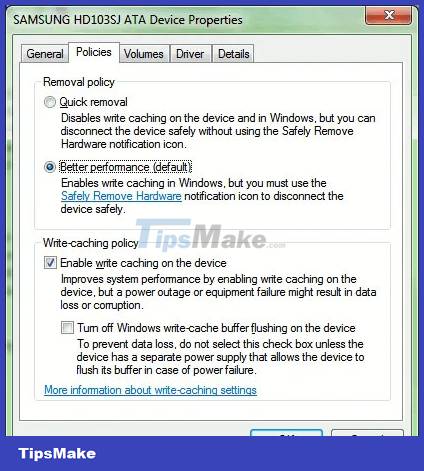
On many SSDs, user-level Write Caching can have a detrimental effect on the drive. To find this out, you will have to disable this option in Windows and see how the drive behaves afterwards. If your drive performs worse, re-enable it.
To get to the configuration window, right-click on the Windows button and select Device Manager . Expand Disk drives , right-click your SSD and select Properties . In the Policies tab , check the box next to Enable write caching on the device . Benchmark your SSD with and without options and compare the results.
8. Set up 'High Performance' power options
This goes without saying. When your SSD turns on and off constantly, you'll notice slight lag whenever you use your computer after it's been idle for a while.
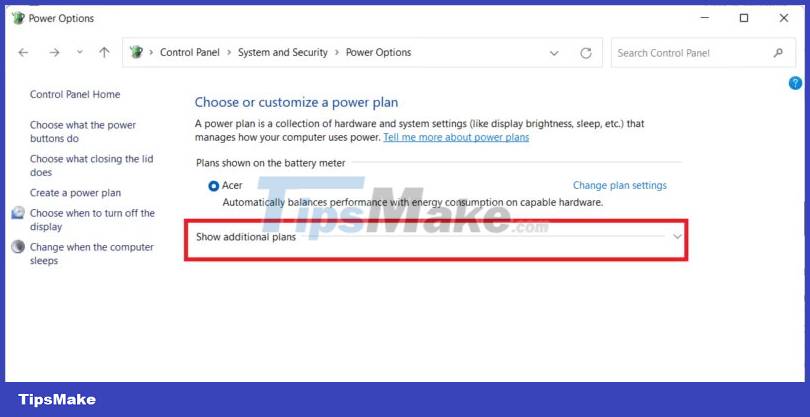
To configure your power options, open Control Panel from the Windows search bar, then navigate to System and Security -> Power Options . Select High Performance . You may need to click Show additional plans to find it.
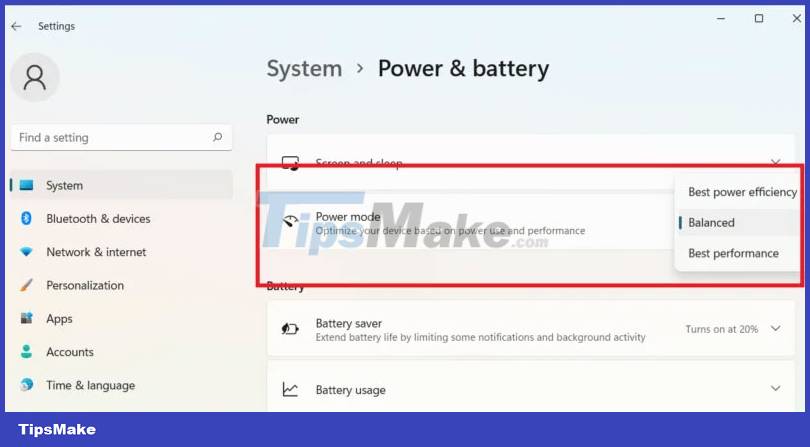
On Windows 11 laptops, you can also click the battery icon in the notification area, then click the battery icon in the pop-up window. In Power , select Power mode -> Best performance .
9. Disable indexing
By default, Windows indexes your drive data to make searching faster whenever you're looking for something. You can choose to disable indexing on your SSD if you don't use the search function much.
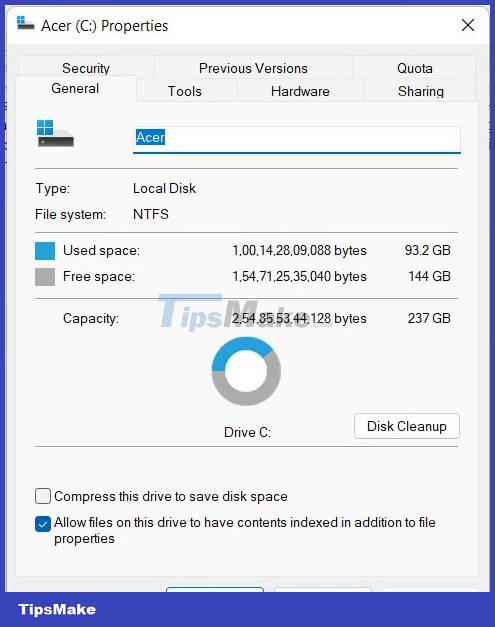
To do this, open Explorer, right-click your Windows drive (usually C:), and click Properties . Uncheck the box next to Allow files on this drive to have contents indexed in addition to file properties .
10. Disable Pagefile for SSD
Windows automatically manages the pagefile size for every drive and uses the file to dump the least used files whenever it starts running out of physical RAM. In case you have more RAM than needed, disable pagefile on the SSD to free up occupied space.
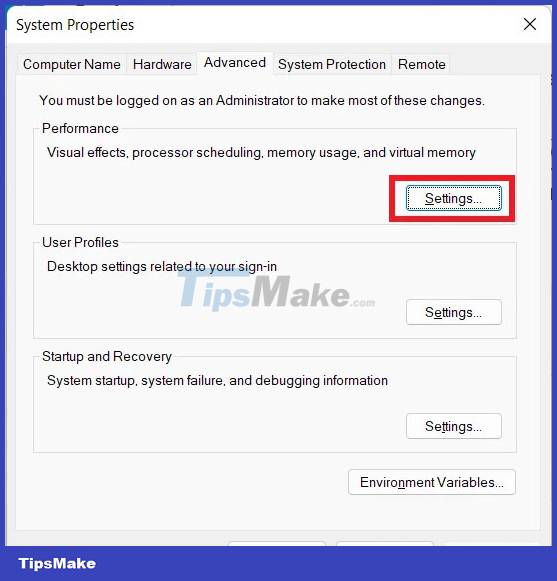
Open the Run window by pressing Win + R . Type 'System Properties Advanced' and press Enter. In the Advanced tab , click Settings in the Performance section .
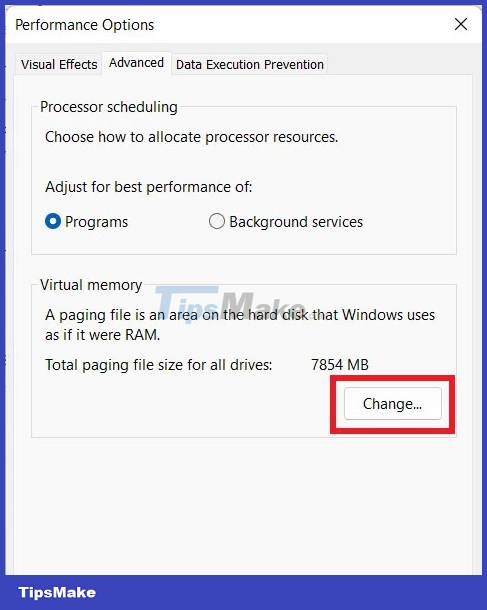
Select the Advanced tab and click Change in the Virtual memory section .
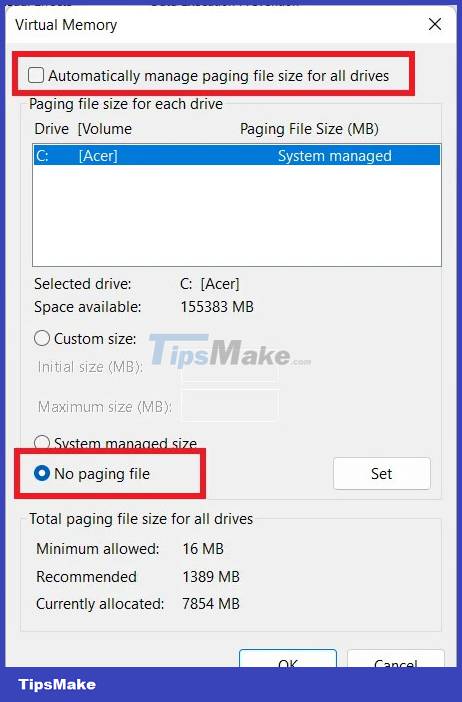
Uncheck Automatically manage paging file size for all drives , select your SSD and select No paging file .
The best SSDs deliver lightning-fast system performance compared to conventional hard drives, whether you're gaming or using creative applications. There are many things to consider when buying an SSD, but the most important is the interface (SATA, NVMe) and whether it is a DRAM or non-DRAM SSD. Some of the fastest Gen4 and Gen5 SSDs can even speed up your game load times using DirectStorage.
Hopefully these tips will help you optimize and improve SSD performance.