Create a border around Word documents
Create a border around Word documents. You can create a border for a paragraph or for the whole page.
Table of Contents
You can create a border for a paragraph or for the whole page, you can use the way to create a border separating the two paragraphs that you want to highlight them.
1. Create a border around a paragraph any text
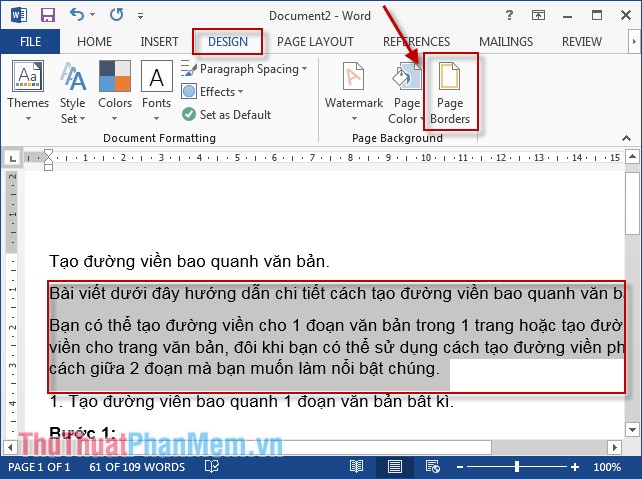
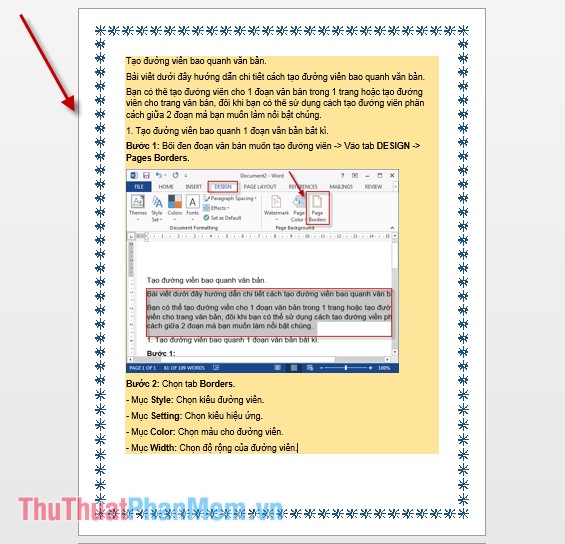
Step 1: Highlight the text you want to create borders -> Go to DESIGN tab -> Page Borders .
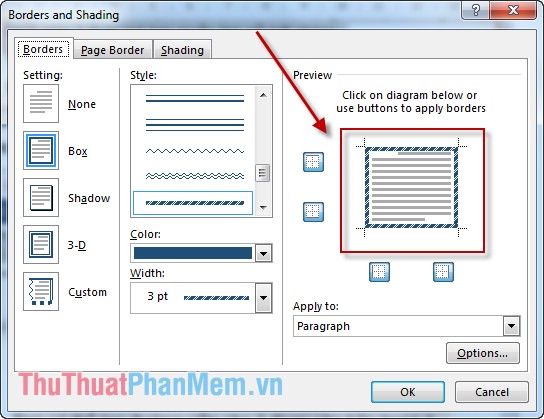
Step 2: Select the Borders tab .
- Item Style : Select the type of border.
- Setting : Choose effect type
- Item Color : Select the color for the border.
- Width : Select the width of the border.

Step 3: In case you want to set some options of position of border, click Options . A dialog box appears, depending on the request you choose the appropriate distance -> OK .

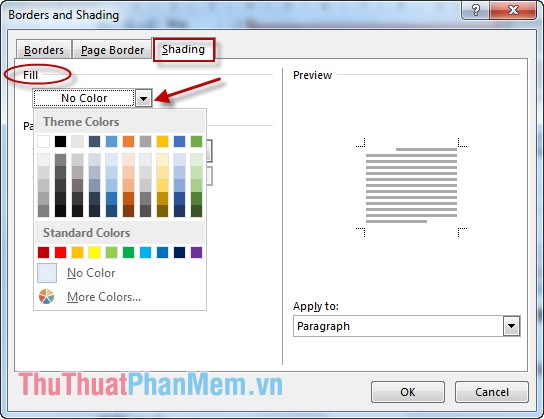
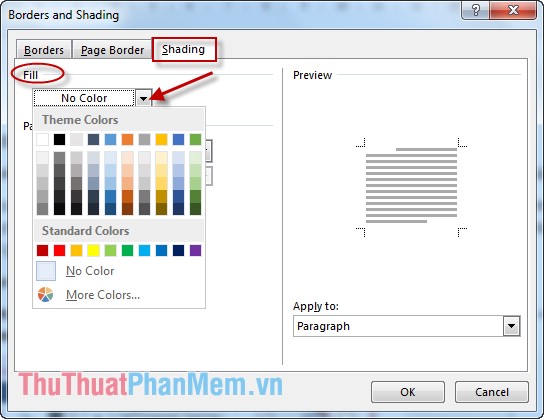
Step 4: Create a background color for the text, click Shading tab -> select the appropriate color in the Fill section .
In case you do not want to create any border, click on it on the Preview section .
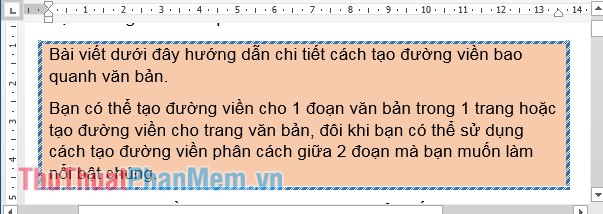
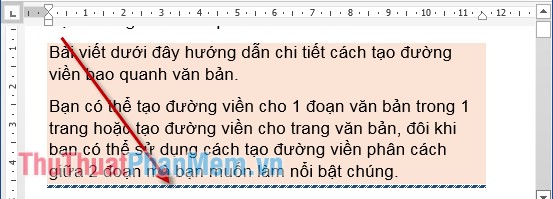
Result:
2. Create a border around a page of text
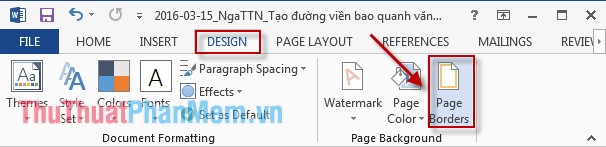
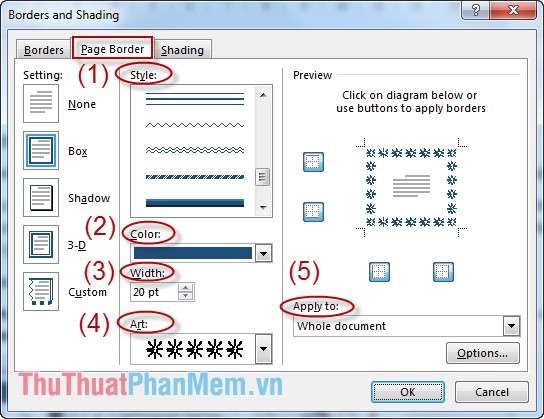
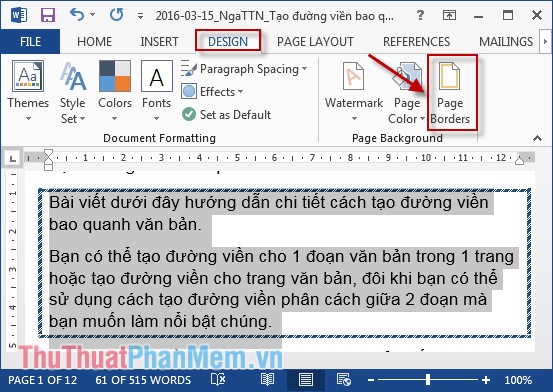
Step 1: Place the cursor in the page you want to create a border -> Go to DESIGN tab -> Page Borders .
Step 2: A dialog box appears -> select the Page Border tab :
- Item Style : Select the type of border.
- Color Section : Select the color of the border.
- Width : Select the width of the border.
- Art section : Select an art border.
- Section Apply to : Apply border settings to the current page or entire pages.
Step 3: Switch to the Shading tab to fill the background color for the text on the page -> Choose the background color in Fill -> OK .
Result:
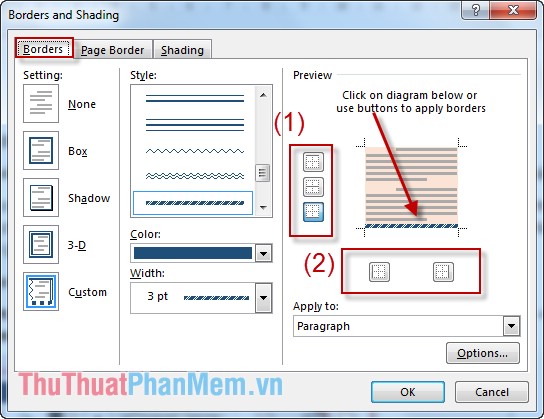
3. Create a border between two paragraphs
In case you want to create a border separating two paragraphs of text you can do the following:
Step 1: Highlight the text you want to create separators -> DESIGN -> Page Borders .

Step 2: Select the Boders tab -> Choose the style and color for the border.
Step 3: After selecting the border you move to Preview, click the border on the left, right and top to remove it. Or you can choose the type in (1) and (2) -> OK .
Result:
4. Delete borders
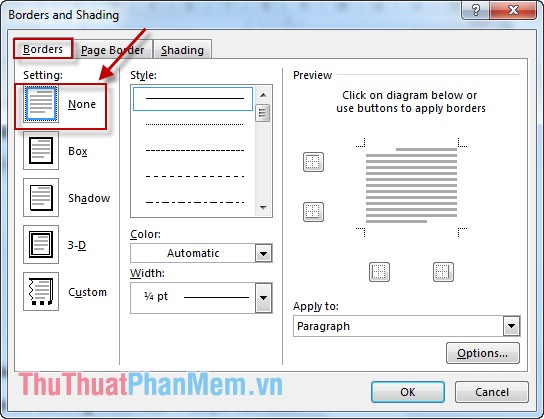
- Delete the borders of a paragraph of text:
Step 1: Highlight the text you want to delete the borders -> DESIGN -> Page Borders .
Step 2: Select the tab Borders -> In the Setting section select None -> OK .
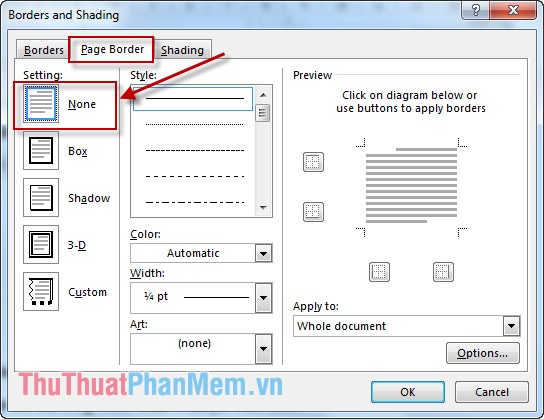
- Delete borders on text pages:
Similar to the border on the text -> Select the Page Borders tab -> In Settings, select None -> OK .
Depending on your requirements, please select the appropriate border.
Good luck!
Was this article helpful?
Your feedback helps us improve.
Related Articles
 Create beautiful border borders in Word2 minutes read
 Beautiful border frames on Word3 minutes read
 Create a border (border) around the text2 minutes read
 How to create a table border in Word5 minutes read
 How to create a cover page in Word7 minutes read
 MS Word - Lesson 2: Working with Documents4 minutes read
Reader Comments 0
Sign in with email or Google to join the discussion.