Set the default file type when saving Word documents
The following article details how to set the default file type when saving in Word. Just a few simple initial steps to apply to your entire document.
In this article, the instructions on Word 2013, with Word 2010 and 2007 are similar.
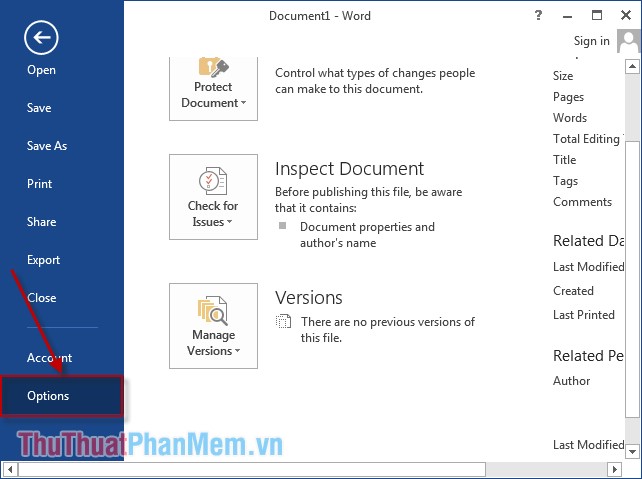
Step 1: On the card File -> Options .

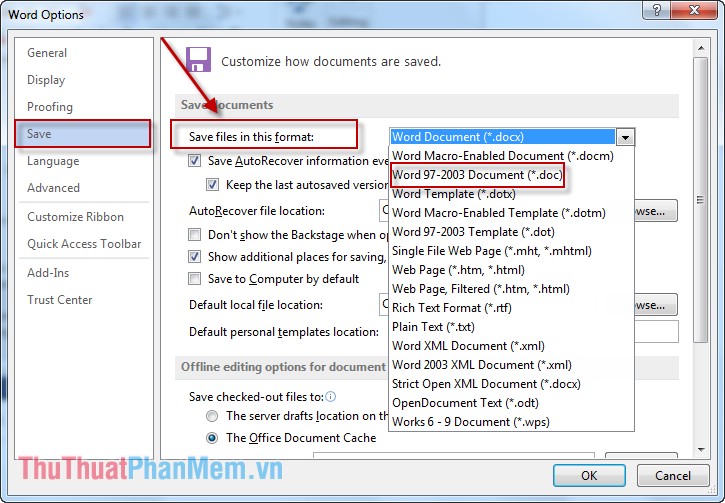
Step 2: Select the Save item .
Select the default file type when saving in Word. For example, here the version of Word 2013 you want to save the file as Word 2003 by default, click Word 97-2003 Document (* .doc) .

Finally, click OK to complete the default setup process when saving text.
Good luck!
4 ★ | 1 Vote
You should read it
- How to reduce Word file size
- Instructions for saving default Office documents to SkyDrive
- How to open backup file in Word 2013?
- How to change the default save file format in Word, Excel and Powerpoint 2016?
- How does the word in Microsoft Word jump?
- How to merge multiple Word files into 1 file, merge multiple Word documents into one
 Invaluable keyboard shortcuts in Excel
 Instructions for installing default fonts in Word, Excel and PowerPoint
 Restore unsaved text in Word, Excel, PowerPoint
 Common errors in Microsoft word and how to fix it
 Method to enter data simultaneously into multiple sheets
 Instructions on how to color alternating rows and columns in Excel