9 time-saving tips when formatting documents in Microsoft Word
A few simple tips can streamline your workflow, helping you create polished, visually appealing documents in just a few minutes..
For most people, Microsoft Word is the go-to tool for creating professional documents, but formatting can be time-consuming. Fortunately, a few simple tips can streamline your workflow, helping you create polished, visually appealing documents in less time.
1. Use essential shortcuts
By keeping your fingers on the keys, you can apply quick formatting changes and stay focused on writing - no more fumbling with the mouse and getting distracted.
For example, to bold text, just press Ctrl + B . Similarly, to italicize, use Ctrl + I , and to underline, press Ctrl + U . These basic formatting shortcuts are just the tip of the iceberg of time-saving shortcuts in Word.
You can quickly align text left, center, or right using Ctrl + L, Ctrl + E, and Ctrl + R . Press Ctrl + 2 to double-space your document and Ctrl + 1 to single-space it. These shortcuts make it easy to adjust the layout of your document.
2. Use Word templates

If you create a lot of similar documents, such as reports, invoices, or newsletters, using Word templates can save a lot of time. Word templates are pre-formatted with placeholders for your content, so you don't have to start from scratch each time.
Word offers a variety of built-in templates for common document types, accessible through the New Document menu . Choose the template that best suits your needs and you'll have a professionally designed document, filled with your own content, of course.
3. Implement consistent formatting with Styles
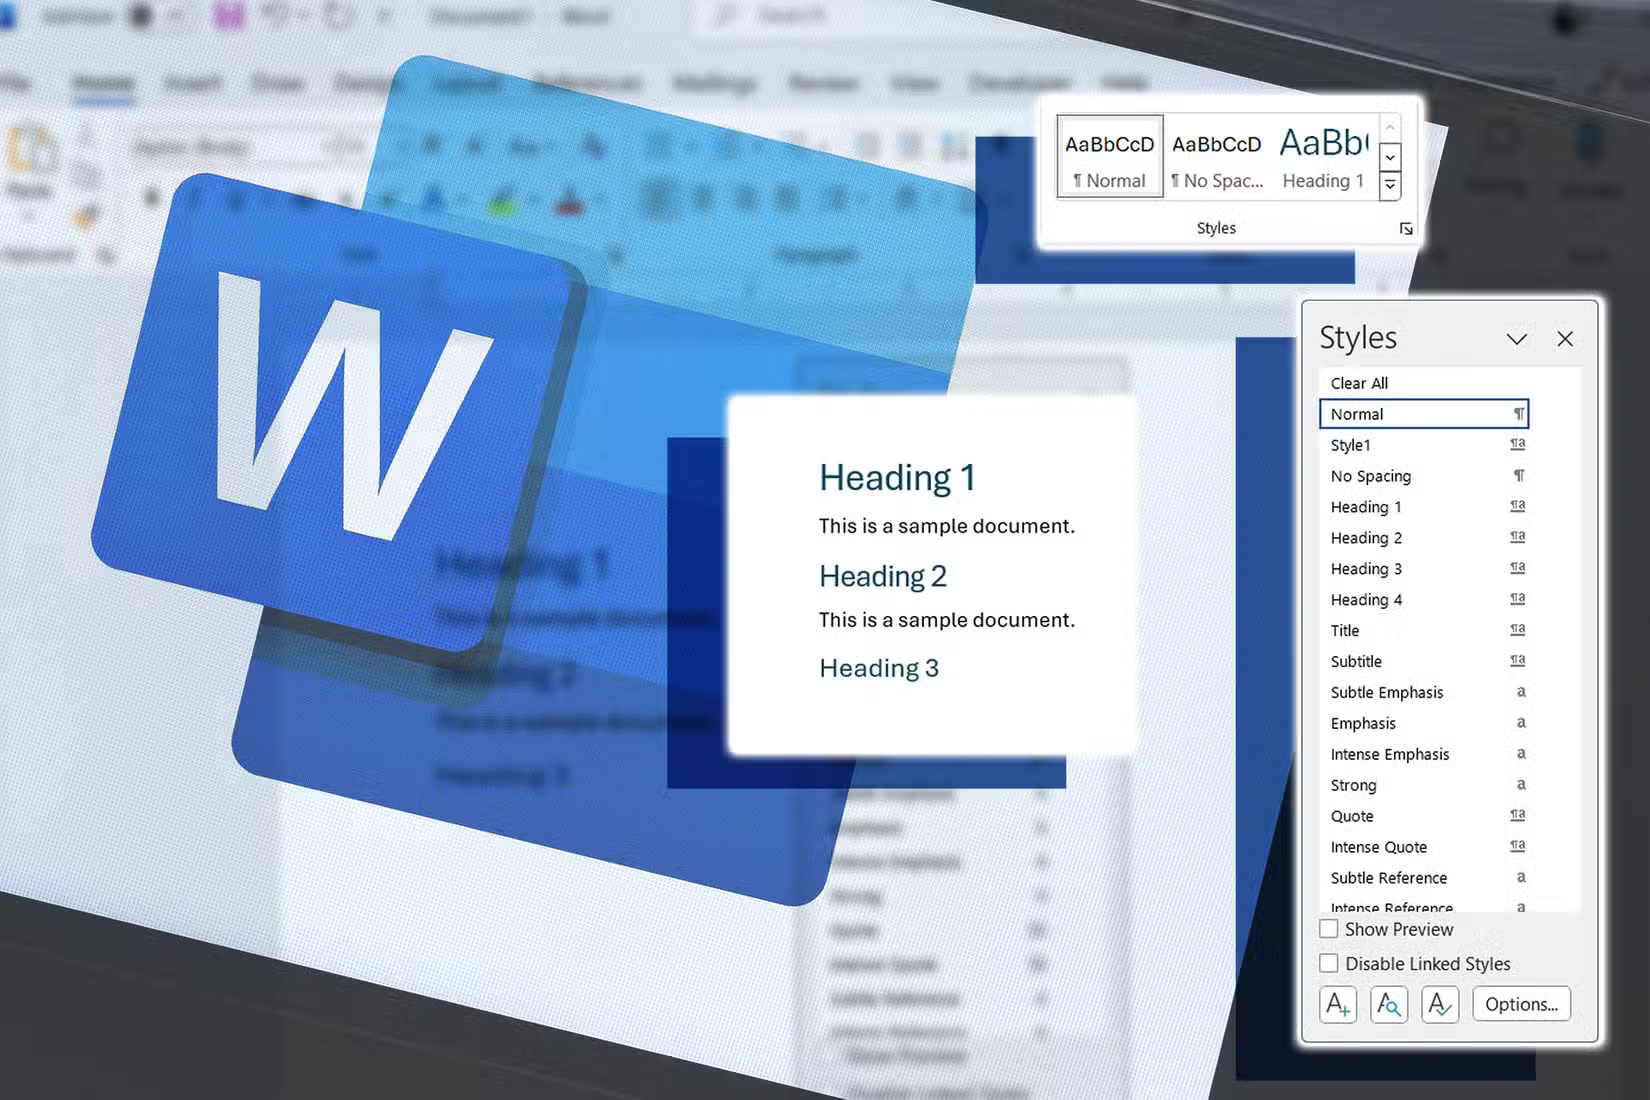
You should always use Styles in Word to apply consistent formatting throughout your document. First, you define styles for headings, paragraphs, and other elements; then you can have a consistent look without having to manually format each section.
To apply a style, select the text and choose the desired style from the Styles gallery on the Home tab .
4. Customize Quick Access Toolbar
The Quick Access Toolbar is a handy feature that lets you keep your most used commands just a click away. By default, it includes basic commands like Save, Undo, and Redo , but you can easily customize it to include your frequently used formatting tools.

It saves you time by eliminating the need to search through the ribbon every time you want to apply a specific format.
5. Navigate using the Navigation pane
Scrolling through pages to find a specific section can be a pain when working with long documents. The Navigation Pane is another powerful tool that helps you quickly switch between sections.

The Navigation Pane is especially useful when you need to make formatting changes to specific parts of your document. You can apply formatting updates efficiently without having to scroll a lot or search manually.
6. Apply formatting to multiple sections using Format Painter
Format Painter is a handy tool that allows you to quickly copy formatting from one part of a document and apply it to another. This feature is a huge time saver when you need to maintain consistent formatting throughout your content.
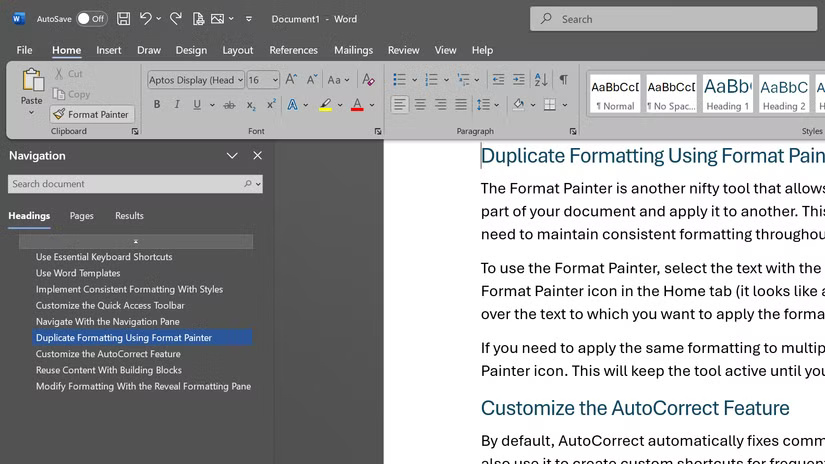
If you need to apply the same format to multiple sections, double-click the Format Painter icon. This will keep the tool active until you press Esc or click the icon again.
7. Customize the AutoCorrect feature
By default, AutoCorrect automatically corrects common typos and spelling errors, but you can also use it to create custom shortcuts for frequently used phrases or formatting.
By default, Word recognizes many math shortcuts, such as typing "pi" to insert the pi symbol (π) or "sqrt" followed by a number to create the square root symbol (√).
8. Reuse content with Quick Parts
Quick Parts are a great way to store and reuse formatted content. This includes headers, footers, cover pages, or even entire sections of a document. By saving these elements as Quick Parts, you can insert them into any document with just a few clicks.
Cover pages are also a great example of how Quick Parts can save you time. Instead of creating a new cover page from scratch for every document, you can create a custom cover page once, save it as a Quick Part, and quickly insert it into any document when needed.
9. Modify formatting using Reveal Formatting
The Reveal Formatting pane displays all the formatting details of the selected text, including font, size, style, and paragraph settings.
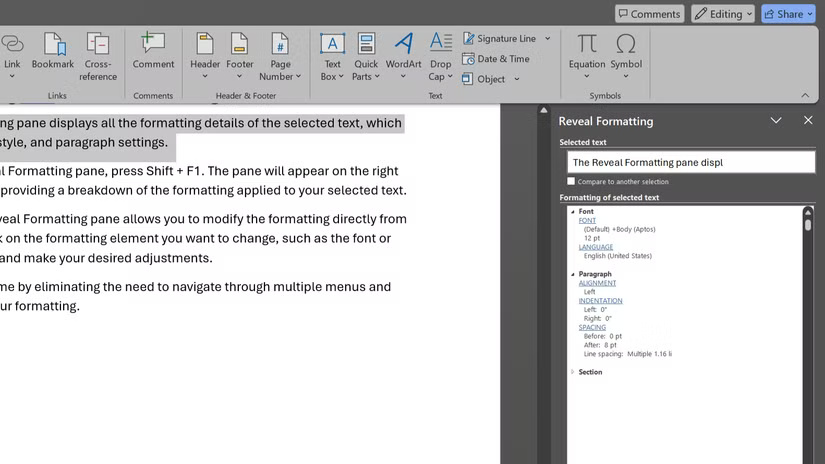
Additionally, the Reveal Formatting pane lets you modify formatting directly from the pane itself. You can click the formatting element you want to change, such as font or paragraph spacing, and make the desired adjustments.
Doing so can save you time by eliminating the need to navigate through multiple menus and dialog boxes to modify formatting.
Now that you know these time-saving tips, you can create professional and well-formatted documents in just a little bit of time.