Table of Contents
This guide provides a clearer, better-organized overview of 6 Quick and Simple Ways to Take Screenshots of Windows 10. It focuses on the essential facts, practical steps, and common questions readers are most likely to have.
Windows 10 provides many facilities for taking screenshots of your computer without requiring the installation of additional software. Do you know how many different ways this operating system supports you to store important photos?. Even if you are a professional software user, knowing the following 6 ways to take screenshots of Windows 10 computers will help you a lot during your work process.
Each Win 10 computer screen capture has its get advantages and disadvantages and depends on the situation for you to apply to your computer screen capture method. Thereby we see the sophistication of Windows that we do not always have the conditions to explore.
Table of Contents: 1. Take a screenshot of your computer screen using Print Screen - Prt sc. 2. Take a screenshot of Windows 10 and save it directly. 3. Take a screenshot of your computer screen by region on Windows 10. 4. Use Game Bar to take a screenshot of your computer screen. 5. Take a screenshot of your computer using the Snipping Tool. 6. Take a screenshot of your computer using Microsoft Edge.
Instructions for Taking Screenshots of Windows 10 Computers
Take Traditional Screenshots with Print Screen - Prt Sc
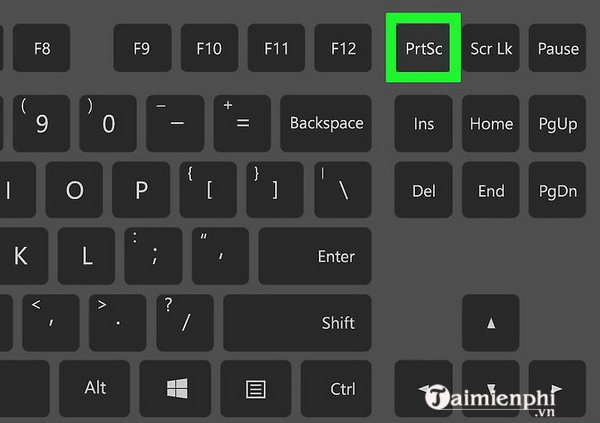
Print Screen Is the button located at the top right of the keyboard whether you are using a laptop or desktop computer. The key select is very common and it is known as the first tool to help you take screenshots at the simplest level. However, the photo is saved in tamk memory and you need to open Paint to paste it and view the photo.
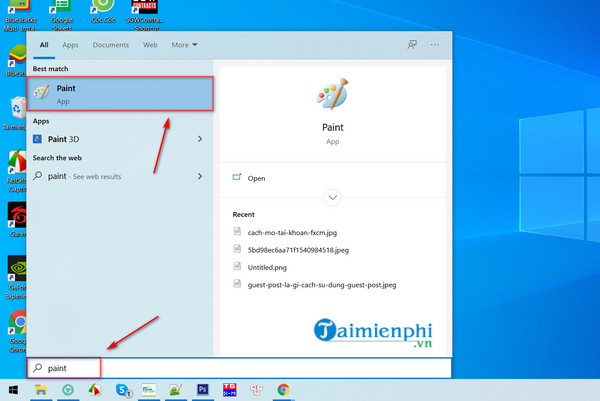
Step 1: After pressing Print Screen - Prt sc to take a photo, turn on The Start Menu , type " Paint " and access the paint tool on your computer.
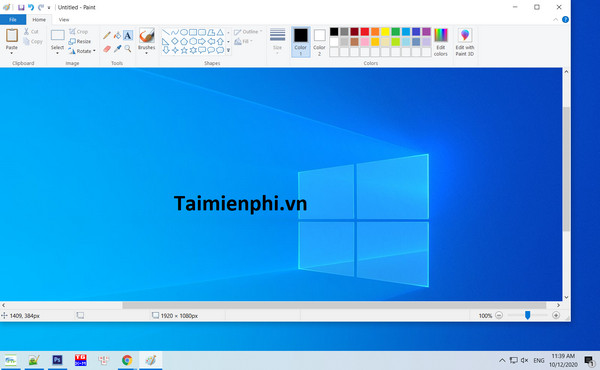
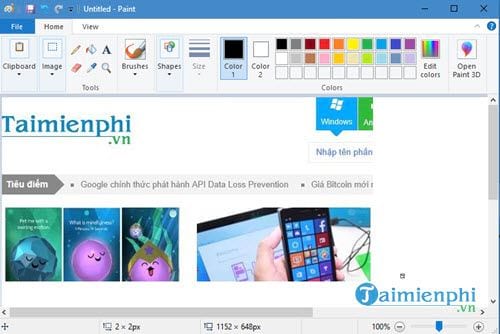
Step 2: In Paint, Simply use Ctrl + V To paste and then save the image anywhere is up to you.
Note That if you want to take a screenshot of your computer screen without the taskbar, select the key combination Alt + Print Screen , for laptops it is Fn + Alt + Print Screen .
Take a Screenshot and Save It Directly
It can also be said that this is a development of traditional screenshots, but it is not saved to the clipboard but exported immediately to your photo library in a separate folder.
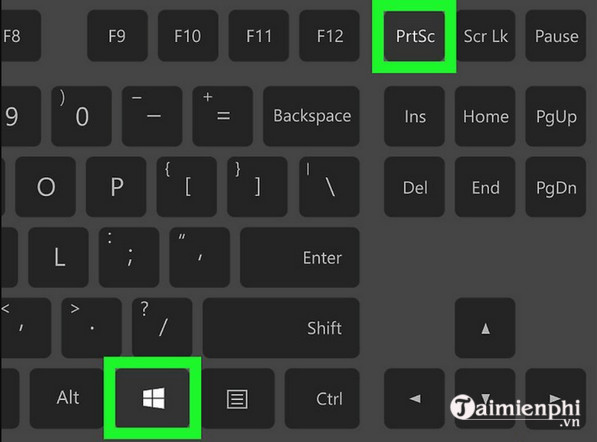
Step 1: With this way to take a screenshot of your Windows 10 computer, use the Windows + Print Ssreen Key combination to take a screenshot and save it directly. As soon as you select the key combination, if you see the screen turn dark for 1 second, it means you have completed taking a screenshot of your Windows 10 computer.
Step 2: Then just open This PC > and access the default Picture Collection.
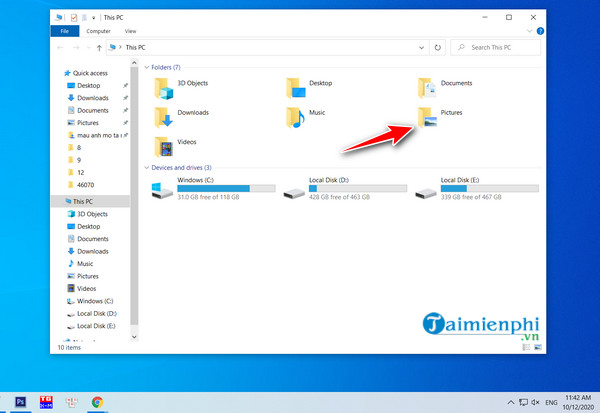
In Picture, an item calledScreenshot Appears, select it.
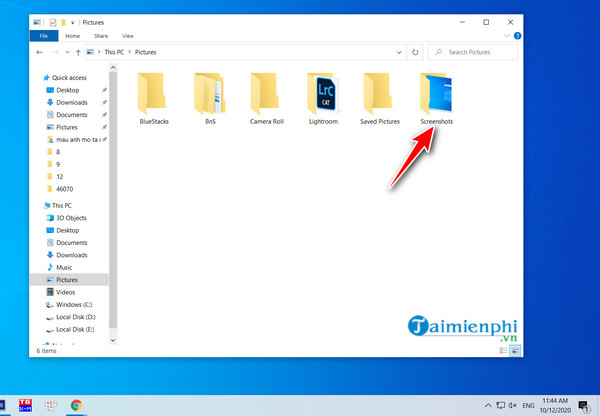
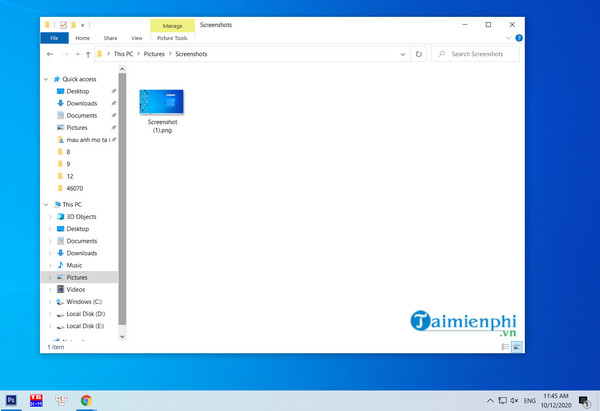
And inside are the photos you just took with the resolution corresponding to the screen you are displaying.
Take a Screenshot of Your Computer Screen by Region on Windows 10
With the methods just introduced, you are simply taking a full screenshot of your Windows 10 computer screen. But with this approach, you can localize and capture any part you want.
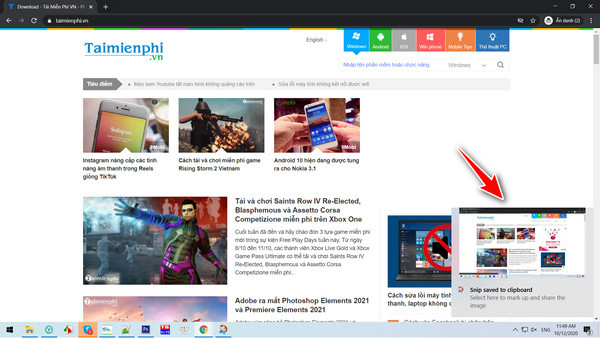
Step 1: Select the key combination Windows + Shift + S To take pictures under the area you zoned.

Step 2: The image you take will be saved in the clipboard. and appears on the bottom right corner of the screen. Select To see full image.
Use Game Bar to Take a Screenshot of Your Computer Screen
Game Bar is a feature that only appears on Windows 10 and integrates with Xbox allowing you to take photos, record videos and share them on the Xbox system. With this way of taking screenshots of Windows 10 computers, you can only take photos of each software or folder in use.
Step 1: To use, select the Windows + G Key combination. The interface appears as shown below.
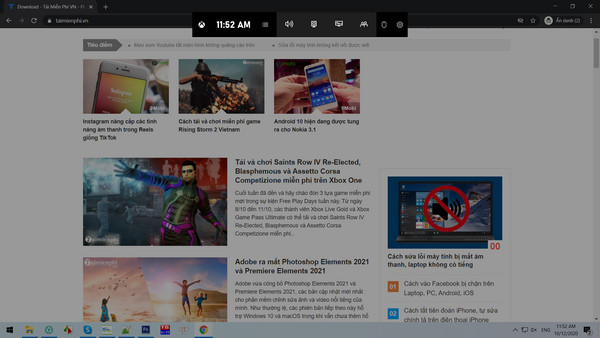
Step 2: Here you can select The computer screen icon Then continue to select The camera icon Or use the key combination Windows + Alt + Print Screen To take a screenshot of the Windows 10 computer screen.
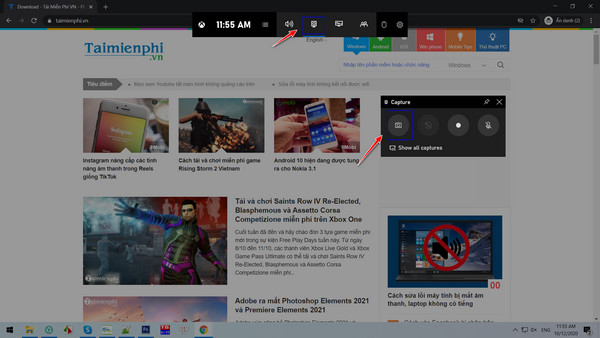
When notified that the photo has been saved, select Show all capture .
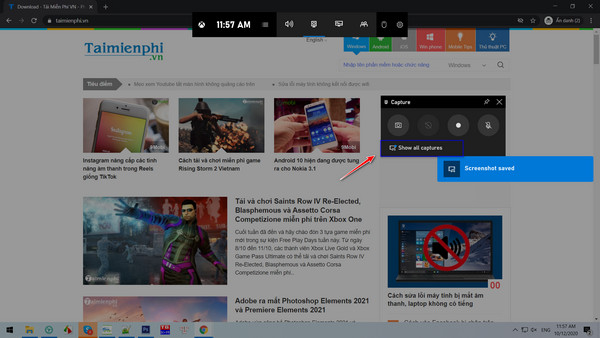
The Gallery Interface appears, select Open Folder To see the folder to save the photos.

Take a Screenshot of Your Computer Using the Snipping Tool
It can be said that Snipping Tool is the most modern tool integrated into Windows 10 that you can use to take screenshots of Windows 10 computers.
Step 1: To activate the Snipping Tool, just open The Start Menu , type Snipping tool And then choose the displayed result.
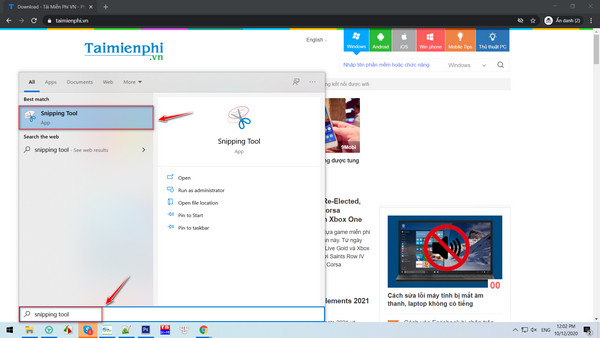
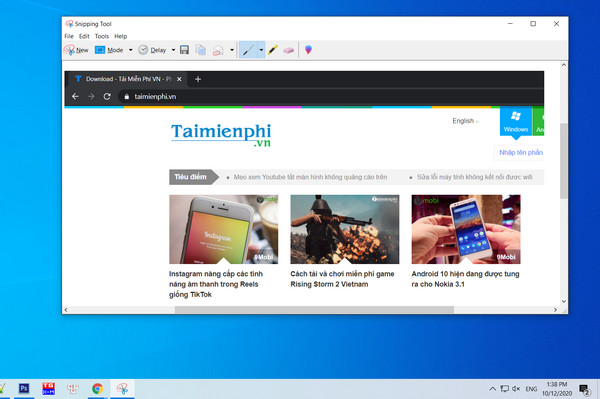
Step 2: The Snipping Tool interface appears, Simply select Mode To select the shooting type and select New To take a screenshot using the option.
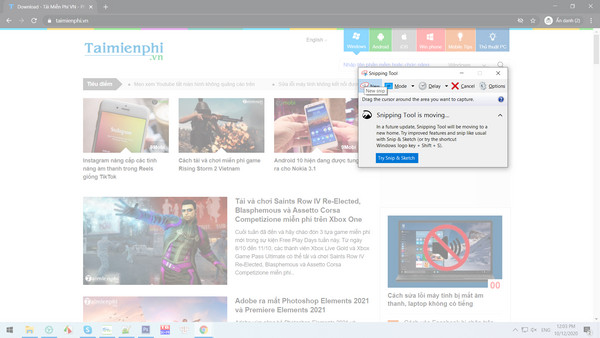
Step 3: Then the Snipping Tool Interface appears, you can use it to change the size, add text or watermark to it.
6. Take a screenshot of your computer using Microsoft Edge (currently the new version of Microsoft Edge is no longer supported).
It's surprising that Edge is on this list, but as Microsoft's darling, there's no reason why Edge wouldn't be equipped with such basic features.
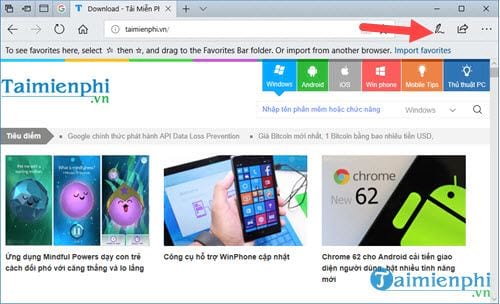
Step 1: Of course, taking a screenshot of a Windows 10 computer only applies to the Edge browser and within that range, but it's enough for you to use. First, open Edge and select The pen icon On the Menu bar.
Step 2: The recording interface appears and Simply select The scissors icon .
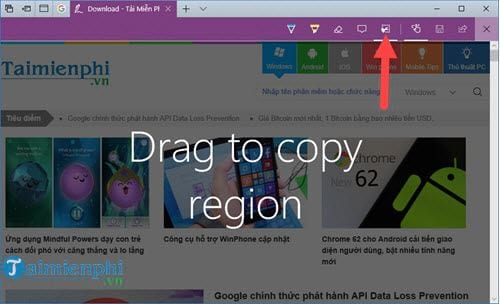
Step 3: Here you Use the mouse to circle A certain distance and then choose Save .
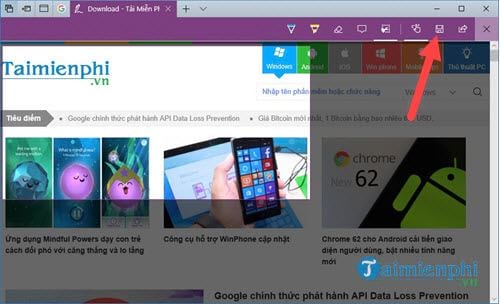
Step 4: Unfortunately, saving only saves in the temporary memory, so you still Need Paint to paste It and save it.
Above are 6 ways to take screenshots of Windows 10 without having to install software. You can use each method to apply to different situations you encounter to maximize the effectiveness of these software.
In addition, using software that supports taking screenshots is also very good for users. You can easily edit, attach logos, add icons,. to your captured photos. So how can you choose the best photography software today?
FAQ
What is the main point of 6 Quick and Simple Ways to Take Screenshots of Windows 10?
Windows 10 provides many facilities for taking screenshots of your computer without requiring the installation of additional software.
Why might the details change over time?
Software versions, prices, policies, services, and product availability can change. Check the official source before making a purchase or changing important settings.
How can I use this information safely?
Follow official instructions, verify downloads and claims, back up important data, and avoid sharing passwords or sensitive account information.
Related Articles
 9+ Ways to Take Screenshots of ASUS Computers for Details: Complete Overview11 minutes read
 3 Simple and Quick Ways to Take a Screenshot on Your Macbook3 minutes read
 6 Easy Ways to Take Screenshots on Windows 10 And 115 minutes read
 Ways to Take Screenshots in Windows 8 Extremely Fast and Simple3 minutes read
 3 Quick Ways to Take Screenshots in Windows 83 minutes read
 5 Ways to Take Screenshots on a Dell Computer Without6 minutes read
Reader Comments 0
Sign in with email or Google to join the discussion.