7 Fastest Ways to Take Screenshots of Computers and Laptops on Windows 10
Are you new to computers and don't know how to take a screenshot on your laptop or computer? Check out this quick and easy way to take a screenshot..
How to auto save screenshot:
This is the simplest and fastest way to take a screenshot because the image will be automatically saved.
Step 1: What you need to do is:
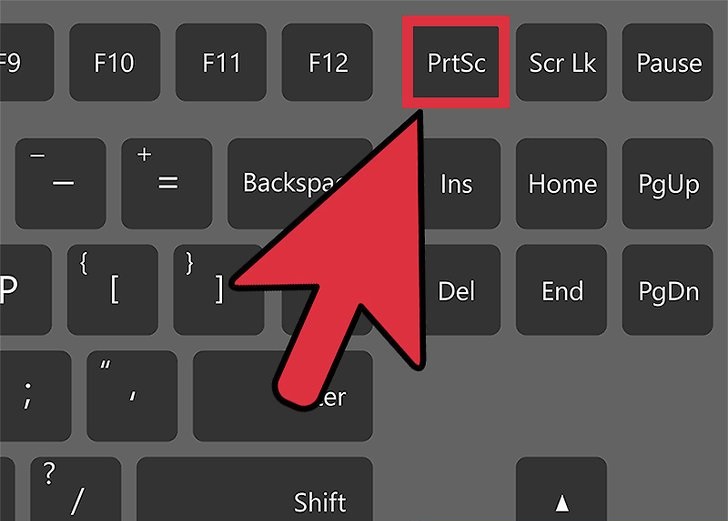
- Press the Windows key and the PrtSc (Print Screen) key ( Windows + PrtSc) on the keyboard. If the PrtSc key does not have any letters or characters attached.
- In case you use a laptop, the PrtSc button may have an additional character attached. At this time, you will need to combine the FN key combination, i.e. Windows + Fn + PrtSc.

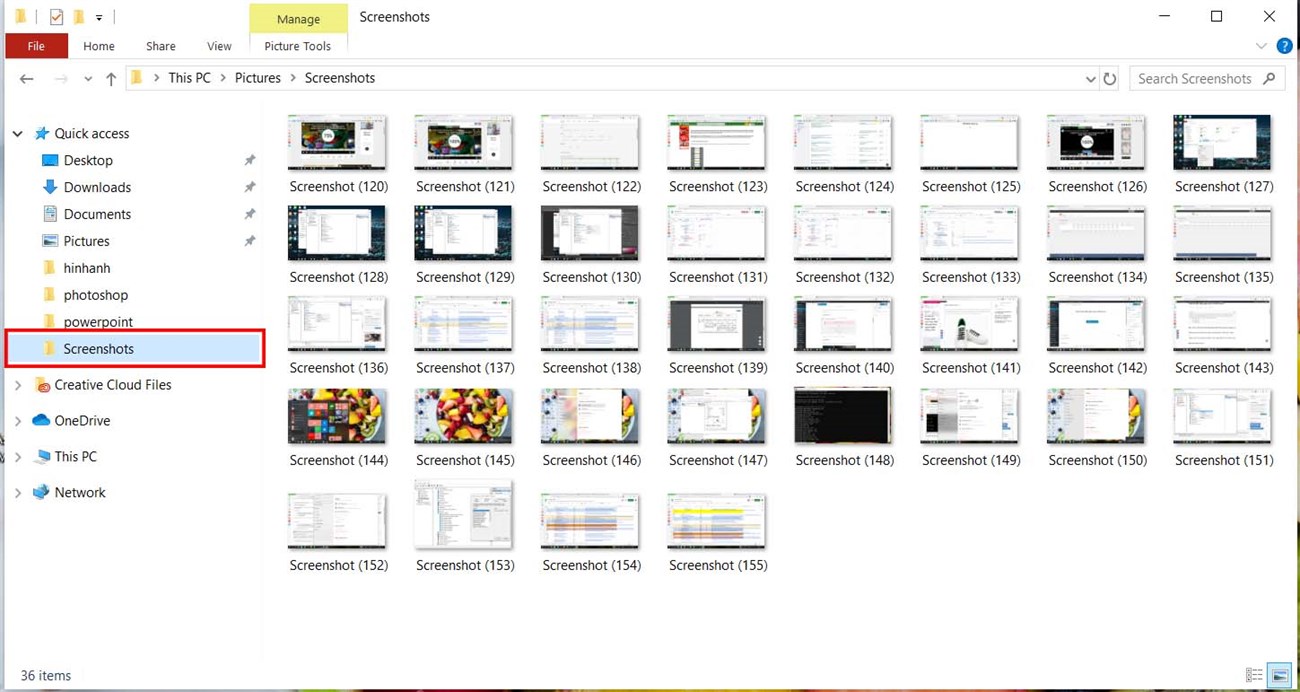
Step 2: From there, the image will be automatically saved in the Screenshots folder .
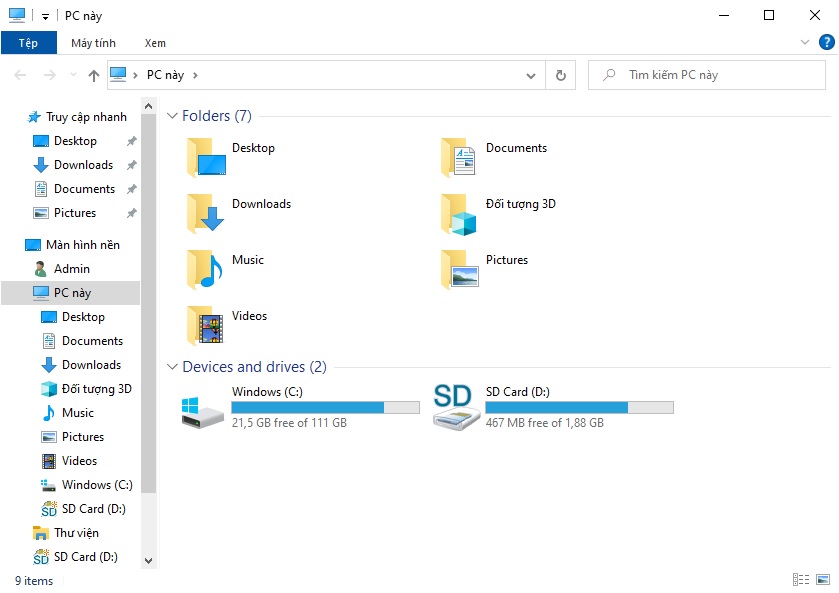
- To open this folder you will need to access My Computer (For Windows 7 or earlier) or This PC (For Windows 10) then select the Pictures folder and then ScreenShots. So the photos will be saved in this folder without having to do any additional backup operations.
However, the disadvantage of this screenshot method is that you cannot customize the button to your liking, and you will not be able to customize any image before saving, which will cause inconvenience for those who want to edit the size and will have to crop with other software if you only want to take a part of the screenshot.
Also, some laptop or PC keyboards have been modified a bit by the manufacturer, so you don't see the PstSc key . Check the buttons on the right side, maybe there is a PstSc button for you.

How to take screenshot, add text with Paint
For how to take a screenshot of your computer , add text with Paint , this method will only apply to computers from Windows XP, Windows 7,. Windows 10. The advantage of this method compared to the automatic saving method above is that you can insert more photos, text, or even crop or rotate the image after taking the photo.
However, the big disadvantage of this method is that it will require more complicated operations, which means you will have to perform more operations to get a screenshot. Anyway, this is a good way to help you guys who want to edit photos.
Step 1: To be able to take a screenshot, add text with paint, you will need to press the PriScn key (Print Screen) similar to many computers will have many different abbreviations such as PrtScn, Prnt Scrn, Print Scr,. Also on a laptop you may have to press the key combination Fn + Print Screen.
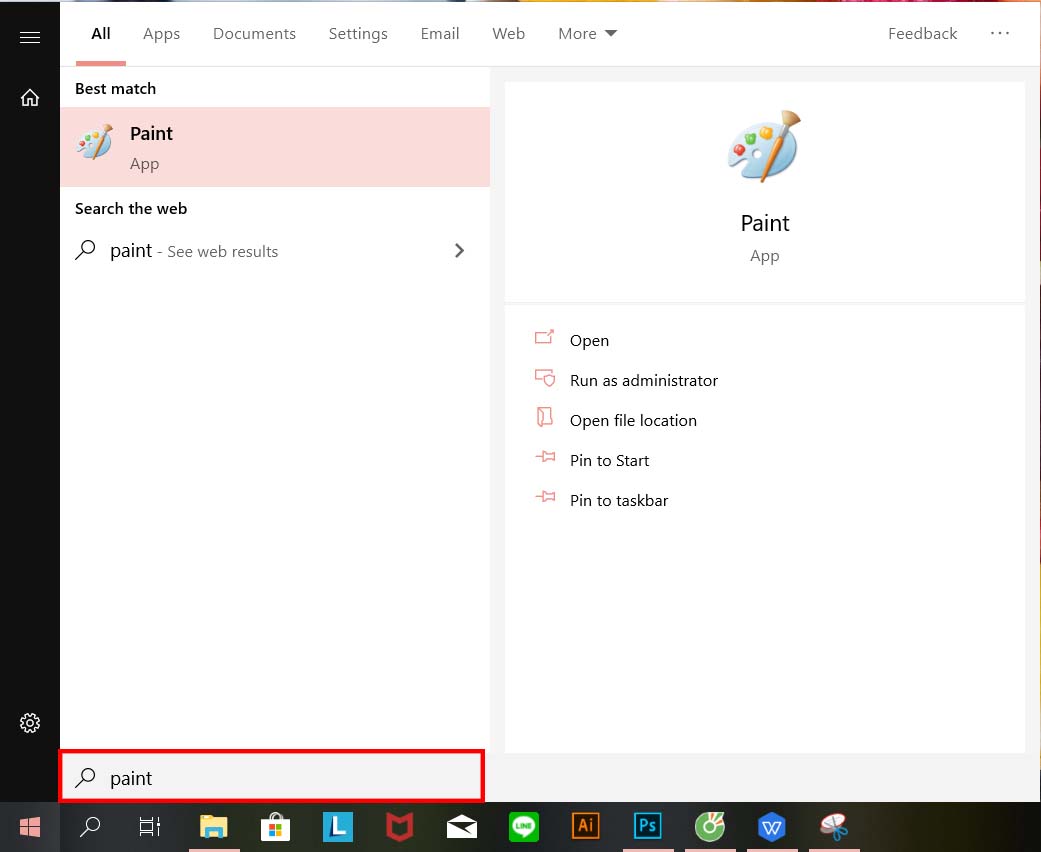
Step 2: Then you will click on the Paint application . To open this software, you will click on the window icon at the bottom left of the screen or press the Windows key on the keyboard (the key with the window icon) then enter the search keyword Paint and click on that software.
Step 3: After the Paint software interface appears , press Ctrl + V to paste the photo you just took. At this point, you will need to do more steps to complete the photo.
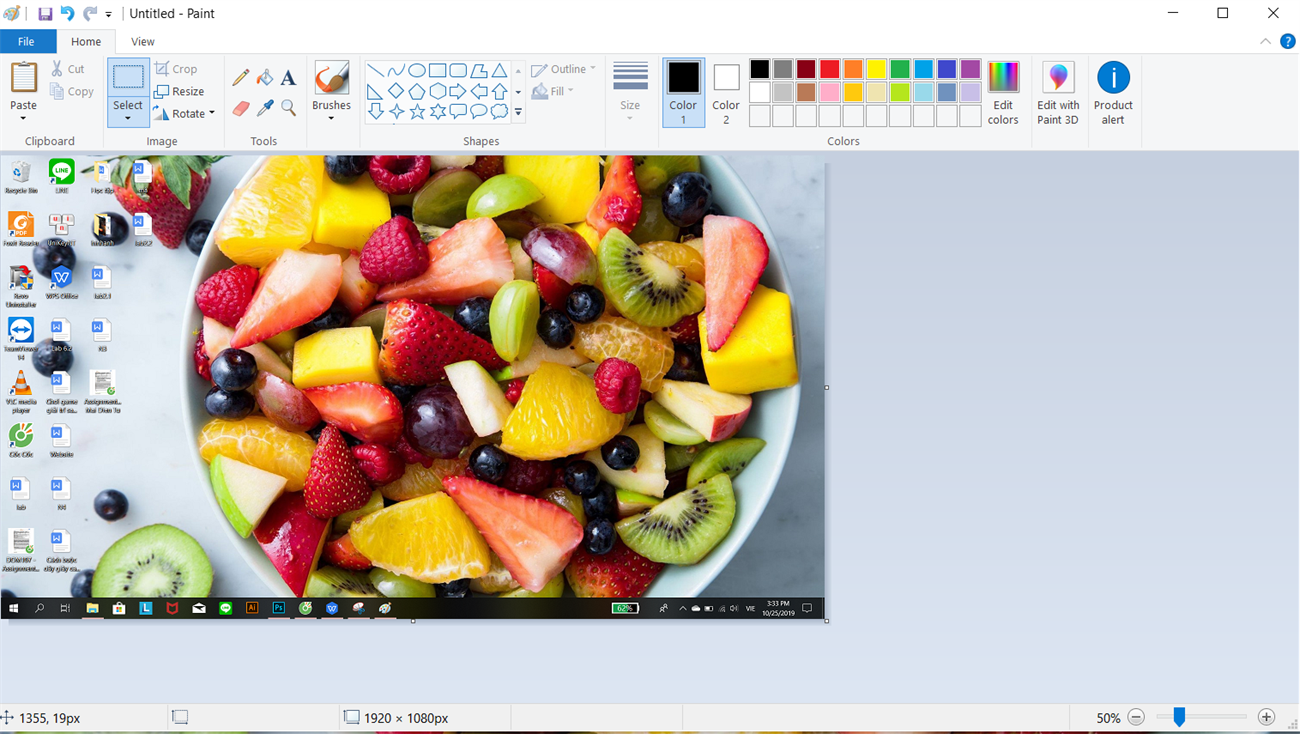
If you just want to capture a portion of the screen, click the Select button on Paint's tool panel , then create the area of the image you want by clicking and dragging, then click the crop tool right next to Select .
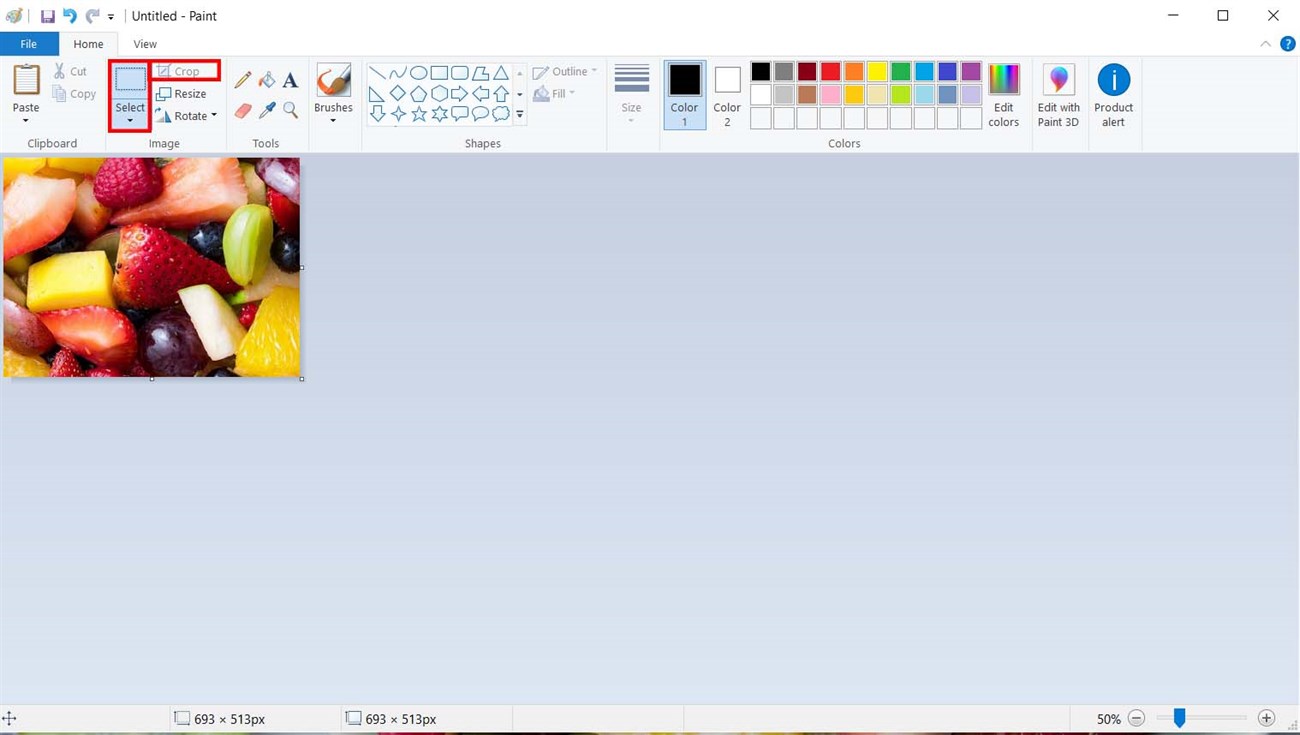
Then press Ctrl + S to save the image or click File and then click Save . So you have saved the cropped image and you can perform many other operations on paint such as rotating or inserting text with Paint software.
Note: This way of using PrintScreen also allows you to paste the screenshot of the window directly into any chat software such as (Messenger, Line, Zalo, Facebook,.) very conveniently without having to edit, however editing through paint will help you get a more satisfactory shooting angle. To paste the image directly into the window screen of chat software, you just need to press the key combination Ctrl + V.
How to take a screenshot of any window
This is a way to automatically take a screenshot of your computer screen , taking only one application window without having to take the entire image on your screen, which makes it look neater and hides content that you don't want others to see (For example, taking a screenshot of a browser window or a game title if you leave it in window mode).
However, this way of taking a screenshot will be a bit more complicated than the automatic saving method with just 2 Windows + Prtsc combinations because you will need to take a screenshot and then open the screenshot software to save the image and then save the image.
To do that, you will need to press the key combination Alt + Print Screen . Then, open the Paint application and press Ctrl + V to paste the captured image. Similar to the screenshot above, you will have to save it by clicking on the toolbar, File, then Save or the key combination Ctrl + S.
How to take a screenshot using Snipping Tool
This is probably the tool that the writer uses the most on Windows, what you need is to turn on the Snipping Tool and capture any area on the screen without having to follow any frame or size but the above screenshot methods . However, the operation of the Snipping Tool will be quite complicated compared to the above methods and you will need to calibrate to avoid image distortion.
Similar to Paint software , Snipping Tool is built into every version of Windows and allows us to take screenshots extremely well and conveniently. Therefore, the writer really likes to use this software instead of the above methods.
To do this you will need to do the following:
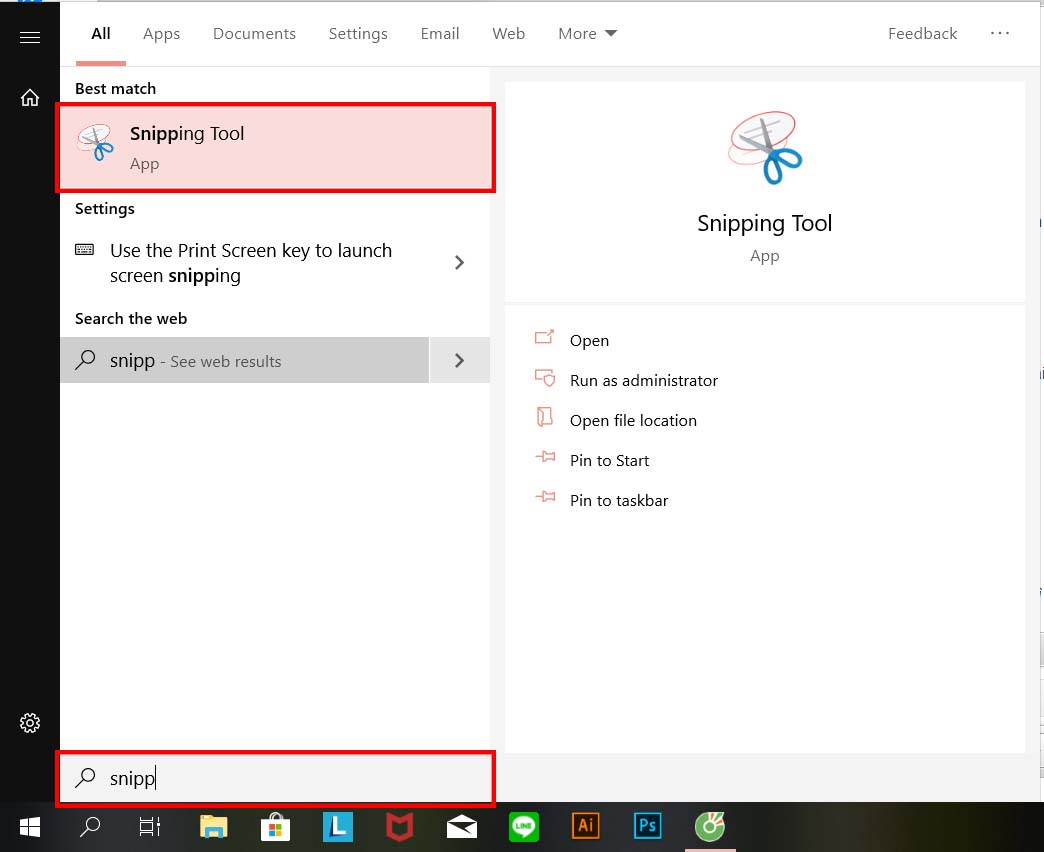
Step 1: For Windows 7 and Windows 10: Just click on start (window in the bottom left corner of the screen or the window key) then type Snipping Tool, then click on the software and this tool will appear.
Meanwhile Windows 8/8.1 will need to hover the mouse to the top right corner of the screen, then you will have to click on the search icon, type Snipping Tool and click on that software.
Step 2: Then you will see the Snipping Tool interface, you will click on the arrow on the right of the word Mode , in this interface we will have 4 options to capture the computer screen, the meaning of these capture methods is as follows:
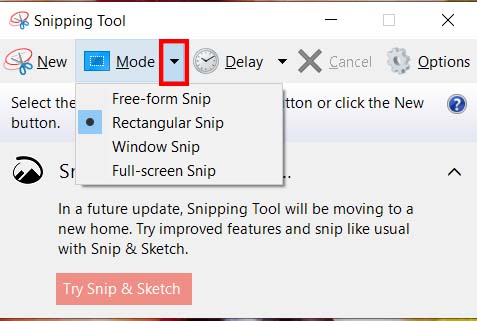
- Free-form Snip: Take a free-form photo, the photo border is the line you draw on the screen
- Rectangular Snip: Captures a photo in a rectangular frame
- Window Snip: Capture an open window
- Full-screen Snip: Capture the entire screen
The writer often uses mainly method number 2, which is Rectangular Snip , to create a rectangular frame, thereby making it easier to send photos to websites. After choosing a satisfactory capture method, what you need to do is press News, then click on the area you want to capture the screen and drag to create the shape . At this point, you will have the result, what you need is to press File, then Save As , select the folder where you want to save the photo.
In addition, this Snipping Tool also allows you to time the photo shoots. This is often used by writers when they want to take a photo of a video and want to time it correctly. Just click on delay and select the number of seconds you want to wait for the photo shoot . With Snipping Tool , this becomes easier.
Take a screenshot on a Macbook (MacOS) computer
If the above methods of taking screenshots only apply to Windows operating systems, the following method will help you use it on Apple's MacOS operating system.
Take a full screen photo of your MacOS computer
To capture the entire screen and save it automatically, just press the following key combination: Press Shift + Command (⌘) + 3. You have successfully captured the entire screen on the MacOS operating system.
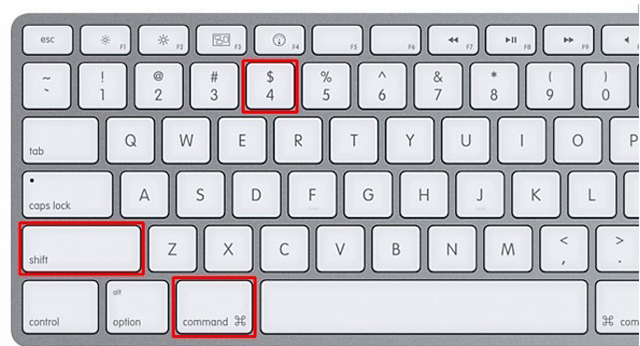
Take a screenshot of a specific part of your screen on MacOS
For capturing a part of the screen, it is simpler than Windows, you just need to press the combination Shift + Command (⌘) + 4. At this time, your mouse pointer will be changed to a cross, what you need to do is move the cross to the area you want to start capturing the screen, then drag them to the end of the area you want to capture. Note that while dragging, you can hold the Shift, Option or Space keys to change the way the selection is moved.
After selecting the area to capture, just release the mouse or trackpad if you use a Macbook. To cancel the capture, just press the Esc key before releasing the mouse . After taking the screenshot, it will be saved as a .png file on the desktop on the main screen. Just click on it and see the results.
Capture a menu on macOS
To capture a menu on MacOS, you just need to click on the menu you want to capture, then press Shift + Command (⌘) + 4. Similar to above, your mouse pointer will turn into a cross, you will just drag the mouse to select the menu and then just release the mouse or trackpad if you use Macbook to capture the screen. Similar to above, you can still press Esc to cancel the result if you take the wrong photo before releasing the mouse . The image will also be saved as a .png extension on the desktop screen.
In case you only want to capture the content of that menu without wanting to get the name of the menu, when your mouse pointer turns into a cross, press the Space key , then the mouse pointer will turn into a camera and move this camera over the menu to highlight it. Then what you need to do is click the mouse or trackpad to capture the menu and the file will be saved similar to the above methods.
Summary:
That is a summary of all the ways to take screenshots on computers on Windows and MacOS operating systems. If you have any questions related to screenshots or you have other questions related to Printscreen, please contact TipsMake to get your questions answered as well as get the clearest advice. TipsMake is proud to be the largest technology company specializing in providing PC Workstations assembly services in Vietnam.