3 simple and quick ways to take a screenshot on your MacBook
You want to take a picture of the MacBook's screen but are struggling forever. Then don't worry, this article will guide you through 3 simple and quick screenshots of the MacBook. Stay tuned!
- Method 1: Capture the entire screen
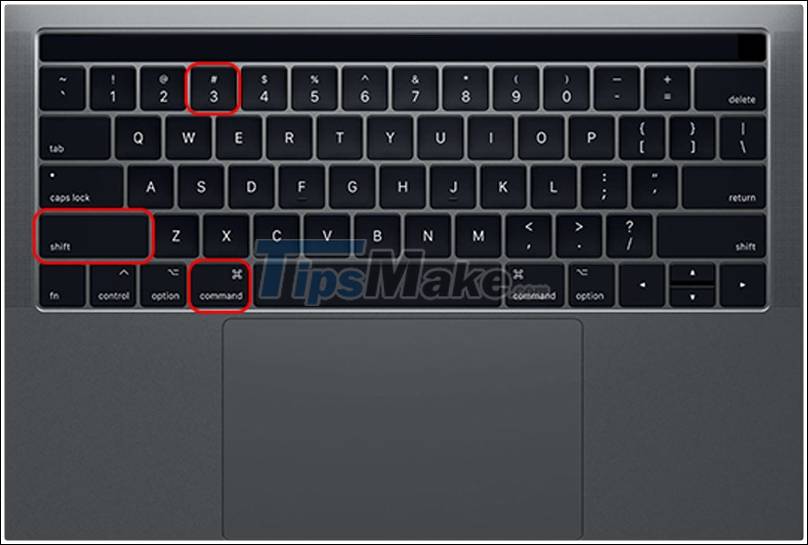
To capture the entire screen computer , you only need to press Command + Shift + 3 and then let go, if you open the opening speakers on the MacBook, you'll hear the cup, so you took Success the whole screen.
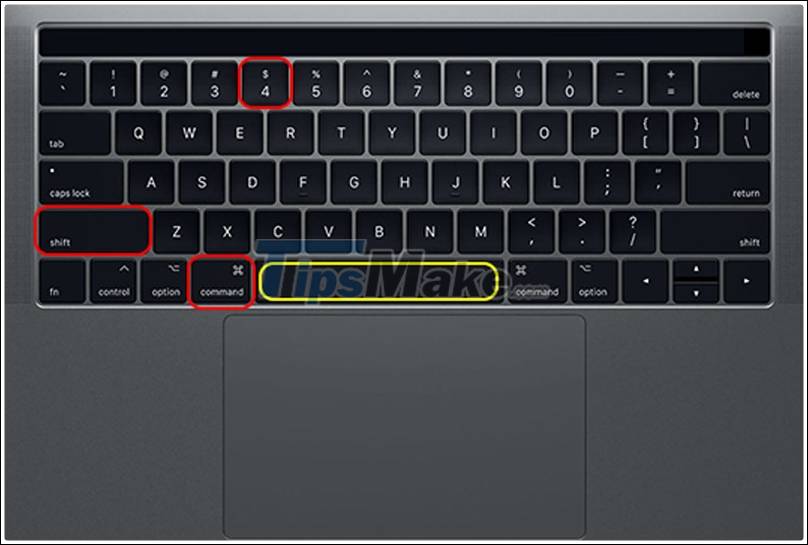
What if you will want to capture an area, the operation is also very simple. You just need to press Command + Shift + 4 , at this time you will see the plus sign + appear instead of the mouse pointer as usual> Hold down and drag the area you want to capture> Release your hand to capture .

You press Command + Shift + 4 + Spacebar , the mouse will turn into a camera icon> You move to the area you want to capture such as the main screen, application or web browser window> Click window to capture the image.
The screenshot will be saved as a file on the Desktop or you can see it by going to Finder (on the menu bar)> Click on Recents .

Above are 3 ways to take screenshots MacBook simplest and fastest. Hope you are succesful.
Was this article helpful?
Your feedback helps us improve.
Related Articles
 5 Simple Ways to Take a Screenshot of Your Macbook, Guaranteed to Be Clear7 minutes read
 The simplest and fastest way to take a screenshot on a MacBook in 2026.13 minutes read
 How to take MacBook screenshots with keyboard shortcuts4 minutes read
 5 ways to take screenshots on Macbook, using shortcut keys, taking screenshots with mouse cursor8 minutes read
 12 quick and simple ways to take screenshots of Acer computers8 minutes read
 How to take a screenshot on MacBook without using software4 minutes read
Reader Comments 0
Sign in with email or Google to join the discussion.