Table of Contents
This practical guide walks through 5 steps to fix Windows 10 using a lot of RAM, explains the main requirements, and highlights common issues that may appear along the way.
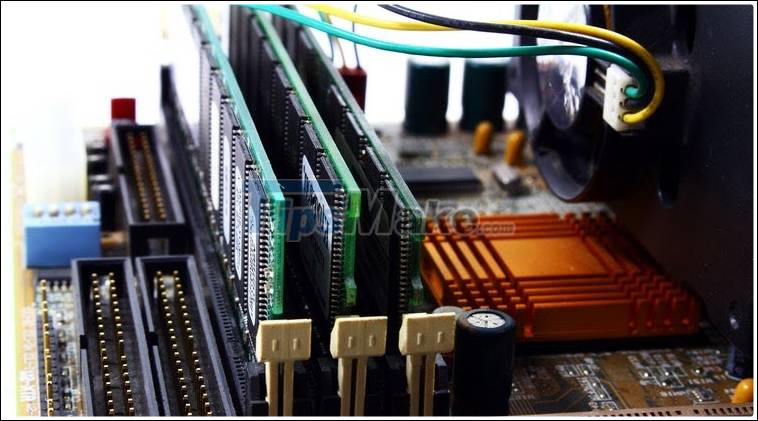
The following are best practices in Windows 10 for reducing memory usage for running software.
1. Close unnecessary programs and applications
All computer memory is connected to CPU and RAM. The high memory usage problem is mainly caused by too many tasks being processed. Therefore, you need to remove unnecessary running programs to minimize memory usage.
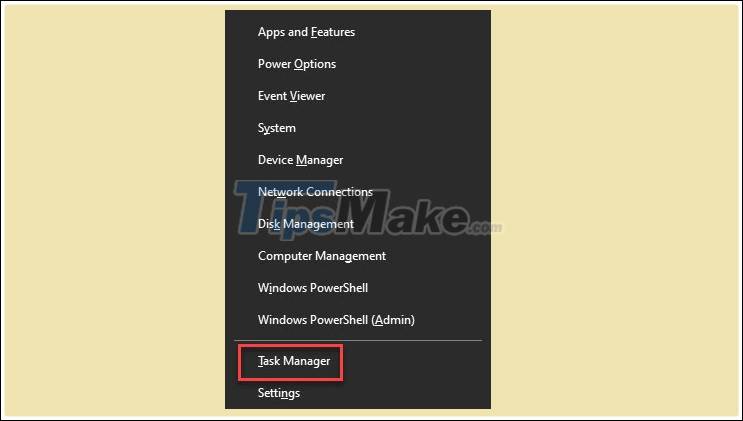
Step 1. Press Windows + X and open Task Manager .
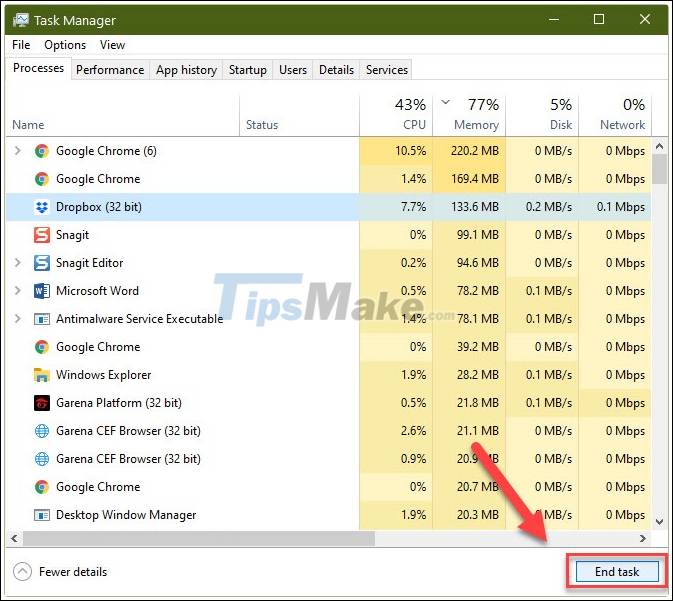
Step 2. When the Task Manager window appears, check to see which active applications you are not using. To end the program, simply click on the application and click End Task .
2. Disk cleanup and optimization
Disk space is another memory that can seriously affect the performance of your applications. Storing too many unnecessary files on your computer sometimes causes a spike in RAM usage. These include temporary files, system files, thumbnails, memory dump files, old Windows updates, and the Recycle Bin.
Windows 10 has a built-in utility called 'Disk Cleanup', which helps to clean up space consumed.
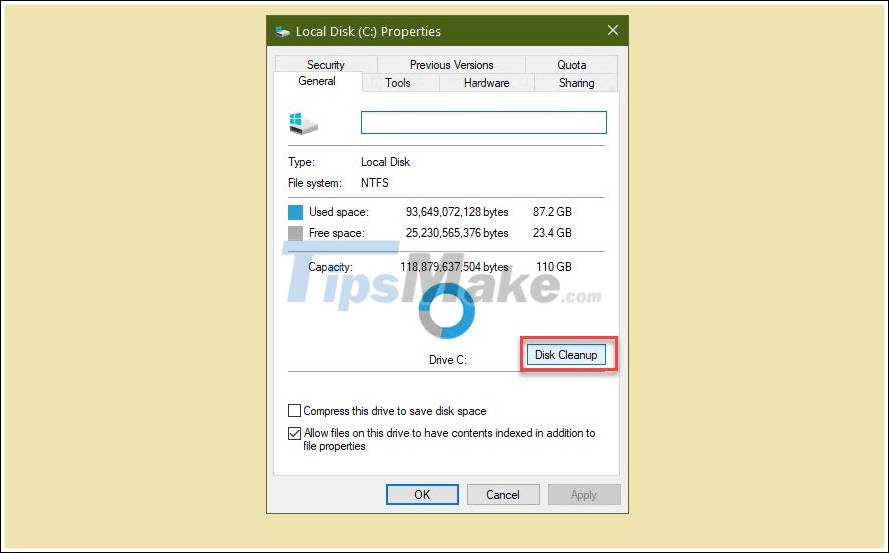
In the File Explorer file manager, right-click drive C and select Properties .

When you are on the General tab, click Disk Cleanup , the system will take a few minutes for statistics to be freed.
You then get a list of the file elements to be deleted. The things that consume the most space include Temporary Internet Files, Delivery Optimization Files, Downloads and Thumbnails. If there are items you do not want to delete, please uncheck the box next to them.
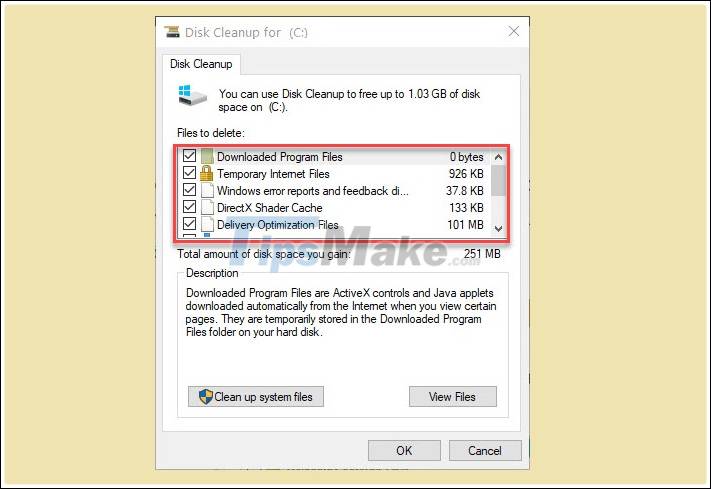
Keep clicking on Clean up system files , you will notice there are more things you can delete. 'Windows Update Cleanup' is the component you need to remove, as we often forget to delete previous Windows updates that are no longer needed.
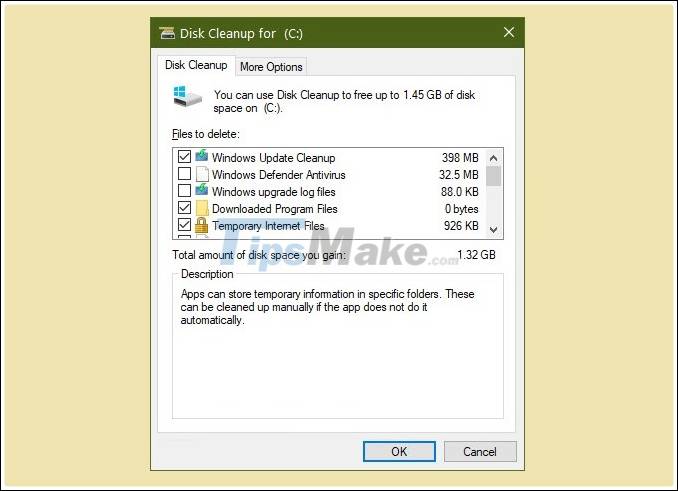
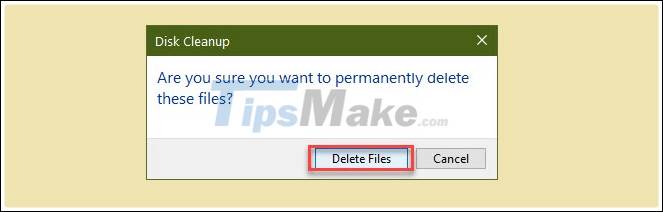
Select the files above and press OK . You will see a message asking for verification, pressing Delete Files frees the drive.
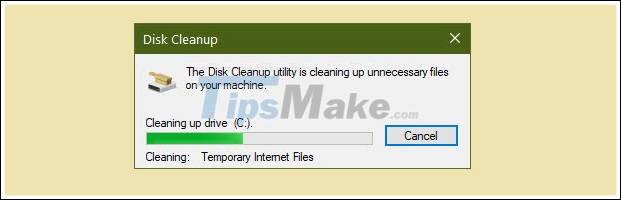
The cleaning process will take anywhere from a few minutes to up to an hour depending on how much disk space you free up.
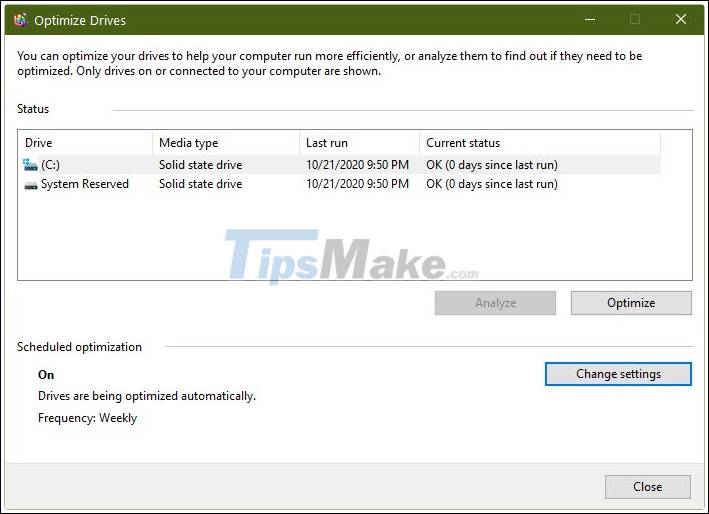
Once done, you can optimize and defrag the drive for increased efficiency. Switch to the Tools tab , click Optimize .

In Windows 10, if you have set a weekly schedule, you don't need to defragment manually.
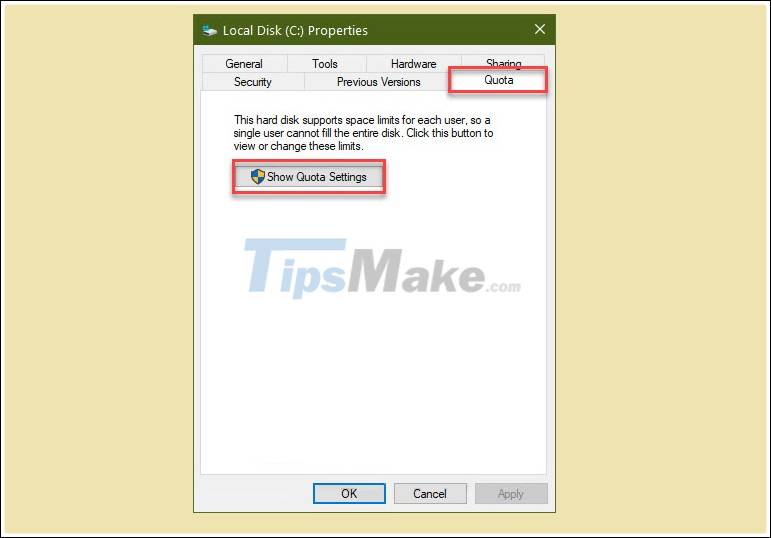
Back to drive management, switch to the Quota tab and click Show Quota Settings .
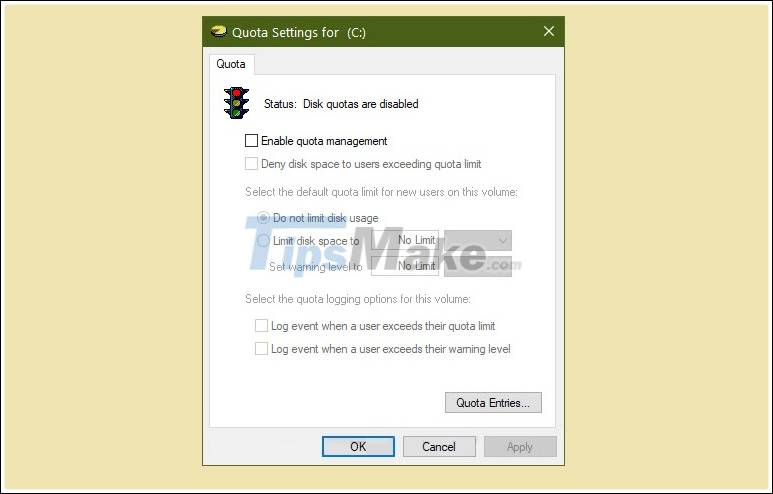
Make sure that every box in this section is unchecked.
3. Increase virtual memory through Registry NDU
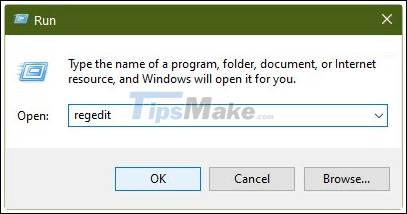
This is a technique that helps you boost your memory instantly. Press Ctrl + R to open the Run dialog box, where you enter regedit and Enter .
Now navigate to the folder below:
ComputerHKEY_LOCAL_MACHINESYSTEMControlSet001ServicesNdu

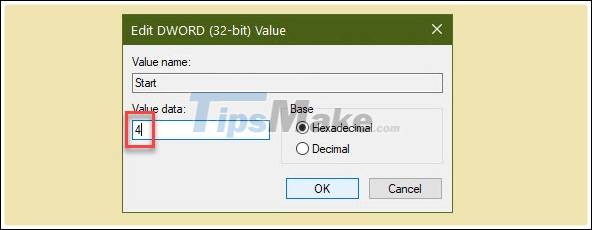
NDU is a resource monitoring setting and its capabilities can help increase memory when multiple applications are open. Right click on Start >> Modify to modify settings.

Increase Value data from 2 to 4 and click OK to save. This will increase virtual memory allocated to your system.
4. Turn off SysMain (Formerly Superfetch)
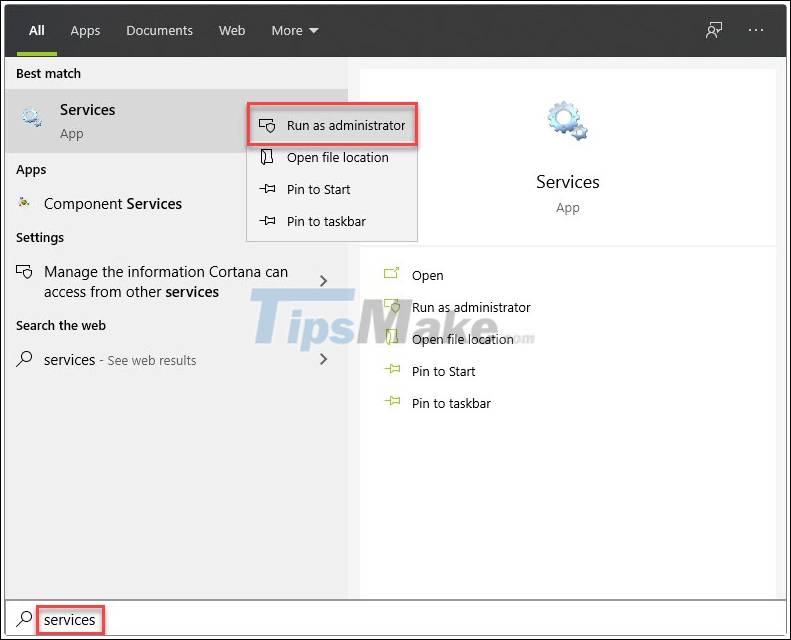
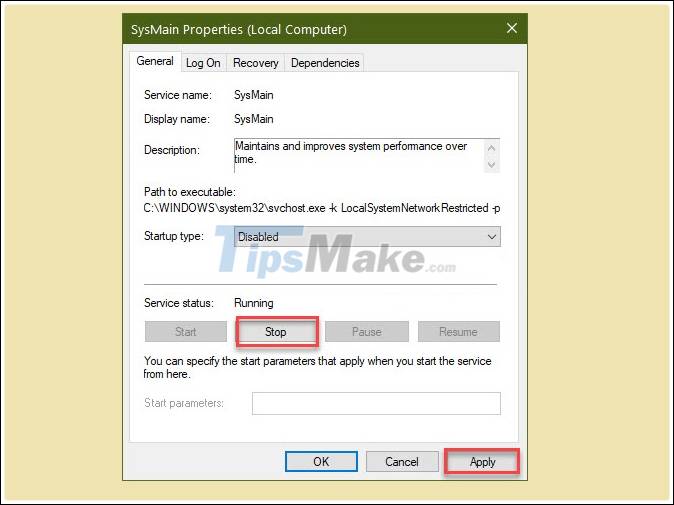
Windows has a utility called SysMain (formerly Superfetch) that also sometimes causes problems with RAM usage. Turning off SysMain will significantly improve memory performance. Enter 'Services' in the search box and open the application under the administrator mode (run as administrator) .
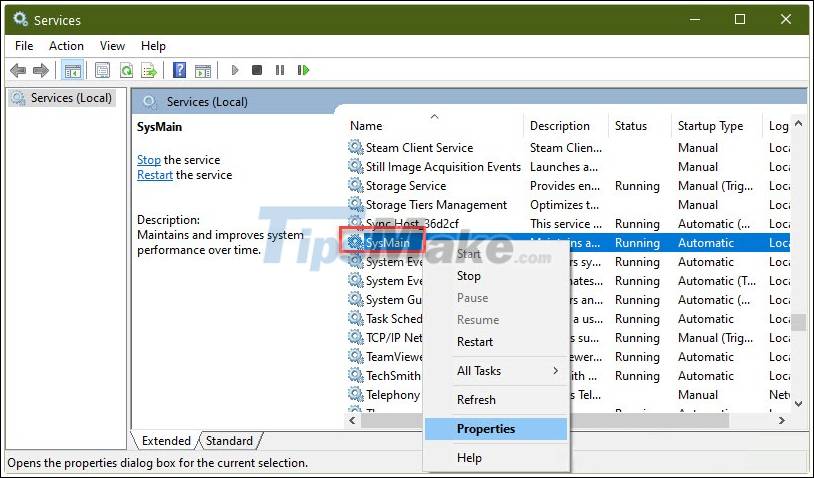
Navigate to SysMain and right click choose Properties .
First, stop the automatic process, in the Startup type you choose Disable .
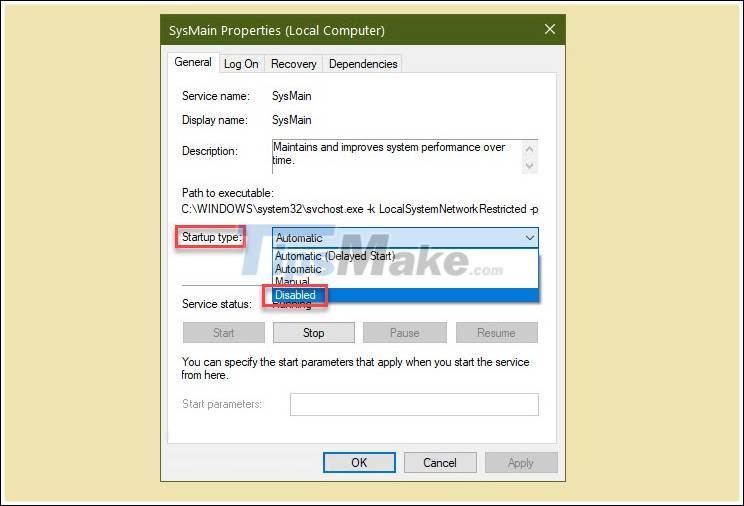
Continue, in the Service status section, click Stop then Apply to turn it off immediately.
5. Finally, upgrade the RAM
After trying all the above methods, if you don't notice memory improvement, then it's time to upgrade your RAM. Please note that, before buying more RAM, you should check if your motherboard has slots, and what kind of slots are available!
In this tutorial, you learned how to solve memory usage problem. All methods are safe and will not harm your system. Also, you should check your anti-virus program, as it can also fill up memory problems quickly.
Key Takeaways
Use the information above as a practical reference for 5 steps to fix Windows 10 using a lot of RAM. Review each step carefully, confirm any requirements, and choose the option that best fits your situation.
FAQ
What does this guide explain about 5 Steps to Fix Windows 10 Using a Lot of RAM?
It explains the main concepts, practical considerations, and useful steps related to 5 steps to fix Windows 10 using a lot of RAM without requiring advanced knowledge.
Who can benefit from learning about 5 Steps to Fix Windows 10 Using a Lot of RAM?
This information is useful for readers who want a clear overview, practical guidance, and reliable steps related to 5 steps to fix Windows 10 using a lot of RAM.
What should I check before applying this information?
Review the requirements, confirm that your device, software, or situation matches the instructions, and back up important data before making major changes.
Related Articles
 5 Simple Steps to Help Increase Safety and Security of5 minutes read
 Instructions for Upgrading Windows XP to Windows 7 or Windows 107 minutes read
 Lockscreen Windows 11: Complete Guide3 minutes read
 Instructions on How to Upgrade from Windows XP to Windows 85 minutes read
 Click: 10 Steps of 'Defense' for Windows5 minutes read
 7 Steps to Successfully Overcome Windows Network7 minutes read
Reader Comments 0
Sign in with email or Google to join the discussion.